In this Python TKinter Tutorial we are going to learn about Python GUI Development with TKinter, we will learn that how you can create your first Python GUI window in TKinter, and also how you can work with different widgets in Python TKinter.
What is TKinter ?
Python is very powerful programming language. It ships with the built-in tkinter module. In only a few lines of code we can build our first Python GUI. the IDE that we are using is Pycharm Community Edition IDE. OK we have said that TKinter is a built in library in Python it means that when you have installed Python, TKinter will be installed by default so now we are going to create our first window in TKinter.
Python GUI Development with TKinter
Now let’s start our topics on building GUI applications with TKinter.
How to Create Window in TKinter
This is the code for creating window in python tkinter.
|
1 2 3 4 5 6 7 8 9 10 11 12 13 14 15 16 17 |
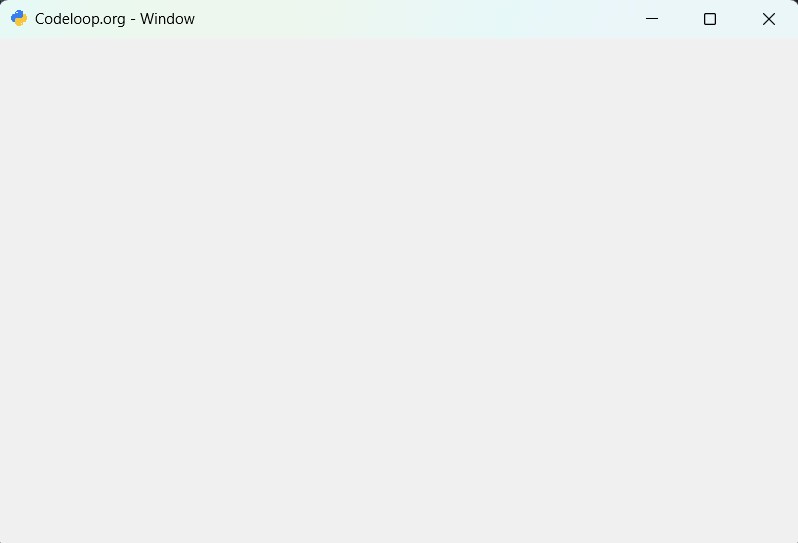
# Import the tkinter module as tk import tkinter as tk # Create an instance of Tkinter win = tk.Tk() # Set the title of the window win.title("Codeloop.org - Window") # Set the minimum size of the window win.minsize(640, 400) # Set the icon for the window win.iconphoto(False, tk.PhotoImage(file='python.png')) # Start the GUI event loop win.mainloop() |
This code initializes a Tkinter application window with a specified title, minimum size and icon. tk.Tk() function creates the main application window, also win.title() sets the window title. win.minsize() defines the minimum dimensions of the window. win.iconphoto() function sets the window icon. Finally, win.mainloop() starts the Tkinter event loop, allowing the window to be displayed and interacted with.
Run the code and this will be the result
Create TKinter Window Using OOP
OK now we want to create our window using Python Object Oriented Programming, now this is the complete code.
|
1 2 3 4 5 6 7 8 9 10 11 12 13 14 15 16 17 18 19 |
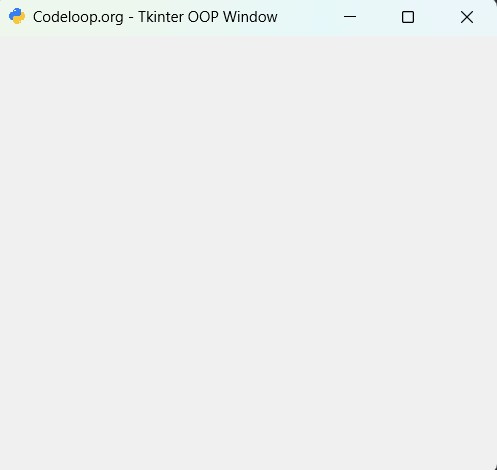
# Import the tkinter module as tk import tkinter as tk # Define custom Window class inheriting from tk.Tk class Window(tk.Tk): def __init__(self): # Initialize the parent class constructor super(Window, self).__init__() # Set the title, minimum size, and icon for the window self.title("Codeloop.org - Tkinter OOP Window") self.minsize(400, 350) self.iconphoto(False, tk.PhotoImage(file='python.png')) # Create an instance of the Window class window = Window() # Start the GUI event loop window.mainloop() |
This code defines custom Window class that inherits from tk.Tk, it it the main tkinter application window class. Inside the __init__ method of the Window class, window title, minimum size, and icon are set. After that an instance of the Window class is created, and the mainloop() method is called to start the Tkinter event loop, and it allows the window to be displayed and interacted with.
Run the code and this will be the result
How to Create Label in TKinter
In this section we want to learn creating of label in python tkinter, so using label you can create and add text in your tkinter window. now this is the complete code for creating of label in python.
|
1 2 3 4 5 6 7 8 9 10 11 12 13 14 15 16 17 18 19 20 21 22 23 24 25 26 27 28 29 30 31 32 |
# Import tkinter and tkinter themed (ttk) module from tkinter import * import tkinter as tk # Define a custom Root class inheriting from Tk class Root(Tk): def __init__(self): # Initialize the parent class constructor super(Root, self).__init__() # Set the title, minimum size, and icon for the window self.title("Codeloop.org - Tkinter Label") self.minsize(500, 400) self.iconphoto(False, tk.PhotoImage(file='python.png')) # Call the method to create the label self.create_label() # Method to create the label def create_label(self): # Create a Label widget with specified text and styling self.label = Label(self, text="Welcome to Codeloop.org", background='#101010', foreground="#D6D6D6") self.label.config(font=("Courier", 20)) # Place the label in the window grid self.label.grid(column=0, row=0) # Create an instance of the Root class root = Root() # Start the GUI event loop root.mainloop() |
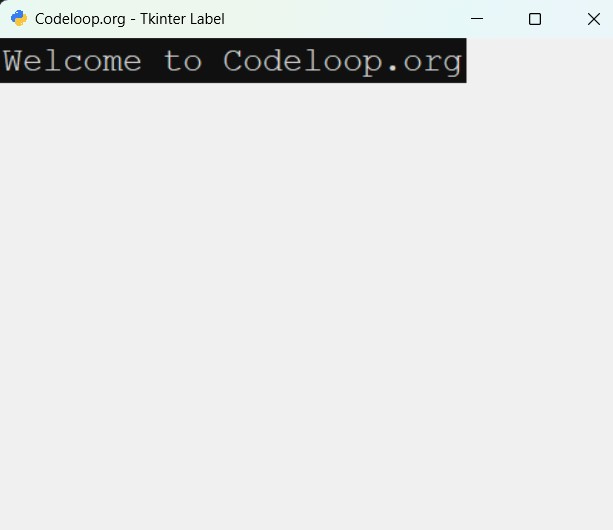
This code creates a tkinter window with a custom label using object-oriented programming (OOP) approach. The Root class inherits from Tk, and in its __init__ method, it sets the window title, minimum size and icon. After that it calls the create_label method to create and configure a Label widget with specified text and styling. Finally, an instance of the Root class is created, and the mainloop() method is called to start the tkinter event loop, allowing the window to be displayed and interacted with.
Run the code and this will be the result
How to Create Button in TKinter
OK now let’s create button in tkinter, also we will learn how you can interact with buttons in tkinter and how you can add commands for the buttons. this is the code for creating button in tkinter.
|
1 2 3 4 5 6 7 8 9 10 11 12 13 14 15 16 17 18 19 20 21 22 23 24 25 26 27 28 29 30 31 32 33 34 35 36 37 38 39 40 |
# Import tkinter themed (ttk) module from tkinter import ttk import tkinter as tk # Define custom Window class inheriting from tk.Tk class Window(tk.Tk): def __init__(self): # Initialize parent class constructor super(Window, self).__init__() # Set the title, minimum size and icon for the window self.title("Codeloop - Button") self.minsize(350, 300) self.iconphoto(False, tk.PhotoImage(file='python.png')) # Create and place Label widget in the window self.label = ttk.Label(self, text="Welcome to Codeloop.org") self.label.grid(column=1, row=0) # Create and place a Button widget in # the window, with a command to execute when clicked self.button = ttk.Button(self, text="Click Me", command=self.click_me) self.button.grid(column=0, row=0) # Method to execute when the button is clicked def click_me(self): # Change the text, foreground and background # color, and font of the label self.label.configure(text="Codeloop - Text is Changed") self.label.configure(foreground='white', background='green') self.label.config(font=("Courier", 20)) # Change the text of the button self.button.configure(text="Button Changed") # Create an instance of the Window class window = Window() # Start the GUI event loop window.mainloop() |
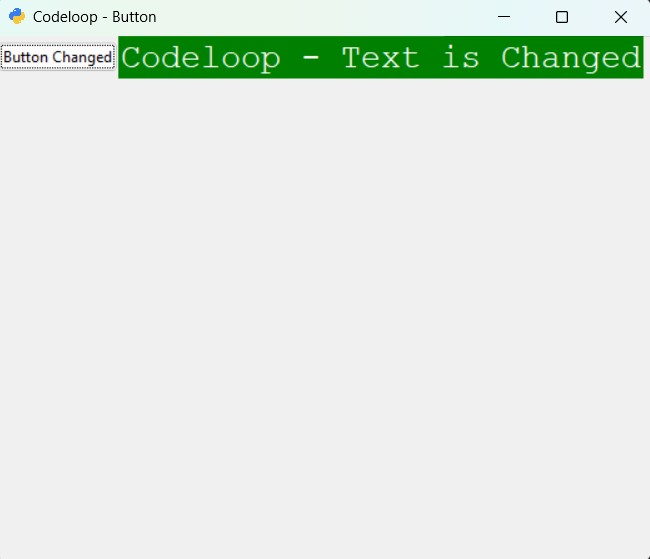
This code creates a tkinter window with custom button and label. Window class inherits from tk.Tk, and in the __init__ method, we set window title, minimum size and icon. After that it creates and places a Label widget and a Button widget in the window grid. Button widget is configured with a command to execute the click_me method when clicked. click_me method changes the text, foreground and background color and font of the label and also changes the text of the button. And the the end an instance of the Window class is created, and the mainloop() method is called to start the tkinter event loop, it allows the window to be displayed and interacted with.
Run the code and this will be the result
How to Create TextBox in Python TKinter
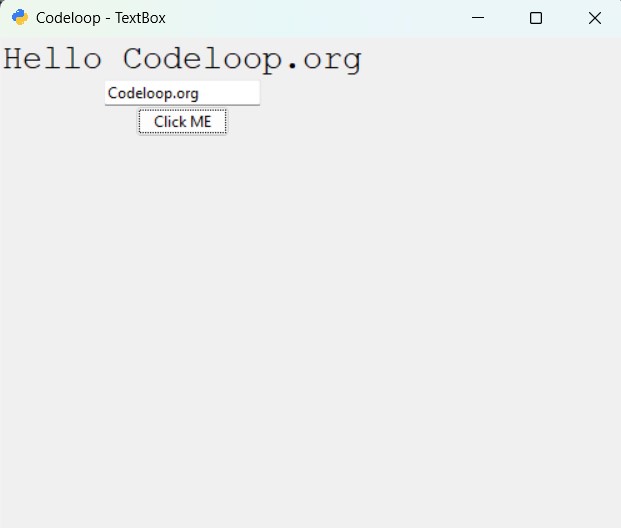
In this part we want to create TextBox in TKinter, this is the complete code for creating the TextBox.
|
1 2 3 4 5 6 7 8 9 10 11 12 13 14 15 16 17 18 19 20 21 22 23 24 25 26 27 28 29 30 31 32 33 34 35 36 37 38 39 40 41 42 43 44 45 46 47 48 49 50 51 52 53 |
# Import tkinter module as tk and themed # (ttk) module from tkinter import tkinter as tk from tkinter import ttk # Define a custom Window class inheriting from tk.Tk class Window(tk.Tk): def __init__(self): # Initialize the parent class constructor super(Window, self).__init__() # Set the title, minimum size, and # icon for the window self.title("Codeloop - TextBox") self.minsize(500, 400) self.iconphoto(False, tk.PhotoImage(file='python.png')) # Call the method to create the text entry widgets self.text_entry() # Method to execute when the button is clicked def click_me(self): # Update the label text with the entered name self.label.configure(text="Hello " + self.name.get()) self.label.config(font=("Courier", 20)) # Method to create text entry widgets def text_entry(self): # Create a StringVar to store the entered text self.name = tk.StringVar() # Create and place a Label widget in the window self.label = ttk.Label(self, text="Enter Your Name") self.label.grid(column=0, row=0) # Create and place a Textbox widget in the window self.textbox = ttk.Entry(self, width=20, textvariable=self.name) self.textbox.focus() self.textbox.grid(column=0, row=1) # Create and place a Button widget in the window, # with a command to execute when clicked self.button = ttk.Button(self, text="Click ME", command=self.click_me) self.button.grid(column=0, row=2) # Configure the button to be disabled initially # self.button.configure(state="disabled") # Create an instance of the Window class window = Window() # Start the GUI event loop window.mainloop() |
This code creates a tkinter window with a textbox and a button. The Window class inherits from tk.Tk, and in the __init__ method, we set the window title, minimum size and icon. after that we calls the text_entry method to create and place a Label widget, a Textbox widget, and a Button widget in the window. Button widget is configured with a command to execute the click_me method when clicked. The click_me method updates the label text with the entered name. and lastly an instance of the Window class is created, and the mainloop() method is called to start the tkinter event loop, allowing the window to be displayed and interacted with.
Run the code and this will be the result
How to Create SpinBox in TKinter
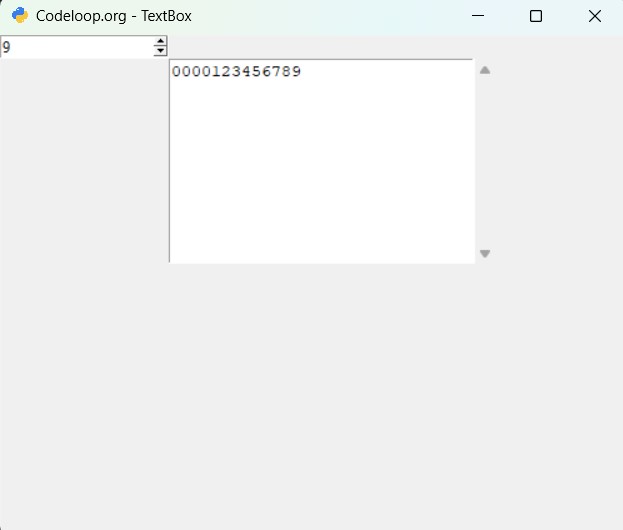
You can use SpinBox() class for creating of spinbox in tkinter, so now this is the complete code for this section.
|
1 2 3 4 5 6 7 8 9 10 11 12 13 14 15 16 17 18 19 20 21 22 23 24 25 26 27 28 29 30 31 32 33 34 35 36 37 38 39 40 41 42 43 44 45 46 47 48 |
import tkinter as tk from tkinter import scrolledtext # Define a custom Window class # inheriting from tk.Tk class Window(tk.Tk): def __init__(self): # Initialize the parent class constructor super(Window, self).__init__() # Set the title, minimum size, and icon for the window self.title("Codeloop.org - TextBox") self.minsize(500, 400) self.iconphoto(False, tk.PhotoImage(file='python.png')) # Call the method to create the spinbox # and scrolled text widgets self.spin_box() # Method to execute when the spinbox value changes def spin_callback(self): # Get the value from the spinbox and insert # it into the scrolled text widget value = self.spin.get() self.controlText.insert(tk.INSERT, value) # Method to create spinbox and scrolled # text widgets def spin_box(self): # Create a Spinbox widget with specified # range and command to execute when value changes self.spin = tk.Spinbox(self, from_=0, to=10, command=self.spin_callback) self.spin.grid(column=0, row=0) # Define dimensions for the scrolled text widget scroll_w = 30 scroll_h = 10 # Create a ScrolledText widget with specified # dimensions and wrapping style self.controlText = scrolledtext.ScrolledText(self, width=scroll_w, height=scroll_h, wrap=tk.WORD) self.controlText.grid(column=1, row=2) # Create an instance of the Window class window = Window() # Start the GUI event loop window.mainloop() |
This code creates tkinter window with a spinbox and a scrolled text area. Window class inherits from tk.Tk, and in the __init__ method, we are setting window title, minimum size, and icon. After that we calls the spin_box method to create and place a Spinbox widget and a ScrolledText widget in the window. Spinbox widget is configured with a command to execute the spin_callback method when its value changes. spin_callback method retrieves the value from the spinbox and inserts it into the scrolled text area. And at the end an instance of the Window class is created, and the mainloop() method is called to start the tkinter event loop, allowing the window to be displayed and interacted with.
Run the complete code and this will be the result
How to Create RadioButton in TKinter
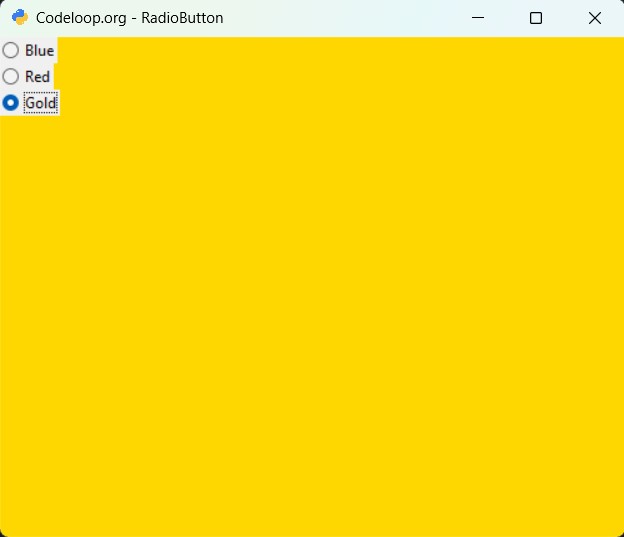
Now we want to create RadioButton in TKinter, you can use RadiButton class, this is the complete code for tkinter radiobutton, basically in this code we want to change the window background based on user selection value from the radio items.
|
1 2 3 4 5 6 7 8 9 10 11 12 13 14 15 16 17 18 19 20 21 22 23 24 25 26 27 28 29 30 31 32 33 34 35 36 37 38 39 40 41 42 43 44 45 46 47 48 49 50 51 52 53 54 55 |
import tkinter as tk from tkinter import ttk # Define color constants COLOR1 = "Blue" COLOR2 = "Red" COLOR3 = "Gold" # Define custom Window class inheriting from tk.Tk class Window(tk.Tk): def __init__(self): # Initialize parent class constructor super(Window, self).__init__() # Set the title, minimum size and icon for the window self.title("Codeloop.org - RadioButton") self.minsize(500, 400) self.iconphoto(False, tk.PhotoImage(file='python.png')) # Call the method to create radio buttons self.create_radio() # Method to execute when radio button is selected def rad_event(self): # Get th value of the selected radio button radSelected = self.radValues.get() # Change background color based on selected radio button if radSelected == 1: self.configure(background=COLOR1) elif radSelected == 2: self.configure(background=COLOR2) elif radSelected == 3: self.configure(background=COLOR3) # Method to create radio buttons def create_radio(self): # Create an IntVar to store the selected radio button value self.radValues = tk.IntVar() # Create and place radio buttons in the window self.rad1 = ttk.Radiobutton(self, text=COLOR1, value=1, variable=self.radValues, command=self.rad_event) self.rad1.grid(column=0, row=0, sticky=tk.W, columnspan=3) self.rad2 = ttk.Radiobutton(self, text=COLOR2, value=2, variable=self.radValues, command=self.rad_event) self.rad2.grid(column=0, row=1, sticky=tk.W, columnspan=3) self.rad3 = ttk.Radiobutton(self, text=COLOR3, value=3, variable=self.radValues, command=self.rad_event) self.rad3.grid(column=0, row=2, sticky=tk.W, columnspan=3) # Create an instance of the Window class window = Window() # Start the GUI event loop window.mainloop() |
This code creates a tkinter window with three radio buttons. Window class inherits from tk.Tk, and in in the __init__ method, we are setting window title, minimum size and icon. After that we calls the create_radio method to create and place three radio buttons in the window. Each radio button is associated with a color constant (COLOR1, COLOR2, COLOR3) and configured to call the rad_event method when selected. The rad_event method changes the window background color based on the selected radio button. And at the end an instance of the Window class is created, and the mainloop() method is called to start the tkinter event loop, and it allows the window to be displayed and interacted with.
Run the code and this will be the result
MessageBox in Python TKinter
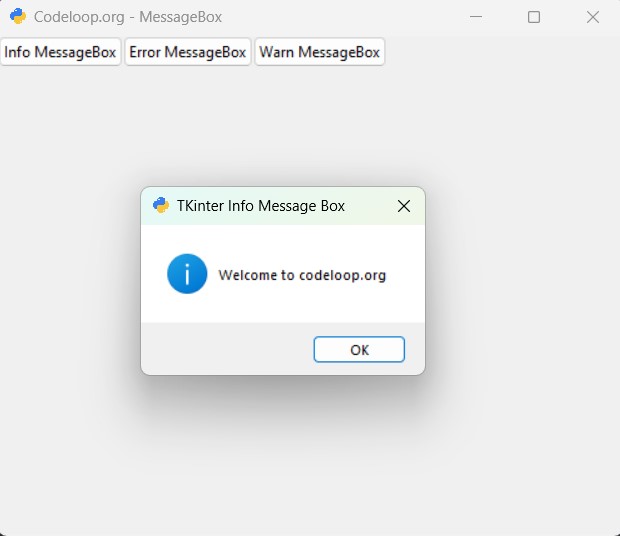
In this part we want to create MessageBox in TKinter, there are different types of messagebox that you can use in tkinter, so we have Information, Warning and Error MessageBox. this is the complete code for MessageBox.
|
1 2 3 4 5 6 7 8 9 10 11 12 13 14 15 16 17 18 19 20 21 22 23 24 25 26 27 28 29 30 31 32 33 34 35 36 37 38 39 40 41 42 43 44 45 46 47 48 |
import tkinter as tk from tkinter import ttk from tkinter import messagebox as msg # Define custom Window class inheriting from tk.Tk class Window(tk.Tk): def __init__(self): # Initialize parent class constructor super(Window, self).__init__() # Set title, minimum size, and icon for the window self.title("Codeloop.org - MessageBox") self.minsize(500, 400) self.iconphoto(False, tk.PhotoImage(file='python.png')) # Call the method to create buttons self.create_button() # Method to create buttons for different message boxes def create_button(self): # Create and place buttons for Info, # Error, and Warning message boxes self.btn = ttk.Button(self, text="Info MessageBox", command=self.info_msg) self.btn.grid(column=1, row=1) self.btn1 = ttk.Button(self, text="Error MessageBox", command=self.error_msg) self.btn1.grid(column=2, row=1) self.btn2 = ttk.Button(self, text="Warn MessageBox", command=self.warn_msg) self.btn2.grid(column=3, row=1) # Method to display an Info message box def info_msg(self): msg.showinfo("TKinter Info Message Box", "Welcome to codeloop.org") # Method to display a Warning message box def warn_msg(self): msg.showwarning("Warning Message Title", "This is a warning") # Method to display an Error message box def error_msg(self): msg.showerror("Error Message Title", "This is an error message box") # Create an instance of the Window class window = Window() # Start the GUI event loop window.mainloop() |
This code creates a tkinter window with three buttons, each of which displays a different type of message box (Info, Error, and Warning) when clicked. Window class inherits from tk.Tk, and in the __init__ method, we are setting window title, minimum size and icon. After that we call create_button method to create and place three buttons in the window, each associated with a different message box type. When a button is clicked, it calls the method (info_msg, warn_msg, error_msg) to display the corresponding message box using the showinfo, showwarning, and showerror functions from the messagebox module. And lastly an instance of the Window class is created, and the mainloop() method is called to start the tkinter event loop.
Run the code and this will be the result
ProgressBar in Python TKinter
In this part we want to learn creating or ProgressBar in TKinter, this is the complete code for creating of TKinter ProgressBar.
|
1 2 3 4 5 6 7 8 9 10 11 12 13 14 15 16 17 18 19 20 21 22 23 24 25 26 27 28 29 30 31 32 33 34 35 36 37 38 39 40 41 42 43 44 45 46 47 |
import tkinter as tk from tkinter import ttk # Define a custom Window class inheriting from tk.Tk class Window(tk.Tk): def __init__(self): # Initialize the parent class constructor super(Window, self).__init__() # Set the title, minimum size, and icon for the window self.title("Geekscoders.com - ProgressBar") self.minsize(400, 350) self.iconphoto(False, tk.PhotoImage(file='python.png')) # Create a label frame to contain the progress bar controls self.label_frame = ttk.LabelFrame(self, text="ProgressBar Example") self.label_frame.grid(column=0, row=0) # Call the method to create progress bar and buttons self.create_progressbar() # Method to create progress bar and buttons def create_progressbar(self): # Create and place buttons to start and stop the progress bar self.button1 = ttk.Button(self.label_frame, text="Start ProgressBar", command=self.start_progress) self.button1.grid(column=0, row=0) self.button2 = ttk.Button(self.label_frame, text="Stop ProgressBar", command=self.stop_progress) self.button2.grid(column=0, row=2) # Create and place the progress bar widget self.progress_bar = ttk.Progressbar(self, orient='horizontal', length=280, mode='determinate') self.progress_bar.grid(column=0, row=3, pady=10) # Method to start the progress bar animation def start_progress(self): self.progress_bar.start() # Method to stop the progress bar animation def stop_progress(self): self.progress_bar.stop() # Create an instance of the Window class window = Window() # Start the GUI event loop window.mainloop() |
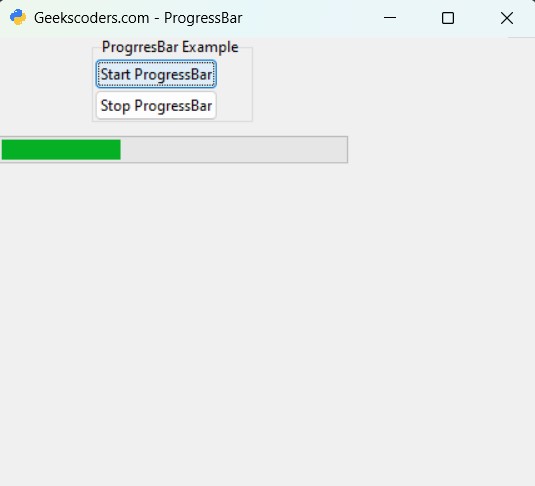
This code creates a tkinter window with a label frame containing two buttons to start and stop a progress bar, and a horizontal progress bar widget. The Window class inherits from tk.Tk, and in the __init__ method, we are seting the window title, minimum size and icon. After that we call the create_progressbar method to create and place the progress bar and buttons inside a label frame. When the “Start ProgressBar” button is clicked, it calls the start_progress method to start the progress bar animation using the start method of the progress bar widget. Similarly, when the “Stop ProgressBar” button is clicked, it calls the stop_progress method to stop the progress bar animation using the stop method of the progress bar widget. and lastly an instance of the Window class is created, and the mainloop() method is called to start the tkinter event loop.
Run the code and this will be the result
FAQs
Q: What is Tkinter?
A: Tkinter is the standard GUI (Graphical User Interface) toolkit for Python. It provides a set of Python bindings for the Tk GUI toolkit, which is a cross-platform graphical toolkit that comes pre-installed with most Python installations.
Q: Is Tkinter easy to learn?
A: Yes, Tkinter is generally considered to be easy to learn, especially for beginners in Python GUI development. Its simplicity and easy of use make it a popular choice for creating basic to moderately complex graphical interfaces.
Q: Is Tkinter suitable for complex applications?
A: While Tkinter is suitable for developing applications of different complexity, it may not be the best choice for extremely complex or highly specialized applications that require extensive customization or advanced graphics capabilities. In such cases, alternative GUI toolkits like PyQt or wxPython may be more suitable.
Q: How to create a GUI in Python with Tkinter?
A: To create a GUI in Python with Tkinter, you can follow these general steps:
-
- Import the tkinter module.
- Create an instance of the main Tkinter window (Tk()).
- Add widgets (such as buttons, labels, entry fields, etc.) to the window using Tkinter’s different widget classes(Button, Label, Entry, etc.).
- Configure the widgets with desired properties (text, color, size, etc.).
- Use layout managers (pack, grid, place) to organize the widgets within the window.
- Run the Tkinter event loop (mainloop()) to display the window and handle user interactions.
Q: How to learn GUI in Python?
A: To learn GUI programming in Python, especially with Tkinter, you can follow these steps:
-
- Start with basic Python programming knowledge.
- Familiarize yourself with the Tkinter library and its components by reading tutorials, official documentation, and books dedicated to Tkinter.
- Practice building simple GUI applications, start with basic widgets like buttons, labels, and entry fields, and gradually increasing complexity as you gain confidence.
- Experiment with different layout managers and styling options to understand how to create nice and user friendly interfaces.
- Explore more advanced features of Tkinter and other GUI toolkits to enhance your skills and tackle more complex projects.
Q: How to use Tk in Python?
A: To use Tkinter (often referred to as Tk) in Python, you need to follow these steps:
-
- Import the tkinter module in your Python script.
- Create an instance of the main Tkinter window using the tk() constructor.
- Add widgets to the window using different Tkinter widget classes (like Button, Label, Entry, Frame, etc.).
- Configure the widgets with desired properties and behaviors.
- Organize the widgets within the window using layout managers (pack, grid, place).
- Run the Tkinter event loop (mainloop()) to display the window and handle user interactions.
Q: Which Python GUI is best for beginners?
A: Tkinter is often considered the best GUI toolkit for beginners in Python due to its simplicity, easy of use and integration with the Python standard library. It provides a straightforward way to create graphical interfaces with minimal code, and this makes it an excellent choice for beginners learning GUI programming in Python. Also Tkinter has documentation and large community of users and contributors.
Q: Which is the best Python GUI?
A: The choice of the best Python GUI depends on different factors such as the requirements of the project, level of complexity, easy of use, platform compatibility and personal preferences. Some popular Python GUI frameworks include Tkinter, PyQt, PyGTK, Kivy and wxPython. Among these, Tkinter is often considered the best choice for beginners due to its simplicity, easy of use and integration with the Python standard library.
Q: What is Python GUI?
A: Python GUI (Graphical User Interface) refers to the visual interface that allows users to interact with a Python application using graphical elements such as windows, buttons, menus, and dialog boxes. Python provides several libraries and frameworks for building GUI applications, each with its own set of features and capabilities. GUIs in Python are used for creating desktop applications, interactive data visualization tools, games, educational software and many more.
How to install and use Tkinter in Python?
Tkinter is included with standard Python installations, so there’s no need to install it separately.
Learn More on PyQt6:
- How to Install PyQt6
- PyQt6 Window Type Classes
- How to Add Title and Icon in PyQt6
- Qt Designer in PyQt6
- How to Convert PyQt6 Designer UI to PY File
Subscribe and Get Free Video Courses & Articles in your Email