Welcome to PyQt5 Tutorial for Beginners, in this complete article we want to learn PyQt5 from basic up to advanced topics. You will learn different concepts on this article, from installation of PyQt5 up to building different widgets in PyQt5.
What is PyQt5 ?
PyQt5 is a comprehensive set of Python bindings for Qt v5. It is implemented as more than 35 extension modules and enables Python to be used as an alternative application development language to C++ on all supported platforms including iOS and Android. PyQt5 is used to write all kinds of GUI applications, from accounting applications, to visualization tools used by scientists and engineers. and Qt is set of cross-platform C++ libraries that implement high-level APIs for accessing many aspects of modern desktop and mobile systems. These includes location and positioning services, multimedia, NFC and Bluetooth connectivity, a Chromium based web browser, as well as traditional UI development.
PyQt5 Installation
You an simply use pip for the installation.
|
1 |
pip install PyQt5 |
How to Create Window in PyQt5
OK now after installation we are going to create our first window in PyQt5, now this is the complete code for creating window in PyQt5.
|
1 2 3 4 5 6 7 8 9 10 11 12 13 14 15 16 17 18 19 20 21 22 23 24 25 26 27 28 29 30 31 32 |
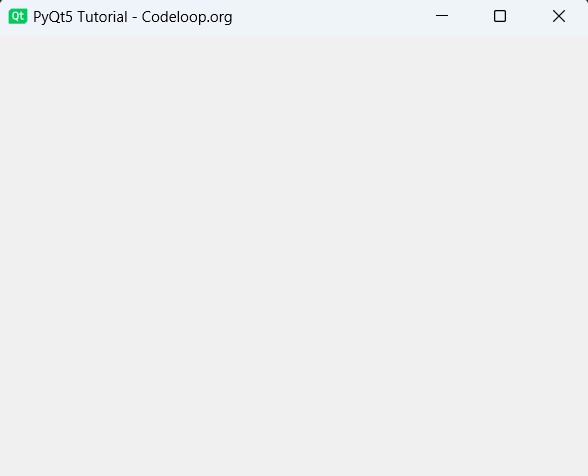
# Import necessary modules from PyQt5 from PyQt5.QtWidgets import QApplication, QWidget from PyQt5.QtGui import QIcon import sys # Define a custom window class inheriting from QWidget class Window(QWidget): def __init__(self): super().__init__() # Set window geometry (x-pos, y-pos, width, height) self.setGeometry(200, 200, 400, 300) # Set window title self.setWindowTitle("PyQt5 Tutorial - Codeloop.org") # Set window icon self.setWindowIcon(QIcon('icon.png')) # Create a QApplication instance app = QApplication(sys.argv) # Create an instance of the custom window class window = Window() # Show the window window.show() # Start the event loop and exit the application when it's done sys.exit(app.exec_()) |
You can see in the above code we have created a class that extends from QWidget, now there are three types of window class that you can use.
- QWidget: The QWidget class is the base class of all user interface
objects, The widget is the important point of the user interface:
it receives mouse, keyboard and other events from the window
system, and paints a representation of itself on the screen. - QDialog: The QDialog class is the base class of dialog window
and A dialog window is a top-level window mostly used for
short-term tasks and brief communications with the user.
QDialogs may be modal or modeless. - QMainWindow: The QMainWindow class provides a main application window
A main window provides a framework for building an
application’s user interface. PyQt5 has QMainWindow and its
related classes for main window management. QMainWindow has
its own layout to which you can add QToolBars, QDockWidgets,
a QMenuBar, and a QStatusBar.
“__init__” is a reserved method in python classes. It is called as a constructor in object oriented programming. This method is called when an object is created from a class and it allows the class to initialize the attributes of the class. The super() function is used to give access to methods and properties of a parent class. And the super() function makes class inheritance more manageable. The word ‘self’ is used to represent the instance of the class. By using the “self” keyword we can access the attributes and methods of the class in python.
Run the complete code and this is the result.
How to Create Button in PyQt5
OK now we want to create QPushButton in PyQt5, the QPushButton widget provides a command button. push button or command button is the most commonly used widget in any graphical user interface. Push (click) a button to command the computer to perform some action, or to answer a question. Typical buttons are OK, Apply, Cancel, Close, Yes, No and Help.
For creating of Button in Python PyQt5 with QPushButton, we need to create the object of QPushButton class.
|
1 |
btn1 = QPushButton("Click Me", self) |
Also if you want to set the size of the button than you can use setGeometry() function, you need to give the x and y position of the button also the width and height of the button.
|
1 |
btn1.setGeometry(100,100, 100,100) |
You can add icon and also style sheet for the button using this code.
|
1 2 3 |
btn1.setIcon(QIcon("cricket.png")) btn1.setIconSize(QSize(40,40)) btn1.setStyleSheet('color:gray') |
Now this is the complete code for creating buttons in PyQt5.
|
1 2 3 4 5 6 7 8 9 10 11 12 13 14 15 16 17 18 19 20 21 22 23 24 25 26 27 28 29 30 31 32 33 34 35 36 37 38 39 40 41 42 43 44 45 46 47 48 49 50 51 52 53 54 55 |
# Import necessary modules from PyQt5 from PyQt5.QtCore import QSize from PyQt5.QtWidgets import QApplication, QWidget, QPushButton from PyQt5.QtGui import QIcon, QFont import sys # Define a custom window class inheriting from QWidget class Window(QWidget): def __init__(self): super().__init__() # Set window geometry (x-pos, y-pos, width, height) self.setGeometry(200, 200, 400, 300) # Set window title self.setWindowTitle("Codeloop.org - Creating Button") # Set window icon self.setWindowIcon(QIcon('icon.png')) # Call method to create buttons self.my_buttons() # Method to create buttons def my_buttons(self): # Create the first button btn1 = QPushButton("Click Me", self) btn1.setGeometry(100, 100, 150, 150) # Set button position and size btn1.setIcon(QIcon("python.png")) # Set button icon btn1.setIconSize(QSize(40, 40)) # Set icon size btn1.setFont(QFont("Times", 14)) btn1.setStyleSheet('color:gray') # Set text color btn1.setStyleSheet('background-color:yellow') # Set background color # Create the second button btn2 = QPushButton("Click Two", self) btn2.setGeometry(250, 100, 150, 150) # Set button position and size btn2.setIcon(QIcon("java.png")) # Set button icon btn2.setIconSize(QSize(40, 40)) # Set icon size btn2.setStyleSheet('color:blue') # Set text color btn2.setStyleSheet('background-color:blue') # Set background color # Create a QApplication instance app = QApplication(sys.argv) # Create an instance of the custom window class window = Window() # Show the window window.show() # Start the event loop and exit the application when it's done sys.exit(app.exec_()) |
Run the complete code and this will be the result

Layout Management in PyQt5
In this part we want to talk about PyQt5 Layout Management, so there are different layout that you can use in PyQt5, we are going to learn about VBOXLayout, HBoxLayout, GridLayout.
QVBoxLayout
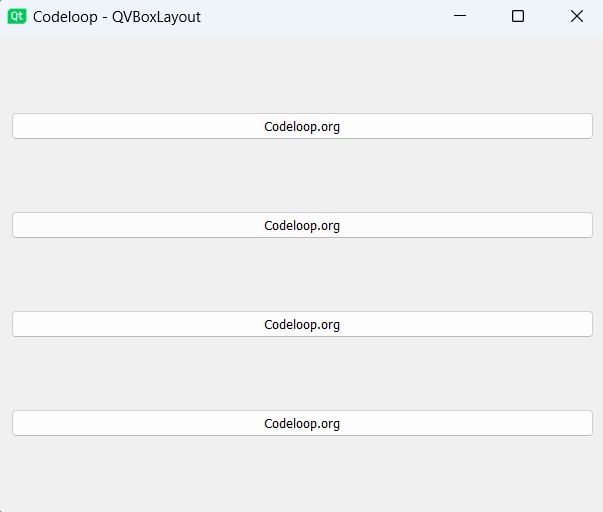
If you want to align your widget vertically than you can use QVBoxLayout, this is the complete code for creating VBoxLayout in PyQt5.
|
1 2 3 4 5 6 7 8 9 10 11 12 13 14 15 16 17 18 19 20 21 22 23 24 25 26 27 28 29 30 31 32 33 34 35 36 37 38 39 40 41 42 |
from PyQt5.QtWidgets import QApplication,QWidget, QVBoxLayout, QPushButton import sys from PyQt5.QtGui import QIcon class Window(QWidget): def __init__(self): super().__init__() #window title, icon and geometry self.setGeometry(200,200, 400,300) self.setWindowTitle("Codeloop - QVBoxLayout") self.setWindowIcon(QIcon('icon.png')) #vboxlayout object vbox = QVBoxLayout() #creating QPushButton btn1 = QPushButton("Codeloop.org") btn2 = QPushButton("Codeloop.org") btn3 = QPushButton("Codeloop.org") btn4 = QPushButton("Codeloop.org") #add widgets in the layout vbox.addWidget(btn1) vbox.addWidget(btn2) vbox.addWidget(btn3) vbox.addWidget(btn4) #set the layout for the main window self.setLayout(vbox) app = QApplication(sys.argv) window = Window() window.show() sys.exit(app.exec_()) |
This is the place that we have created our QVBoxLayout object.
|
1 |
vbox = QVBoxLayout() |
We are going to add four QPushButton in our QVBoxLayout, first you need to create the object of QPushButton.
|
1 |
btn1 = QPushButton("Codeloop.org") |
After creating of your buttons, you need to add the buttons in VBoxLayout. you can use addWidget() method.
|
1 |
vbox.addWidget(btn1) |
Now you need to set the layout for the main window, if you don’t do this you will not see any widgets in your window.
|
1 |
self.setLayout(vbox) |
Run the code and this is the result
QHBoxLayout
If you want to align your widget horizontally than you can use QHBoxLayout, this is the complete code for creating QHBoxLayout in PyQt5.
|
1 2 3 4 5 6 7 8 9 10 11 12 13 14 15 16 17 18 19 20 21 22 23 24 25 26 27 28 29 30 31 32 33 34 35 36 37 38 39 40 41 42 43 44 45 46 47 48 49 50 |
# Import necessary modules from PyQt5 from PyQt5.QtWidgets import QApplication, QWidget, QHBoxLayout, QPushButton from PyQt5.QtGui import QIcon import sys # Define custom window class inheriting from QWidget class Window(QWidget): def __init__(self): super().__init__() # Set window geometry (x-pos, y-pos, width, height) self.setGeometry(200, 200, 400, 300) # Set window title self.setWindowTitle("Codeloop - QHBoxLayout") # Set window icon self.setWindowIcon(QIcon('icon.png')) # Create QHBoxLayout hbox = QHBoxLayout() # Create QPushButton instances btn1 = QPushButton("Codeloop.org") btn2 = QPushButton("Codeloop.org") btn3 = QPushButton("Codeloop.org") btn4 = QPushButton("Codeloop.org") # Add buttons to the QHBoxLayout hbox.addWidget(btn1) hbox.addWidget(btn2) hbox.addWidget(btn3) hbox.addWidget(btn4) # Set the layout of the window to the created QHBoxLayout self.setLayout(hbox) # Create a QApplication instance app = QApplication(sys.argv) # Create an instance of the custom window class window = Window() # Show the window window.show() # Start the event loop and exit the application when it's done sys.exit(app.exec_()) |
You can use QHBoxLayout class for creating hboxlayout in Python GUI programming.
|
1 |
hbox = QHBoxLayout() |
We want to add four buttons in this hbox layout.
|
1 2 3 4 |
btn1 = QPushButton("Codeloop.org") btn2 = QPushButton("Codeloop.org") btn3 = QPushButton("Codeloop.org") btn4 = QPushButton("Codeloop.org") |
After creating of your buttons, you need to add the buttons in HBoxLayout. you can use addWidget() method.
|
1 |
hbox.addWidget(btn1) |
Run the code and this is the result.

QGridLayout
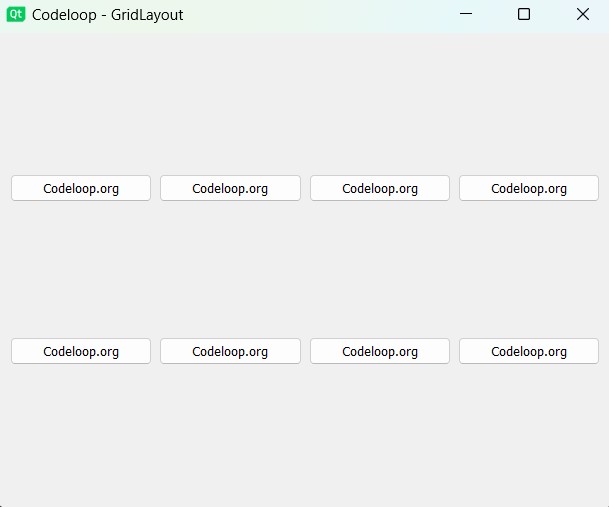
By using gridlayout you can align your widgets in row and columns, now this is the complete code for QGridLayout.
|
1 2 3 4 5 6 7 8 9 10 11 12 13 14 15 16 17 18 19 20 21 22 23 24 25 26 27 28 29 30 31 32 33 34 35 36 37 38 39 40 41 42 43 44 45 46 47 48 49 50 51 52 53 54 55 56 57 58 |
# Import necessary modules from PyQt5 from PyQt5.QtWidgets import QApplication, QWidget, QGridLayout, QPushButton from PyQt5.QtGui import QIcon import sys # Define a custom window class inheriting from QWidget class Window(QWidget): def __init__(self): super().__init__() # Set window geometry (x-pos, y-pos, width, height) self.setGeometry(200, 200, 400, 300) # Set window title self.setWindowTitle("Codeloop - GridLayout") # Set window icon self.setWindowIcon(QIcon('icon.png')) # Create a QGridLayout grid = QGridLayout() # Create QPushButton instances btn1 = QPushButton("Codeloop.org") btn2 = QPushButton("Codeloop.org") btn3 = QPushButton("Codeloop.org") btn4 = QPushButton("Codeloop.org") btn5 = QPushButton("Codeloop.org") btn6 = QPushButton("Codeloop.org") btn7 = QPushButton("Codeloop.org") btn8 = QPushButton("Codeloop.org") # Add buttons to the QGridLayout at specified positions grid.addWidget(btn1, 0, 0) grid.addWidget(btn2, 0, 1) grid.addWidget(btn3, 0, 2) grid.addWidget(btn4, 0, 3) grid.addWidget(btn5, 1, 0) grid.addWidget(btn6, 1, 1) grid.addWidget(btn7, 1, 2) grid.addWidget(btn8, 1, 3) # Set the layout of the window to the created QGridLayout self.setLayout(grid) # Create a QApplication instance app = QApplication(sys.argv) # Create an instance of the custom window class window = Window() # Show the window window.show() # Start the event loop and exit the application when it's done sys.exit(app.exec_()) |
You can use QGridLayout class for creating of the grid layout in PyQt5.
|
1 |
grid = QGridLayout() |
And you can addWidget() method for adding the items of widgets in your QGridLayout, for example in here we want to add some QPushButtons in our PyQt5 GridLayout, also you need to specify the row and column number for the widgets.
|
1 |
grid.addWidget(btn1, 0, 0) |
Now you need to set the layout for the main window, if you don’t do this you will not see any widgets in your window.
|
1 |
self.setLayout(grid) |
Run the code and this will be the result
Creating QLabel in PyQt5
All right guys, now let’s create label in PyQt5, you can use QLabel class for creating label in PyQt5. the QLabel widget provides a text or image display. QLabel is used for displaying text or an image.
You can create the label using QLabel object.
|
1 |
label = QLabel("Welcome To Codeloop.org") |
This is our vertical layout.
|
1 |
vbox = QVBoxLayout() |
Using this code you can set the font for the label.
|
1 |
label2.setFont(QtGui.QFont("Sanserif", 20)) |
This is used for changing the color of the label.
|
1 |
label2.setStyleSheet('color:red') |
This is the complete code
|
1 2 3 4 5 6 7 8 9 10 11 12 13 14 15 16 17 18 19 20 21 22 23 24 25 26 27 28 29 30 31 32 33 34 35 36 37 38 39 40 41 42 43 44 45 46 47 48 49 50 51 52 |
import sys from PyQt5.QtWidgets import QApplication, QWidget, QVBoxLayout, QLabel from PyQt5.QtGui import QFont, QIcon class MyWindow(QWidget): def __init__(self): super().__init__() # Set window properties self.setWindowTitle("QLabel Example") self.setGeometry(100, 100, 400, 200) self.setWindowIcon(QIcon("icon.png")) # Create a QVBoxLayout for our vertical layout vbox = QVBoxLayout(self) # Create a QLabel with the specified text self.label1 = QLabel("PyQt5 GUI Development") # Add the label to the vertical layout vbox.addWidget(self.label1) # Create another QLabel self.label2 = QLabel("Welcome To Codeloop.org") # Set font for the second label self.label2.setFont(QFont("Sanserif", 20)) # Set stylesheet for changing the color of the second label self.label2.setStyleSheet('color:red') # Add the second label to the vertical layout vbox.addWidget(self.label2) # Set the layout of the window to the vertical layout self.setLayout(vbox) # Show the window self.show() if __name__ == '__main__': # Create a QApplication instance app = QApplication(sys.argv) # Create an instance of MyWindow class window = MyWindow() # Start the event loop sys.exit(app.exec_()) |
Run the code and this will be the result

PyQt5 Signal & Slots
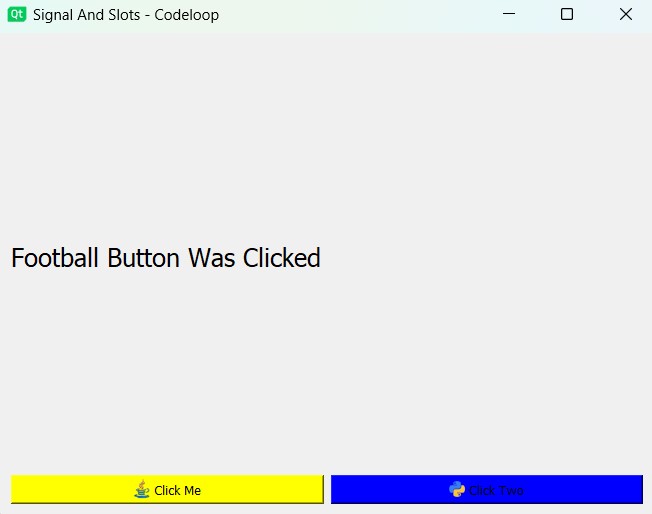
In this part we want to learn about PyQt5 Signal & Slots, Signal and Slots are used for communication between some objects. a Signal is emitted when a particular event occurs, and a Slot is called when its connected signal is emitted. so now we are going to create an example of PyQt5 Signal and Slots. so this is the complete code for this part.
This is the code for PyQt5 Signals and Slots
|
1 2 3 4 5 6 7 8 9 10 11 12 13 14 15 16 17 18 19 20 21 22 23 24 25 26 27 28 29 30 31 32 33 34 35 36 37 38 39 40 41 42 43 44 45 46 47 48 49 50 51 52 53 54 55 56 57 58 59 60 61 62 63 64 65 66 67 68 69 70 71 72 73 74 75 76 |
# Import necessary modules from PyQt5 from PyQt5.QtWidgets import QApplication, QHBoxLayout, QVBoxLayout, QLabel, QWidget, QPushButton from PyQt5.QtGui import QIcon, QFont import sys # Define a custom window class inheriting from QWidget class Window(QWidget): def __init__(self): super().__init__() # Set window geometry (x-pos, y-pos, width, height) self.setGeometry(200, 200, 400, 200) # Set window title self.setWindowTitle("Signal And Slots - Codeloop") # Set window icon self.setWindowIcon(QIcon('icon.png')) # Call method to create buttons and labels self.create_buttons() def create_buttons(self): # Create a QVBoxLayout to hold widgets vertically vbox = QVBoxLayout() # Create a QHBoxLayout to hold buttons horizontally hbox = QHBoxLayout() # Create the first button btn1 = QPushButton("Click Me", self) btn1.setIcon(QIcon("java.png")) # Set button icon btn1.setStyleSheet('color:red') # Set text color btn1.setStyleSheet('background-color:yellow') # Set background color hbox.addWidget(btn1) # Add button to the horizontal layout btn1.clicked.connect(self.clicked_btn) # Connect button click to method # Create the second button btn2 = QPushButton("Click Two", self) btn2.setIcon(QIcon("python.png")) # Set button icon btn2.setStyleSheet('color:yellow') # Set text color btn2.setStyleSheet('background-color:blue') # Set background color hbox.addWidget(btn2) # Add button to the horizontal layout btn2.clicked.connect(self.second_clicked) # Connect button click to method # Create a QLabel self.label = QLabel("Hello") self.label.setFont(QFont("Sanserif", 15)) # Set font for label # Add the QLabel and QHBoxLayout to the QVBoxLayout vbox.addWidget(self.label) vbox.addLayout(hbox) # Set the layout of the window to the QVBoxLayout self.setLayout(vbox) # Method to handle click on the first button def clicked_btn(self): self.label.setText("Cricket Button Was Clicked") # Method to handle click on the second button def second_clicked(self): self.label.setText("Football Button Was Clicked") # Create a QApplication instance app = QApplication(sys.argv) # Create an instance of the custom window class window = Window() # Show the window window.show() # Start the event loop and exit the application when it's done sys.exit(app.exec_()) |
This code defines PyQt5 application that demonstrates the usage of signals and slots. It creates a custom window class Window that inherits from QWidget. Inside the Window class, the create_buttons method sets up the layout of the window by creating two buttons (btn1 and btn2) horizontally aligned using a QHBoxLayout. Each button is styled with custom colors and icons. Additionally, a QLabel (self.label) is created and added above the buttons to display messages when buttons are clicked. The clicked_btn and second_clicked methods are connected to the respective buttons’ clicked signals to handle button clicks and update the label text accordingly.
Run the code and this will the result
Create QRadioBox in PyQt5
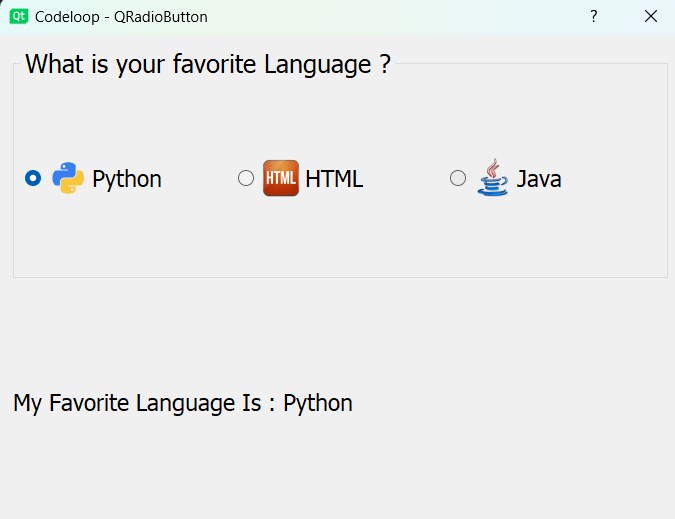
Now we want to create QRadioBox in PyQt5, also we are going to learn how we can use toggled signal of RadioButton, in pyqt5 we can use QRadioButton class for creating of radiobutton, along with QRadioButton we will learn creating of QGroupBox in PyQt5. this is the complete code for creating QRadioButton and QGroupBox.
This is the code for PyQt5 QRadioButton
|
1 2 3 4 5 6 7 8 9 10 11 12 13 14 15 16 17 18 19 20 21 22 23 24 25 26 27 28 29 30 31 32 33 34 35 36 37 38 39 40 41 42 43 44 45 46 47 48 49 50 51 52 53 54 55 56 57 58 59 60 61 62 63 64 65 66 67 68 69 70 71 72 73 74 75 76 77 78 79 80 81 82 83 84 85 86 87 88 89 90 91 92 93 94 95 96 97 98 99 |
# Import necessary modules from PyQt5 from PyQt5.QtWidgets import QApplication, QDialog, QGroupBox, QHBoxLayout, QLabel, QVBoxLayout, QRadioButton from PyQt5.QtGui import QIcon, QFont from PyQt5.QtCore import QSize import sys # Define custom window class inheriting from QDialog class Window(QDialog): def __init__(self): super().__init__() # Set window geometry (x-pos, y-pos, width, height) self.setGeometry(200, 200, 400, 300) # Set window title self.setWindowTitle("Codeloop - QRadioButton") # Set window icon self.setWindowIcon(QIcon('icon.png')) # Call method to create radio buttons self.create_radiobutton() # Create a QVBoxLayout for the main window layout vbox = QVBoxLayout() # Add the group box containing radio buttons to the main layout vbox.addWidget(self.groupbox) # Create a QLabel for displaying selected language self.label = QLabel("") self.label.setFont(QFont("Sanserif", 14)) # Add the label to the main layout vbox.addWidget(self.label) # Set the main window layout self.setLayout(vbox) # Method to create radio buttons def create_radiobutton(self): # Create a group box to contain radio buttons self.groupbox = QGroupBox("What is your favorite Language ?") self.groupbox.setFont(QFont("Sanserif", 15)) # Create a QHBoxLayout for arranging radio buttons horizontally hbox = QHBoxLayout() # Create radio buttons and configure them self.rad1 = QRadioButton("Python") self.rad1.setChecked(True) self.rad1.setIcon(QIcon('python.png')) self.rad1.setIconSize(QSize(40, 40)) self.rad1.setFont(QFont("Sanserif", 14)) # Connect toggled signal to method self.rad1.toggled.connect(self.on_selected) hbox.addWidget(self.rad1) self.rad2 = QRadioButton("HTML") self.rad2.setIcon(QIcon('html.png')) self.rad2.setIconSize(QSize(40, 40)) self.rad2.setFont(QFont("Sanserif", 14)) # Connect toggled signal to method self.rad2.toggled.connect(self.on_selected) hbox.addWidget(self.rad2) self.rad3 = QRadioButton("Java") self.rad3.setIcon(QIcon('java.png')) self.rad3.setIconSize(QSize(40, 40)) self.rad3.setFont(QFont("Sanserif", 14)) # Connect toggled signal to method self.rad3.toggled.connect(self.on_selected) hbox.addWidget(self.rad3) # Set the layout of the group box to the horizontal layout self.groupbox.setLayout(hbox) # Method to handle selection of radio buttons def on_selected(self): radio_button = self.sender() if radio_button.isChecked(): self.label.setText("My Favorite Language Is: " + radio_button.text()) # Create a QApplication instance app = QApplication(sys.argv) # Create an instance of the custom window class window = Window() # Show the window window.show() # Start the event loop and exit the application when it's done sys.exit(app.exec_()) |
This code demonstrates the usage of QRadioButton in PyQt5 application. It creates a custom dialog window class Window that inherits from QDialog. Inside the Window class, the create_radiobutton method sets up a group box (QGroupBox) containing three radio buttons (QRadioButton) arranged horizontally using a QHBoxLayout. Each radio button represents a programming language option and is styled with custom icons and fonts. The on_selected method is connected to the toggled signal of each radio button to handle selection events. When a radio button is selected, the label text above the group box updates to display the selected language.
Run the code and this will be the result
Creating QSpinBox in PyQt5
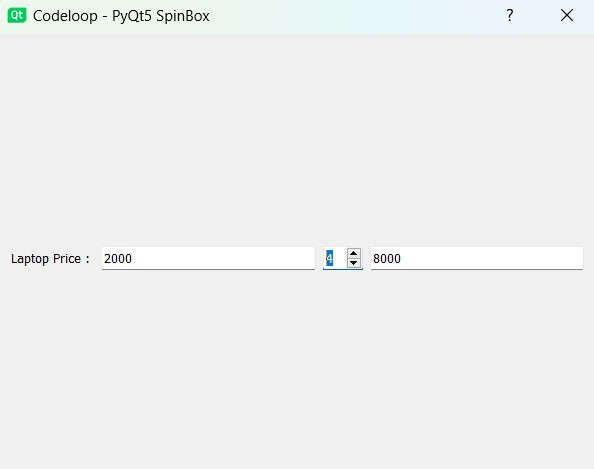
Let’s create spinbox in pyqt5, QSpinBox is designed to handle integers and discrete sets of values (e.g., month names), use QDoubleSpinBox for floating point values. QSpinBox allows the user to choose a value by clicking the up/down buttons or pressing up/down on the keyboard to increase/decrease the value currently displayed. You can use QSpinBox class object for creating of the spinbox in PyQt5 GUI.
This is the code for PyQt5 QSpinBox
|
1 2 3 4 5 6 7 8 9 10 11 12 13 14 15 16 17 18 19 20 21 22 23 24 25 26 27 28 29 30 31 32 33 34 35 36 37 38 39 40 41 42 43 44 45 46 47 48 49 50 51 52 53 54 55 56 57 58 59 60 61 62 63 64 65 66 67 68 69 70 71 72 73 |
# Import necessary modules from PyQt5 from PyQt5.QtWidgets import QApplication, QDialog, QHBoxLayout, QSpinBox, QLabel, QLineEdit from PyQt5.QtGui import QIcon import sys # Define a custom window class inheriting from QDialog class Window(QDialog): def __init__(self): super().__init__() # Set window geometry (x-pos, y-pos, width, height) self.setGeometry(200, 200, 400, 300) # Set window title self.setWindowTitle("Codeloop - PyQt5 SpinBox") # Set window icon self.setWindowIcon(QIcon("icon.png")) # Call method to create spin box and related widgets self.create_spinbox() def create_spinbox(self): # Create a QHBoxLayout for arranging widgets horizontally hbox = QHBoxLayout() # Create a label for displaying "Laptop Price" label = QLabel("Laptop Price : ") # Create a QLineEdit for user input of laptop price self.lineEdit = QLineEdit() # Create a QSpinBox for selecting the quantity self.spinbox = QSpinBox() # Connect the valueChanged signal of the spin box to spin_selected method self.spinbox.valueChanged.connect(self.spin_selected) # Create a QLineEdit for displaying the total price self.totalResult = QLineEdit() # Add widgets to the horizontal layout hbox.addWidget(label) hbox.addWidget(self.lineEdit) hbox.addWidget(self.spinbox) hbox.addWidget(self.totalResult) # Set the layout of the window to the horizontal layout self.setLayout(hbox) # Method to calculate total price when spin box value changes def spin_selected(self): if self.lineEdit.text() != 0: # Check if line edit has a valid input price = int(self.lineEdit.text()) totalPrice = self.spinbox.value() * price self.totalResult.setText(str(totalPrice)) else: print("Wrong value") # Notify if line edit has no valid input # Create a QApplication instance App = QApplication(sys.argv) # Create an instance of the custom window class window = Window() # Show the window window.show() # Start the event loop and exit the application when it's done sys.exit(App.exec()) |
This code creates PyQt5 dialog window application that features a spin box (QSpinBox) for selecting the quantity of items, a line edit (QLineEdit) for entering the price of a laptop, and another line edit for displaying the total price. The window’s geometry, title, and icon are set accordingly. When selecting a quantity or changing the laptop price, the total price is calculated and displayed in real-time.
Run the complete code and this will be the result
Creating QLCDNumber in PyQt5
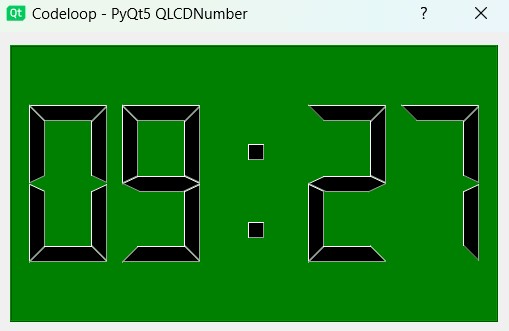
QLCDNumber widget displays a number with LCD-like digits. It can display a number in just about any size. It can display decimal, hexadecimal, octal or binary numbers. It is easy to connect to data sources using the display() slot, which is overloaded to take any of five argument types.
In this example we want to display our computer clock using QLCDNumber.
|
1 2 3 4 5 6 7 8 9 10 11 12 13 14 15 16 17 18 19 20 21 22 23 24 25 26 27 28 29 30 31 32 33 34 35 36 37 38 39 40 41 42 43 44 45 46 47 48 49 50 51 52 53 54 55 56 57 58 59 60 61 62 63 64 65 66 67 68 69 70 71 72 73 |
# Import necessary modules from PyQt5 from PyQt5.QtWidgets import QApplication, QDialog, QLCDNumber, QVBoxLayout from PyQt5.QtGui import QIcon from PyQt5.QtCore import QTime, QTimer import sys # Define a custom window class # inheriting from QDialog class Window(QDialog): def __init__(self): super().__init__() # Set window geometry (x-pos, y-pos, width, height) self.setGeometry(200, 200, 400, 200) # Set window title self.setWindowTitle("Codeloop - PyQt5 QLCDNumber") # Set window icon self.setWindowIcon(QIcon("icon.png")) # Create a QTimer object timer = QTimer() # Connect the timeout signal of the timer # to the lcd_number method timer.timeout.connect(self.lcd_number) # Start the timer to update the LCD number every second (1000 ms) timer.start(1000) # Call lcd_number method initially to display the time self.lcd_number() def lcd_number(self): # Create a QVBoxLayout for arranging widgets vertically vbox = QVBoxLayout() # Create a QLCDNumber object lcd = QLCDNumber() # Set background color of the LCD number lcd.setStyleSheet('background:green') # Add the LCD number to the vertical layout vbox.addWidget(lcd) # Get the current system time time = QTime.currentTime() # Convert the time to a string format (hours:minutes) text = time.toString('hh:mm') # Display the system time in the LCD number lcd.display(text) # Set the layout of the window to the vertical layout # containing the LCD number self.setLayout(vbox) # Create a QApplication instance App = QApplication(sys.argv) # Create an instance of the custom window class window = Window() # Show the window window.show() # Start the event loop and exit the application when it's done sys.exit(App.exec()) |
This code creates PyQt5 dialog window application with QLCDNumber widget, and it displays the current system time. also we have window’s geometry, title, and icon. QTimer object is utilized to update the displayed time every second (1000 milliseconds). lcd_number method updates the displayed time by retrieving the current system time and formatting it as hours and minutes. The time is then displayed in the QLCDNumber widget, which has a green background color.
Run the code and this will be the result
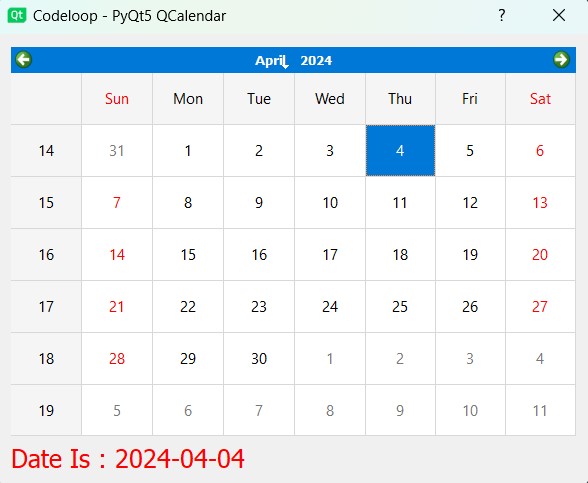
Creating QCalendarWidget in PyQt5
QCalendarWidget class provides a monthly based calendar widget allowing the user to select a date.
This is the code for PyQt5 Calendar
|
1 2 3 4 5 6 7 8 9 10 11 12 13 14 15 16 17 18 19 20 21 22 23 24 25 26 27 28 29 30 31 32 33 34 35 36 37 38 39 40 41 42 43 44 45 46 47 48 49 50 51 52 53 54 55 56 57 58 59 60 61 62 63 64 65 66 67 68 69 70 71 72 |
# Import necessary modules from PyQt5 from PyQt5.QtWidgets import QApplication, QDialog, QVBoxLayout, QCalendarWidget, QLabel from PyQt5.QtGui import QIcon, QFont import sys # Define ustom window class inheriting from QDialog class Window(QDialog): def __init__(self): super().__init__() # Set window geometry (x-pos, y-pos, width, height) self.setGeometry(200, 200, 400, 200) # Set window title self.setWindowTitle("Codeloop - PyQt5 QCalendar") # Set window icon self.setWindowIcon(QIcon("icon.png")) # Create QVBoxLayout for arranging widgets vertically vbox = QVBoxLayout() # Create QCalendarWidget instance self.calendar = QCalendarWidget() # Set grid visible in the calendar widget self.calendar.setGridVisible(True) # Connect selectionChanged signal of the # calendar widget to the calendar_date method self.calendar.selectionChanged.connect(self.calendar_date) # Create a QLabel instance for displaying selected date self.label = QLabel("") # Set font for the label self.label.setFont(QFont("Sanserif", 15)) # Set text color self.label.setStyleSheet('color:red') # Add the calendar widget and label to the vertical layout vbox.addWidget(self.calendar) vbox.addWidget(self.label) # Set the layout of the window to the vertical layout self.setLayout(vbox) # Method to handle selection of date in the calendar def calendar_date(self): dateselected = self.calendar.selectedDate() # Convert selected date to string date_in_string = str(dateselected.toPyDate()) # Set the text of the label to display the selected date self.label.setText("Date Is : " + date_in_string) # Create a QApplication instance App = QApplication(sys.argv) # Create an instance of the custom window class window = Window() # Show the window window.show() # Start the event loop and exit the application # when it's done sys.exit(App.exec()) |
This code creates PyQt5 dialog window application with QCalendarWidget for selecting dates. Also we have added window’s geometry, title, and icon to the window. QCalendarWidget displays a calendar where the user can select a date. When a date is selected, the selected date is displayed below the calendar in a QLabel widget. The displayed date is updated dynamically as the user selects different dates.
Run the complete code and this will be the result
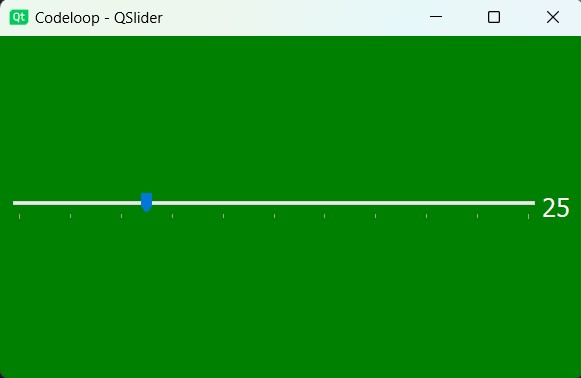
PyQt5 Creating QSlider
Using QSlider widget you can create vertical or horizontal slider, and it lets the user move a slider handle along a horizontal or vertical groove and translates the handle’s position into an integer value within the legal range.
This is the code for PyQt5 QSlider
|
1 2 3 4 5 6 7 8 9 10 11 12 13 14 15 16 17 18 19 20 21 22 23 24 25 26 27 28 29 30 31 32 33 34 35 36 37 38 39 40 41 42 43 44 45 46 47 48 49 50 51 52 53 54 55 56 57 58 59 60 61 62 63 64 65 66 67 68 69 70 71 72 73 74 75 76 77 78 79 80 81 82 83 84 |
# Import necessary modules from PyQt5 from PyQt5.QtWidgets import QApplication, QWidget, QSlider, QLabel, QHBoxLayout from PyQt5.QtGui import QIcon, QFont from PyQt5.QtCore import Qt import sys # Define custom window class inheriting from QWidget class Window(QWidget): def __init__(self): super().__init__() # Set window geometry (x-pos, y-pos, width, height) self.setGeometry(200, 200, 400, 200) # Set window title self.setWindowTitle("Codeloop - QSlider") # Set window icon self.setWindowIcon(QIcon("icon.png")) # Set background color of the window self.setStyleSheet('background-color:green') # Create a QHBoxLayout for arranging widgets horizontally hbox = QHBoxLayout() # Create a QSlider instance self.slider = QSlider() # Set orientation of the slider to horizontal self.slider.setOrientation(Qt.Horizontal) # Set tick position below the slider self.slider.setTickPosition(QSlider.TicksBelow) # Set tick interval self.slider.setTickInterval(10) # Set minimum and maximum values of the slider self.slider.setMinimum(0) self.slider.setMaximum(100) # Connect the valueChanged signal of the slider # to the changed_slider method self.slider.valueChanged.connect(self.changed_slider) # Create a QLabel instance for # displaying the slider value self.label = QLabel("") # Set font for the label self.label.setFont(QFont("Sanserif", 15)) # Set text color self.label.setStyleSheet('color:white') # Add the slider and label to the horizontal layout hbox.addWidget(self.slider) hbox.addWidget(self.label) # Set the layout of the window to the horizontal layout self.setLayout(hbox) # Method to handle changes in the slider value def changed_slider(self): value = self.slider.value() # Set the text of the label to display the slider value self.label.setText(str(value)) # Create a QApplication instance App = QApplication(sys.argv) # Create an instance of the custom window class window = Window() # Show the window window.show() # Start the event loop and exit the # application when it's done sys.exit(App.exec()) |
This code creates PyQt5 window application with QSlider widget for selecting values within a range. Also we have window’s geometry, title, and icon in with a green background color in our window. QSlider is horizontal with tick marks displayed below it. As the user moves the slider, the selected value is displayed in a QLabel widget next to it.
Run the code and this will be the result
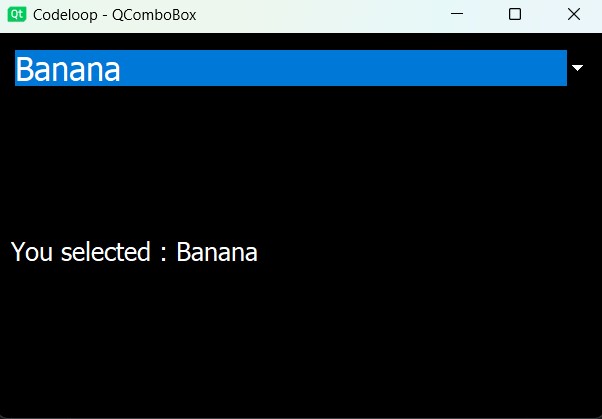
Creating QComboBox in PyQt5
A QComboBox provides a means of presenting a list of options to the user in a way that takes up the minimum amount of screen space. A combobox is a selection widget that displays the current item, and can pop up a list of selectable items.
This is the code for PyQt5 ComboBox
|
1 2 3 4 5 6 7 8 9 10 11 12 13 14 15 16 17 18 19 20 21 22 23 24 25 26 27 28 29 30 31 32 33 34 35 36 37 38 39 40 41 42 43 44 45 46 47 48 49 50 51 52 53 54 55 56 57 58 59 60 61 62 63 64 65 66 67 68 69 70 71 72 73 74 75 76 77 78 79 80 81 82 |
# Import necessary modules from PyQt5 from PyQt5.QtWidgets import QApplication, QWidget, QVBoxLayout, QComboBox, QLabel from PyQt5.QtGui import QIcon, QFont import sys # Define a custom window class # inheriting from QWidget class Window(QWidget): def __init__(self): super().__init__() # Set window geometry (x-pos, y-pos, width, height) self.setGeometry(200, 200, 400, 200) # Set window title self.setWindowTitle("Codeloop - QComboBox") # Set window icon self.setWindowIcon(QIcon("icon.png")) # Set background color of the window self.setStyleSheet('background-color:black') # Create a QVBoxLayout for arranging # widgets vertically vbox = QVBoxLayout() # Create a QComboBox instance self.combo = QComboBox() # Set text color and font for the combo box self.combo.setStyleSheet('color:white') self.combo.setFont(QFont("Times", 20)) # Add items to the combo box self.combo.addItem("Melon") self.combo.addItem("Apple") self.combo.addItem("Banana") self.combo.addItem("Pear") # Connect the currentTextChanged signal of # the combo box to the combo_selected method self.combo.currentTextChanged.connect(self.combo_selected) # Create a QLabel instance for displaying the # selected item from the combo box self.label = QLabel("") # Set font for the label self.label.setFont(QFont("Sanserif", 15)) # Set text color self.label.setStyleSheet('color:white') # Add the combo box and label to the vertical layout vbox.addWidget(self.combo) vbox.addWidget(self.label) # Set the layout of the window to the vertical layout self.setLayout(vbox) # Method to handle selection of item in the combo box def combo_selected(self): item = self.combo.currentText() # Set the text of the label to display the selected item self.label.setText("You selected : " + item) # Create a QApplication instance App = QApplication(sys.argv) # Create an instance of the custom window class window = Window() # Show the window window.show() # Start the event loop and exit the # application when it's done sys.exit(App.exec()) |
This code creates PyQt5 window application with QComboBox widget for selecting items from a dropdown list. Also we have added window’s geometry, title, and icon with a black background color to the window. QComboBox has customized text color and font. As the user selects an item from the combo box, the selected item is displayed in a QLabel widget below it.
Run the code and this will be the result
FAQs
Q: What is PyQt5?
A: PyQt5 is a set of Python bindings for the Qt application framework developed by Riverbank Computing. It allows Python programmers to create desktop applications with a graphical user interface (GUI) using the powerful Qt toolkit.
Q: Why use PyQt5 for GUI development?
A: PyQt5 provides different GUI components and features, and it allows you to create cross platform applications with a native look and feel. It offers high performance, flexibility and extensive documentation, and this is one of the best choice for both small and large-scale projects.
Q: Which platforms does PyQt5 support?
A: PyQt5 supports multiple platforms, including Windows, macOS, Linux and different Unix systems. It provides a consistent API across different platforms, and it allows you to write code that works easily across different operating systems.
Q: How do I install PyQt5?
A: PyQt5 can be installed using pip. You can install PyQt5 by running pip install PyQt5. Also you may need to install PyQt5 tools and other dependencies based on your specific requirements.
Q: Can I use Qt Designer with PyQt5?
A: Yes, Qt Designer is a powerful visual design tool for building GUIs with Qt, and it can be used with PyQt5. You can design your GUIs visually using Qt Designer and then load them into your PyQt5 application using PyQt’s uic module or by converting them to Python code.
Q: How to create GUI using PyQt5?
A: For creating a GUI using PyQt5, you first need to install PyQt5 using pip. after the installation you can import the necessary PyQt5 modules in your Python script and start building your GUI by creating QWidget or QMainWindow instances, also you can add different widgets like buttons, labels, text boxes, etc., and you can organize them using layouts such as QVBoxLayout or QHBoxLayout, and connecting signals and slots to handle user interactions. You can also use Qt Designer, a visual design tool, to create your GUIs visually and then integrate them into your PyQt5 application.
Q: Is PyQt good for GUI?
A: Yes, PyQt is excellent for GUI development. It provides different GUI components and features, and it allows you to create cross-platform desktop applications with a native look and feel. PyQt offers high performance, flexibility and big documentation.
Is Python suitable for GUI development?
Yes, Python is suitable for GUI development, especially when used in conjunction with frameworks like PyQt, Tkinter, wxPython and Kivy. Python’s simplicity, readability, and extensive libraries make it an excellent choice for developing GUI applications. You can build desktop, web or mobile platforms using Python.
Learn More on PyQt6:
- How to Install PyQt6
- PyQt6 Window Type Classes
- How to Add Title and Icon in PyQt6
- Qt Designer in PyQt6
- How to Convert PyQt6 Designer UI to PY File
Subscribe and Get Free Video Courses & Articles in your Email
