In this article we are going to talk about Python Best GUI Frameworks , so Python has become one of the most popular programming languages in , thanks to its simplicity, powerful, and ease of use. one of the key advantages of Python is its ability to create graphical user interfaces (GUIs) for desktop applications, using different GUI frameworks that are available.
These are some of best Python GUI frameworks that developers can use to create desktop applications:
- PyQt6: PyQt6 is Python binding for Qt toolkit, it is cross platform application framework and it is widely used for developing GUI applications. PyQt6 allows developers to create desktop applications that can run on multiple platforms, including Windows, macOS and Linux, using the Python programming language. PyQt6 provides set of Python modules that wraps functionality of the Qt framework, including modules for user interface elements such as buttons, labels and text boxes, as well as modules for working with graphics, databases and networking. PyQt6 is powerful tool for building cross platform desktop applications using Python Programming Language.
- Tkinter: Tkinter is standard GUI toolkit included with Python. It is lightweight and easy framework that providesdifferent tools for creating graphical user interfaces. Tkinter provides widgets such as buttons, labels, text boxes and canvas and also it supports events such as mouse clicks and keypresses. Tkinter is widely used for building simple desktop applications and is the best choice for beginners.
- Kivy: Kivy is an open source Python framework for creating multi touch applications, including desktop applications. Kivy provides a lot of tools for creating GUIs that can be used with touchscreens and other input devices and it makes it best choice for building applications that require touch input. Kivy supports different types of platforms, including Windows, macOS, Linux, iOS and Android.
- PySide6: PySide is Python binding for Qt toolkit, similar to PyQt6. PySide6 is lightweight and easy framework that provides different tools for creating graphical user interfaces. PySide6 supports a lot of platforms, including Windows, macOS and Linux.
- wxPython: wxPython is Python binding for wxWidgets C++ toolkit, it is popular cross platform GUI framework. wxPython provides different tools for creating graphical user interfaces, including widgets such as buttons, labels and text boxes, and also supports events such as mouse clicks and keypresses. wxPython is the best choice for building desktop applications that require native look and feel.
So now let’s talk about the installation of these frameworks and how we can create simple GUI Applications with Python Best GUI Frameworks.
PyQt6 Window
First of all we need to install PyQt6, you can use pip for the installation of PyQt6.
|
1 |
pip install PyQt6 |
Now let’s create our First GUI Window using PyQt6.
|
1 2 3 4 5 6 7 8 9 10 11 12 13 14 15 16 17 18 19 20 21 22 23 24 25 26 27 28 29 30 31 |
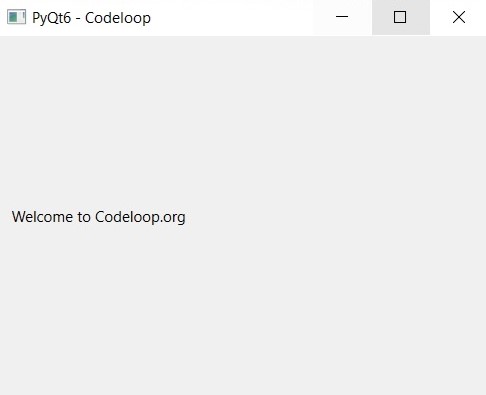
import sys from PyQt6.QtWidgets import QApplication, QWidget, QLabel, QVBoxLayout class MyWindow(QWidget): def __init__(self): super().__init__() # Set window title and size self.setWindowTitle("PyQt6 - Codeloop") self.setGeometry(100, 100, 400, 300) # Create label and add it to vertical layout label = QLabel("Welcome to Codeloop.org") layout = QVBoxLayout() layout.addWidget(label) # Set window layout self.setLayout(layout) if __name__ == "__main__": # Create application object app = QApplication(sys.argv) # Create window object window = MyWindow() # Show window window.show() # Run event loop sys.exit(app.exec()) |
We have started by importing necessary modules from PyQt6. QApplication is the application object, QWidget is base class for all GUI elements, QLabel is widget that displays text or an image and QVBoxLayout is layout that arranges widgets vertically.
Also we have defined our custom MyWindow class that extends from QWidget. in the constructor we have set window title and size using setWindowTitle and setGeometry methods.
also we have created QLabel widget with the text “Welcome to Codeloop.org” and QVBoxLayout layout. we have added label to the layout using the addWidget method and set the window layout using setLayout.
Finally we have created QApplication object, created an instance of our MyWindow class, show window using show method, and run the event loop using app.exec. we have also included standard if __name__ == “__main__”: check to ensure that the code is only executed if the script is run directly, and not imported as module.
Run the complete code and this will be the result
- Working with Qt Designer in PyQt5
- Create CheckBox in PyQt5 with Qt Designer
- PyQt5 Radiobutton in Qt Designer
TKinter Window
Now let’s create an example of TKinter, you don’t need to install Python TKinter, because it is built in module in Python.
|
1 2 3 4 5 6 7 8 9 10 11 12 13 14 15 16 17 18 19 20 21 22 |
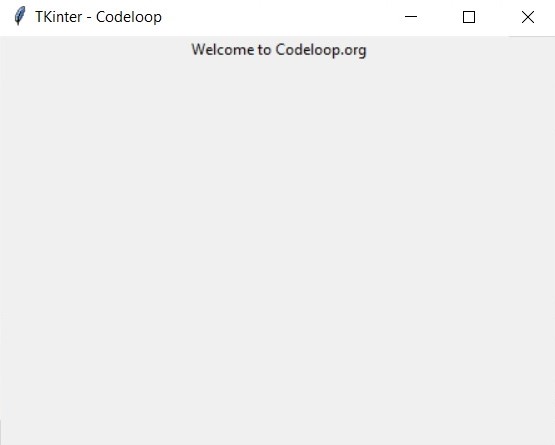
import tkinter as tk class MyWindow: def __init__(self, master): # Initialize the window self.master = master self.master.title("TKinter - Codeloop") self.master.geometry("400x300") # Create label and add it to the window self.label = tk.Label(self.master, text="Welcome to Codeloop.org") self.label.pack() if __name__ == "__main__": # Create the application object root = tk.Tk() # Create the window object window = MyWindow(root) # Run the event loop root.mainloop() |
In the above code we have imported our tkinter library, and after that we have created our MyWindow class, also in this class we have created title for the window, width and height of the window and also a label inside the window, and at the end we run the event loop.
Run the complete code and this will be the result
Kivy Window
Now let’s create our window using Kivy Python GUI Framework, first of all you need to install this GUI Framework using pip.
|
1 |
pip install Kivy |
After installation let’s create our basic window with Python Kivy.
|
1 2 3 4 5 6 7 8 9 10 11 12 13 14 15 16 |
import kivy from kivy.app import App from kivy.uix.label import Label from kivy.uix.widget import Widget class MyWindow(Widget): pass class MyApp(App): def build(self): # Create the window return MyWindow() if __name__ == '__main__': MyApp().run() |
Run the complete code and this will be the result
PySide6 Window
Now let’s create our window using Python PySide6, first of all you need to install Pyside6 using pip
|
1 |
pip install PySide6 |
Now let’s create our basic window
|
1 2 3 4 5 6 7 8 9 10 11 12 13 14 15 16 17 18 19 20 21 22 23 24 25 |
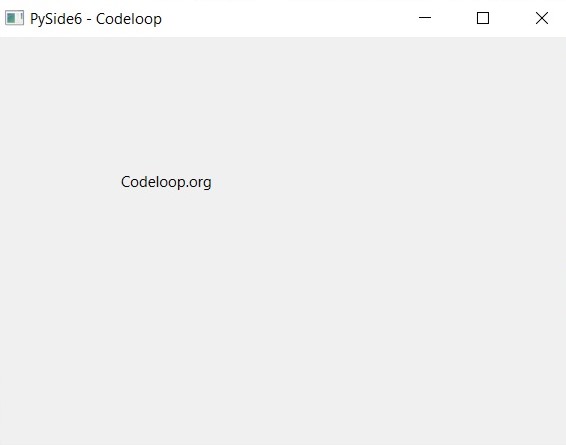
import sys from PySide6.QtWidgets import QApplication, QMainWindow, QLabel class MyWindow(QMainWindow): def __init__(self): super().__init__() # Set window titl and size self.setWindowTitle("PySide6 - Codeloop") self.setGeometry(100, 100, 400, 300) # Create label and add it to the window label = QLabel("Welcome to Codeloop.org", self) label.move(100, 100) if __name__ == "__main__": # Create application object app = QApplication(sys.argv) # Create window object window = MyWindow() window.show() # Run event loop sys.exit(app.exec()) |
Run the complete code and this will be the result
wxPython Window
Now let’s create our GUI Window using wxPython, first of all we need to install this library, you can use pip for the installation.
|
1 |
pip install wxPython |
This is our code for creating window
|
1 2 3 4 5 6 7 8 9 10 11 12 13 14 15 16 17 18 19 20 21 22 23 24 25 26 27 28 29 30 31 |
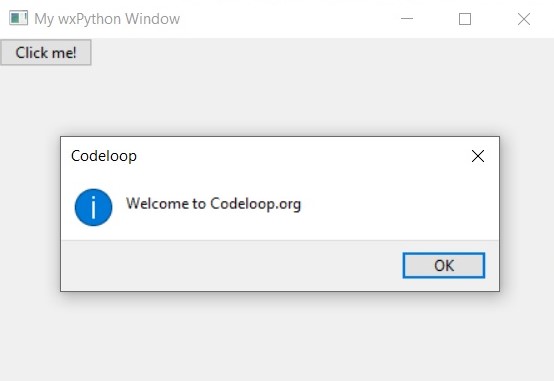
import wx class MyFrame(wx.Frame): def __init__(self, parent, title): super().__init__(parent, title=title, size=(400, 300)) # Create panel and add a button to it panel = wx.Panel(self) button = wx.Button(panel, label="Click me!") button.Bind(wx.EVT_BUTTON, self.on_button_click) # Add panel to the frame and center the frame on the screen sizer = wx.BoxSizer(wx.VERTICAL) sizer.Add(panel, 1, wx.EXPAND) self.SetSizerAndFit(sizer) self.Center() def on_button_click(self, event): # Show message box when the button is clicked wx.MessageBox("Welcome to Codeloop.org", "Codeloop") if __name__ == "__main__": # Create application object app = wx.App() # Create window object frame = MyFrame(None, "My wxPython Window") frame.Show() # Run event loop app.MainLoop() |
Run the complete code and this will be the result
In result we can say that Python provides different GUI frameworks that developers can use to create desktop applications. each framework has its own strengths and weaknesses and developers should choose the framework that best suits their needs based on factors such as platform support, easy to use and required features. Regardless of the framework chosen, Python is powerful and flexible tool for building desktop applications with GUIs.
Subscribe and Get Free Video Courses & Articles in your Email