In this Python article we are going to learn about Print System Time with Pyside2, so for this purpose we are using QLCDNumber class from Pyisde2 GUI Library. so the QLCDNumber widget displays a number with LCD-like digits. It can display a number in just about any size. It can display decimal, hexadecimal, octal or binary numbers. It is easy to connect to data sources using the display() slot, which is overloaded to take any of five argument types.
What is PySide2 ?
PySide2 is Python binding for the Qt application framework, which allows developers to create cross platform graphical user interfaces (GUIs) using the Python programming language. PySide2 provides different Python modules that enable developers to access the functionality of the Qt library from within their Python programs.
PySide2 is successor to the PySide library and was developed by The Qt Company as community driven project. It supports different platforms, including Windows, Linux, macOS and Android and also provides developers with access to rich set of graphical widgets, as well as support for multimedia, networking and other advanced features.
PySide2 is licensed under the LGPLv3 license, which allows developers to use it in both open source and commercial applications. It is widely used in industries such as software development, engineering, and scientific research, among others.
To install PySide2 you can use this command
|
1 |
pip install PySide2 |
What is QLCDNumber ?
In PySide2, QLCDNumber is a class that provides widget for displaying numeric values in digital format. It is part of the QtWidgets module and inherits from QFrame, which means it can be added to a parent widget as child widget.
Also you can check more Python GUI Development tutorials with different libraries.
- PyQt5 GUI Development Tutorials
- TKinter GUI Development Tutorials
- wxPython GUI Development Tutorials
- Kivy GUI Development Tutorials
Learn How to Draw Polygon in Pyside2 with QPainter class
So now this is the complete code for Python Print System Time with Pyside2
|
1 2 3 4 5 6 7 8 9 10 11 12 13 14 15 16 17 18 19 20 21 22 23 24 25 26 27 28 29 30 31 32 33 34 35 36 37 38 39 40 41 42 43 44 |
from PySide2.QtWidgets import QApplication, QDialog, QLCDNumber, QVBoxLayout import sys from PySide2.QtCore import QTime, QTimer class Window(QDialog): def __init__(self): super().__init__() self.setWindowTitle("Pyside2 system Clock") self.setGeometry(300,200,200,100) timer = QTimer() timer.timeout.connect(self.show_clock) timer.start(1000) self.show_clock() self.show() def show_clock(self): vbox = QVBoxLayout() lcd = QLCDNumber() lcd.setStyleSheet('color:green') lcd.setStyleSheet('background:yellow') vbox.addWidget(lcd) time = QTime.currentTime() text = time.toString('hh:mm') lcd.display(text) self.setLayout(vbox) app = QApplication(sys.argv) window = Window() sys.exit(app.exec_()) |
These are the imports that we need for this article.
|
1 2 3 |
from PySide2.QtWidgets import QApplication, QDialog, QLCDNumber, QVBoxLayout import sys from PySide2.QtCore import QTime, QTimer |
In this line of code we have set our window title, also we are going to set the geometry for the window, you can use setGeometry() method and it takes some parameters like x, y position also width and height.
|
1 2 |
self.setWindowTitle("Pyside2 system Clock") self.setGeometry(300,200,200,100) |
In here we need to create timer for QLCDNumber, so the QTimer class provides repetitive and single-shot timers. also the QTimer class provides a high-level programming interface for timers. to use it, create a QTimer, connect its timeout() signal to the appropriate slots, and call start(). From then on, it will emit the timeout() signal at constant intervals.
|
1 2 3 4 |
timer = QTimer() timer.timeout.connect(self.show_clock) timer.start(1000) |
We are going to create a QVBoxLayout, because we want to add our QLCDNumber widget in the vertical box.
|
1 |
vbox = QVBoxLayout() |
In here we have created our QLCDNumber, also we have added some color and styles to the QLCDNumber.
|
1 2 3 |
lcd = QLCDNumber() lcd.setStyleSheet('color:green') lcd.setStyleSheet('background:yellow') |
You need to add your widget in the VBoxLayout.
|
1 |
vbox.addWidget(lcd) |
Because we want to show our System Time in Python, so you need to create the object of QTime and after that set the time to the QLCDNumber object.
|
1 2 3 |
time = QTime.currentTime() text = time.toString('hh:mm') lcd.display(text) |
When you are going to use layouts in Pyside2, than after creating the layout, you need to set the layout for the main window like this, if you don’t do this you will not see any widgets in the screen.
|
1 |
self.setLayout(vbox) |
For every Pyside2 application we need to create the object of QApplication.
|
1 |
app = QApplication(sys.argv) |
And this is the starting point of the loop.
|
1 |
sys.exit(app.exec_()) |
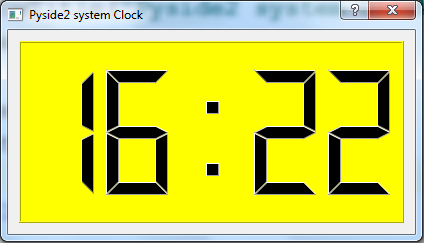
Run the complete code and this is the result.
Also you can watch the complete video for this article
Subscribe and Get Free Video Courses & Articles in your Email
