This is our twelfth article in Django, in this article we are going to talk about Django Rendering Data from Mysql Database.
OK by default when you create New Project, Django comes with default database configuration for SQLite3 database, but you can change, as we have already learned that how you can connect your django application with Mysql Database Django Mysql Database Connection . but in this article we are going to retrieve our data from Mysql Database.
Flask Web Development Tutorials
1: Flask CRUD Application with SQLAlchemy
2: Flask Creating News Web Application
3: Flask Creating REST API with Marshmallow
Python GUI Development Tutorials
1: PyQt5 GUI Development Tutorials
2: Pyside2 GUI Development Tutorials
3: wxPython GUI Development Tutorials
4: Kivy GUI Development Tutorials
5: TKinter GUI Development Tutorials
OK first of all you need to create a project in Django, we have already covered the creation of the Django project in our previous article Django Introduction & Installation. but you can use this command for creating of Django Project.
|
1 |
django-admin startproject MyProject |
Now you need to create a database in the WAMP Server, so my Database name is codeloop. but you can give what ever you want for the database name.
As we have created our Django Project, now we need to open settings.py file in Django Project and bring some changes in the DATABASE section, by default if you see we have SQLite3 database. but we want to use MySQL Database. for this purpose you need to add some configuration of your mysql database, for example like database name, port, username, password and database host.
|
1 2 3 4 5 6 7 8 9 10 |
DATABASES = { 'default': { 'ENGINE': 'django.db.backends.mysql', 'NAME': 'codeloop', 'USER': 'root', 'PASSWORD': '', 'HOST': 'localhost', 'PORT': '3306', } } |
After adding these configurations in your settings.py file, you need to migrate your project, because we have added a new database configuration.
|
1 2 |
cd MyProject python manage.py migrate |
Now we need to create an App, you can read the complete article about Django Apps in this link Django Apps & URL Routing . i have named my App as news, but you can name it what ever you want.
|
1 |
python manage.py startapp news |
Also you need to add your newly created app in the Django settings.py INSTALLED_APPS. make sure that always do this process after creating a new App.
|
1 2 3 4 5 6 7 8 9 10 |
INSTALLED_APPS = [ 'django.contrib.admin', 'django.contrib.auth', 'django.contrib.contenttypes', 'django.contrib.sessions', 'django.contrib.messages', 'django.contrib.staticfiles', 'news', #added app ] |
OK before this we have talked about how you can use templates in django, you can check this article Django Templates Introduction. but you need to just create a templates folder in your project and you need to add some html files. basically we are going to create some html files. and also don’t forget to add your templates folder in your settings.py DIRS Section. also we have talked about template inheritance in django, Django Template Inheritance.
This is our navbar.html, and we have already included this file in to our base.html, you can check this article for How to Include Template Tag in Django Django Include Template Tag. also we have used url template tag for linking of the views with our navbar, you can read this article for that Django URL Template Tag.
|
1 2 3 4 5 6 7 8 9 10 |
<nav> <ul> <li><a href="{% url 'home' %}" >Home</a></li> <li><a href="{% url 'contact' %}" >Contact</a></li> <li><a href="{% url 'about' %}" >About</a></li> </ul> </nav> |
OK now this is our base.html. and we have included an external html file at name of navbar.html, that we have already created.
|
1 2 3 4 5 6 7 8 9 10 11 12 13 14 15 16 |
<!DOCTYPE html> <html lang="en"> <head> <meta charset="UTF-8"> <title>{% block title %}{% endblock %}</title> </head> {% include 'navbar.html' %} <body> {% block body %} {% endblock %} </body> </html> |
Before adding our html files, you need to open your models.py in your news app and add this model, we have already talked about Django Models, you can check this article Django Models Introduction.
|
1 2 3 4 5 6 7 8 9 10 11 12 13 |
from django.db import models # Create your models here. class News(models.Model): author = models.CharField(max_length=100) title = models.CharField(max_length=100) description = models.TextField() def __str__(self): return self.title |
After adding your model, you need to do migrations like this
|
1 |
python manage.py makemigrations |
|
1 |
python manage.py migrate |
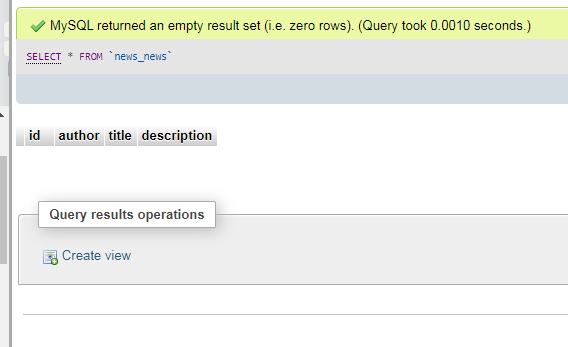
Now if you check your Mysql Database, we have a table called news with the specific fields. but right now we don’t have any data in our database, because we want to fetch the data from mysql database, you need to add some data. you can do this manually in Mysql Database, or you can use Django Admin Panel, and add some data. for using django admin panel check this article Django Creating Super User.

OK after adding some data to your database table, now we need to create our view, and we want to fetch the data in our home view. you can see that we have fetched all of our data from Mysql database. you can read the article about template context in this link Template Context in Django .
|
1 2 3 4 5 6 7 8 9 10 11 12 13 14 15 16 17 |
from django.shortcuts import render from .models import News def home(request): obj = News.objects.all() context = {"object":obj} return render(request, "home.html", context) def about(request): return render(request, "about.html") def contact(request): return render(request, "contact.html") |
Now we need to render the data in our home.html file, and we have used for loop for iterating over the data, you can read the article about django for loop in this link Django Template For Loop.
templates/home.html
|
1 2 3 4 5 6 7 8 9 10 11 12 13 14 15 16 17 18 19 20 21 22 23 24 25 26 27 |
{% extends 'base.html' %} {% block title %} Home {% endblock %} {% block body %} <h1>Codeloop.org</h1> <p>Django Tutorial Number 12 , Rendering Data From Mysql Database</p> <hr/> {% for news in object %} <div> <h1>{{news.title}}</h1> <h3>{{news.author}}</h3> <p>{{news.description}}</p> <hr/> </div> {% endfor %} {% endblock %} |
templates/about.html
|
1 2 3 4 5 6 7 8 9 10 11 |
{% extends 'base.html' %} {% block title %} About {% endblock %} {% block body %} <h1>Codeloop.org, this is our about page</h1> <p>Django Tutorial Number 12 , Rendering Data From Mysql Database</p> {% endblock %} |
templates/contact.html
|
1 2 3 4 5 6 7 8 9 10 11 |
{% extends 'base.html' %} {% block title %} Contact {% endblock %} {% block body %} <h1>Codeloop.org, this is our contact page</h1> <p>Django Tutorial Number 12 , Rendering Data From Mysql Database</p> {% endblock %} |
Also you need to create your urls, you can read this article for url routing Django Apps & URL Routing . but just create a new python file in your news app at name of urls.py and add these codes.
|
1 2 3 4 5 6 7 8 9 10 |
from django.urls import path from .views import home, about,contact urlpatterns = [ path('', home, name = 'home'), path('about/', about, name = 'about'), path('contact/', contact, name = 'contact'), ] |
And also you need to include your app urls.py in your project urls.py file.
|
1 2 3 4 5 6 7 8 |
from django.contrib import admin from django.urls import path,include urlpatterns = [ path('admin/', admin.site.urls), path('', include('news.urls')), ] |
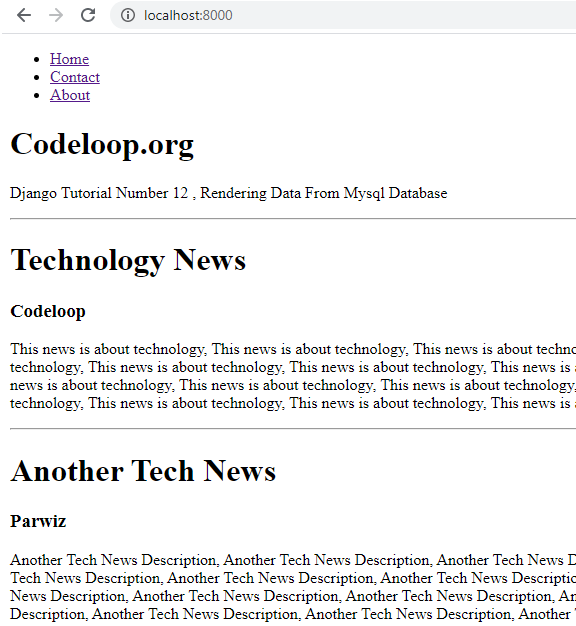
Now you can run the project and you can see our mysql data in the home page
|
1 |
python manage.py runserver |
http://localhost:8000/

Subscribe and Get Free Video Courses & Articles in your Email