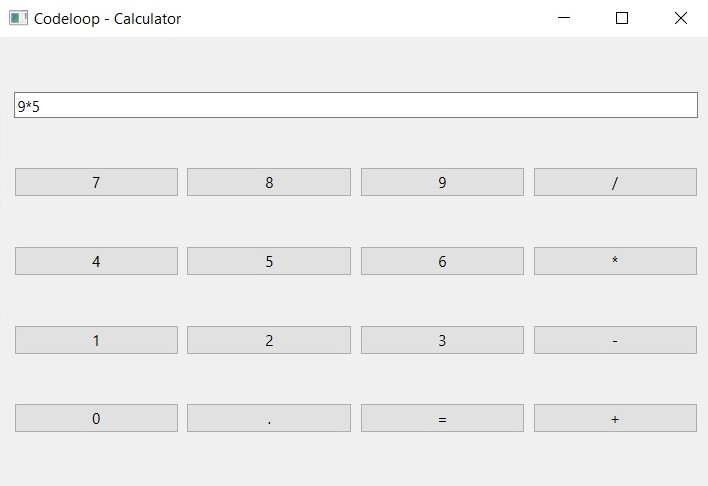
In this Python PyQt6 article i want to show you How to Build Python Calculator with PyQt6, as you know from the title, we are going to use Python programming language with PyQt6 GUI Framework for building our Python Calculator, now first of all let’s talk about PyQt6 and the installation process.
What is Python PyQt6 ?
PyQt6 is set of Python bindings for the Qt6 application framework and runs on all platforms supported by Qt6. PyQt6 enables the use of Qt6 libraries in Python programs. Qt is popular cross-platform application development framework and PyQt6 allows you to use its functionality in your Python programs to create graphical user interfaces (GUIs) and perform other tasks.
Key Features of PyQt6 ?
As we have already mentioned that PyQt6 is set of Python bindings for the Qt6 application framework and is used to create desktop and mobile applications. some of the key features of PyQt6 are:
- Cross-platform support: PyQt6 supports multiple platforms, including Windows, macOS, Linux and mobile platforms like Android and iOS.
- User interface design: PyQt6 provides rich set of tools and widgets for creating modern and attractive user interfaces, including buttons, sliders, text boxes and many more.
- Signal and slot mechanism: PyQt6’s signal and slot mechanism allows developers to create dynamic connections between objects, which can respond to user events or changes in data.
- Integration with Qt Designer: PyQt6 can be integrated with Qt Designer, it is graphical user interface design tool, allowing developers to design UI elements visually and then export them as code.
- Support for multimedia and graphics: PyQt6 provides support for multimedia elements like audio and video.
Python PyQt6 Installation
You can install PyQt6 using pip.
|
1 |
pip3 install PyQt6 |
So now this is the complete code creating our GUI Calculator
|
1 2 3 4 5 6 7 8 9 10 11 12 13 14 15 16 17 18 19 20 21 22 23 24 25 26 27 28 29 30 31 32 33 34 35 36 37 38 39 40 41 42 43 44 45 46 47 48 49 50 51 52 |
import sys from PyQt6.QtWidgets import QApplication, QWidget, QGridLayout, QLineEdit, QPushButton class CalculatorWindow(QWidget): def __init__(self): super().__init__() self.MyUI() def MyUI(self): grid = QGridLayout() self.display = QLineEdit() self.display.setReadOnly(True) grid.addWidget(self.display, 0, 0, 1, 4) names = ['7', '8', '9', '/', '4', '5', '6', '*', '1', '2', '3', '-', '0', '.', '=', '+'] positions = [(i, j) for i in range(1, 5) for j in range(4)] for position, name in zip(positions, names): if name == '=': btn = QPushButton(name) btn.clicked.connect(self.equals) grid.addWidget(btn, *position) else: btn = QPushButton(name) btn.clicked.connect(lambda x, b=name: self.append_number(b)) grid.addWidget(btn, *position) self.setLayout(grid) self.setWindowTitle('Codeloop - Calculator') def append_number(self, b): self.display.setText(self.display.text() + b) def equals(self): try: result = eval(self.display.text()) self.display.setText(str(result)) except: self.display.setText('Error') if __name__ == '__main__': app = QApplication(sys.argv) calculator = CalculatorWindow() calculator.show() sys.exit(app.exec()) |
In the above code first of all necessary modules are imported, which are sys for system specific parameters and functions, and QApplication, QWidget, QGridLayout, QLineEdit and QPushButton from PyQt6.QtWidgets for creating graphical user interface.
Next we have created a class called CalculatorWindow, which extends from the QWidget class. it has constructor method __init__ that calls MyUI method, which creates the user interface for the calculator.
MyUI method initializes the QGridLayout and QLineEdit widgets for displaying the input and output. it also creates 16 buttons with labels ranging from 0 to 9, arithmetic operators and equal sign, and adds them to the grid layout using for loop with the help of zip function. each button connects to the corresponding method equals or append_number using the clicked signal.
append_number method appends the clicked button’s label to the text displayed on the QLineEdit widget.
equals method evaluates the expression entered in the QLineEdit widget using the eval function and displays the result in the QLineEdit widget. If an error occurs during evaluation, it displays an error message.
Lastly this code creates an instance of the QApplication class, initializes an object of CalculatorWindow class, and calls show() method to display the calculator window. and finally it enters the main event loop by calling app.exec() and exits the program when the user closes the window.
- Working with Qt Designer in PyQt5
- Create CheckBox in PyQt5 with Qt Designer
- PyQt5 Radiobutton in Qt Designer
Run your code and you will have nice Python Calculator with PyQt6

Subscribe and Get Free Video Courses & Articles in your Email