Creating Circle Button in Android Studio: Enhance Your UI
In this Android Studio tutorial we are going to learn Creating Circle Button in Android , so now let’s start coding. also if you are interested in more Android Development articles you can check the below links.
Read More on Android Development
Setting Up Your Android Project
So first of all you need to open your Android Studio and create a New Project, and choose your API Level, for this article I am using API Level 22.
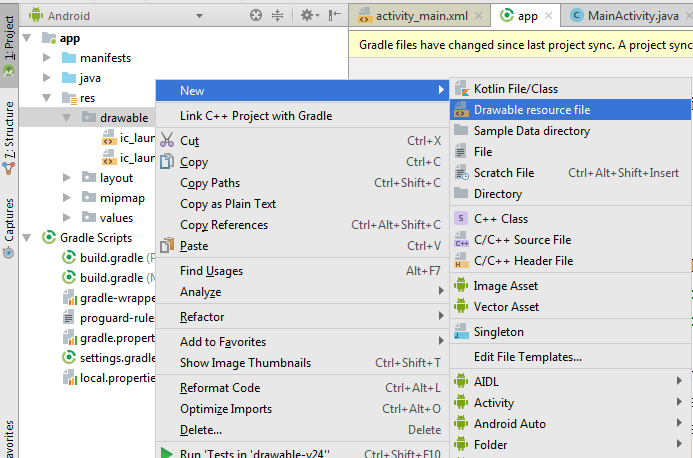
After creating of Android Project, you need to create a new Drawable Resource File in your drawable folder, because we are going to add some design and colors for our button. I am going to call my file circle_button.xml.

Designing the Circle Button: Drawable Resource File
This is the code for circle_button.xml that you need to add. basically, we are going to just use design for our button.
|
1 2 3 4 5 6 7 8 9 10 |
<?xml version="1.0" encoding="utf-8"?> <selector xmlns:android="http://schemas.android.com/apk/res/android"> <item> <shape android:shape="oval"> <stroke android:color="#ff2d1e" android:width="5dp" /> <solid android:color="#ebc087"/> <size android:width="160dp" android:height="150dp"/> </shape> </item> </selector> |
Now open your activity_main.xml file, you need to create a button in their and you can see that in the background we have added our xml file that we have already created.
|
1 2 3 4 5 6 7 8 9 10 11 12 13 14 15 16 17 18 19 20 21 22 23 |
<?xml version="1.0" encoding="utf-8"?> <LinearLayout xmlns:android="http://schemas.android.com/apk/res/android" xmlns:app="http://schemas.android.com/apk/res-auto" xmlns:tools="http://schemas.android.com/tools" android:orientation="vertical" android:background="@color/colorPrimaryDark" android:layout_width="match_parent" android:layout_height="match_parent" tools:context="org.codeloop.circleimage.MainActivity"> <Button android:id ="@+id/button" android:layout_width="150dp" android:layout_height="150dp" android:layout_margin="50dp" android:text="Codeloop" android:textAppearance="?android:textAppearanceLarge" android:background="@drawable/circle_button" android:padding="15dp" /> </LinearLayout> |
You don’t need to bring changes in your Mainactivity.java file, we have just added the widget in the Layout.
Testing and Final Result
Execute the code to witness the result: a visually appealing Circle Button integrated seamlessly into your Android Studio project. Stay tuned for more insightful Android development tutorials and happy coding!
This will be our result

Subscribe and Get Free Video Courses & Articles in your Email