In this PyQt6 Tutorial we want to learn How to Create QHBoxLayout, when it comes to building GUI applications, then layout management is one of the important topic that we need to pay attention.
so first of all let’s talk about QHBoxLayout.
What is QHBoxLayout in PyQt6?
HBox layout, or QHBoxLayout is a layout manager provided by PyQt6, using QHBoxLayout we can arrange widgets horizontally from left to right. It automatically adjusts the size of widgets to fit inside the layout’s dimensions. QHBoxLayout is commonly used for organizing buttons, labels, and other widgets in a toolbar or status bar.
Creating a Simple Application with QHBoxLayout
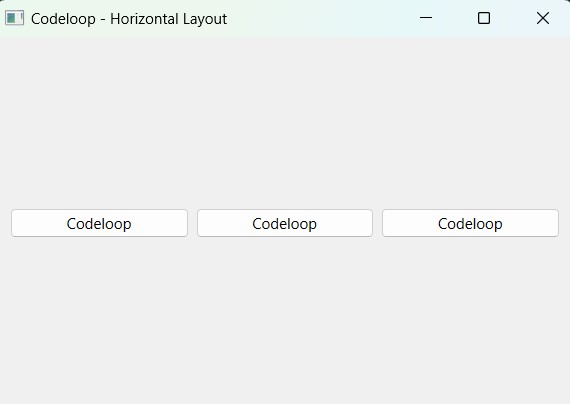
Now let’s create a simple PyQt6 application with a QHBoxLayout. We want to add a few buttons arranged horizontally inside a window.
|
1 2 3 4 5 6 7 8 9 10 11 12 13 14 15 16 17 18 19 20 21 22 23 24 25 26 27 28 29 30 31 32 33 34 |
import sys from PyQt6.QtWidgets import QApplication, QWidget, QPushButton, QHBoxLayout class MyWindow(QWidget): def __init__(self): super().__init__() self.setWindowTitle("Codeloop - Horizontal Layout") # Create QHBoxLayout layout = QHBoxLayout() # Add buttons to the layout button1 = QPushButton("Codeloop") button2 = QPushButton("Codeloop") button3 = QPushButton("Codeloop") layout.addWidget(button1) layout.addWidget(button2) layout.addWidget(button3) # Set the layout for the window self.setLayout(layout) # Create the application instance app = QApplication(sys.argv) # Create and show the window window = MyWindow() window.show() # Execute the application event loop sys.exit(app.exec()) |
In the above example:
- We have created a custom QWidget subclass called MyWindow.
- Inside the constructor (__init__), we set the window title and created a QHBoxLayout.
- We have create QPushButton instances and added them to the QHBoxLayout using addWidget().
- Finally, we set the QHBoxLayout as the layout for the window using setLayout().
Run the code and this will be the result

How to Customize QHBoxLayout in PyQt6
HBox layouts offer flexibility in customization, and you can adjust spacing, alignment, and other properties. This is an example of customizing a QHBoxLayout:
|
1 2 3 4 5 6 7 |
layout = QHBoxLayout() # Set spacing between widgets layout.setSpacing(20) # Align widgets to the center layout.setAlignment(Qt.AlignmentFlag.AlignCenter) |
FAQs:
Q: What is QHBoxLayout in PyQt6?
A: Using QHBoxLayout you can arrange widgets horizontally in row from left to right. It automatically adjusts the size of widgets to fit inside the layout dimensions, QHBoxLayout is commonly used for organizing buttons, labels and other widgets in a toolbar or status bar.
Q: How to Create QHBoxLayout in PyQt6?
A: For creating QHBoxLayout in PyQt6, First we need to instantiate the QHBoxLayout class and add widgets to it using the addWidget() method. And lastly we set the QHBoxLayout as the layout for the parent widget using the setLayout() method.
Q: Can I customize spacing between widgets in QHBoxLayout?
Yes, you can customize spacing between widgets in a QHBoxLayout using the setSpacing() method. This allows you to adjust the spacing to achieve the desired visual appearance and layout for your application.
Learn More on PyQt6 Widgets:
Subscribe and Get Free Video Courses & Articles in your Email