In this PyQt5 QML article iam going to show you Creating of TextInput Example. first of all let’s talk about QML TextInput in PyQt5 Tutorial.
What is QML?
QML (Qt Modeling Language) is a user interface markup language that is part of the Qt framework. It is used for designing and building modern, and dynamic UIs with a focus on simplicity and easy of use. QML is declarative and is designed to be simple, and this is good for both designers and developers.
In PyQt5, QML can be used alongside with Python for creating powerful applications. PyQt5 is a set of Python bindings for Qt libraries, and using PyQt5 you can create applications in Python with the rich feature set of the Qt framework.
PyQt5 Tutorial: Creating TextInput in QML
TextInput type displays a single line of editable plain text. TextInput is used to accept a line of text input. Input constraints can be placed on a TextInput item (for example, through a validator or inputMask), and setting echoMode to an appropriate value enables TextInput to be used for a password input field. On macOS, the Up/Down key bindings for Home/End are explicitly disabled. If you want such bindings (on any platform), you will need to construct them in QML.
OK now you need to open your Pycharm IDE and create two files one main.qml and the second is main.py.
This is our main.qml file.
|
1 2 3 4 5 6 7 8 9 10 11 12 13 14 15 16 17 18 19 20 21 22 23 24 25 26 27 28 29 30 31 32 33 34 35 36 37 38 39 40 41 42 43 44 45 46 47 48 49 50 51 52 53 54 55 56 57 58 59 60 61 62 63 64 65 66 67 68 69 70 71 72 73 74 75 76 77 78 79 80 81 82 83 84 85 86 87 88 89 90 |
import QtQuick.Window 2.2 import QtQuick 2.3 Window { visible:true width:600 height:400 color:"yellow" title: "PyQt5 QML Window" Rectangle { id:blueRect color:"blue" width:450 height:64 //x:80 //y:80 anchors.centerIn:parent border.color:"black" border.width:6 radius:15 } Text { id:text1 text:"Hello QtQuick Application" font.pixelSize:30 font.bold:true color:"white" anchors.centerIn:parent } Image { id:image source:"qml.png" sourceSize.width:parent.width/2 sourceSize.height:parent.height/2 } TextInput { id:te text:"Hello" color:"black" //scale:6 font.pixelSize: 16; font.bold: true maximumLength: 16 focus: true x:200 y:50 font.capitalization: Font.AllUppercase } } |
So now in the above code this is our main window in QML and the other elements are the child of this window.
|
1 |
Window { visible:true width:600 height:400 color:"yellow" title: "PyQt5 QML Window" |
in the window we have width, height, color and title for the window.
This code is for creating a Rectangle in our window.
|
1 2 3 4 5 6 7 8 9 10 11 12 13 14 15 16 17 18 |
Rectangle { id:blueRect color:"blue" width:450 height:64 //x:80 //y:80 anchors.centerIn:parent border.color:"black" border.width:6 radius:15 } |
Also this code is for creating of Text in our Window.
|
1 2 3 4 5 6 7 8 9 10 |
Text { id:text1 text:"Hello QtQuick Application" font.pixelSize:30 font.bold:true color:"white" anchors.centerIn:parent } |
This is the image code.
|
1 2 3 4 5 6 7 8 9 10 |
Image { id:image source:"qml.png" sourceSize.width:parent.width/2 sourceSize.height:parent.height/2 } |
So now the last section is for creating of our TextInput.
|
1 2 3 4 5 6 7 8 9 10 11 12 13 14 15 16 17 18 19 20 |
TextInput { id:te text:"Hello" color:"black" //scale:6 font.pixelSize: 16; font.bold: true maximumLength: 16 focus: true x:200 y:50 font.capitalization: Font.AllUppercase } |
In the above code this is for the text size and style.
|
1 |
font.pixelSize: 16; font.bold: true |
And this is for the capitalization of the letter.
|
1 |
font.capitalization: Font.AllUppercase |
So now this the second file our main.py that we load our main.qml.
|
1 2 3 4 5 6 7 8 9 10 11 12 13 14 15 16 17 18 19 20 21 22 23 24 25 26 27 28 29 30 31 |
from PyQt5.QtQml import QQmlApplicationEngine from PyQt5.QtWidgets import QApplication from PyQt5.QtGui import QIcon import sys def runQML(): # Create an instance of QApplication app = QApplication(sys.argv) # Create an instance of QQmlApplicationEngine engine = QQmlApplicationEngine() # Set window icon for the application app.setWindowIcon(QIcon("codeloop.png")) # Load QML file engine.load('main.qml') # Check if there are any root objects loaded. If not, return -1 if not engine.rootObjects(): return -1 # Execute application and return the exit code return app.exec_() # Entry point of the script if __name__ == "__main__": # Exit the application sys.exit(runQML()) |
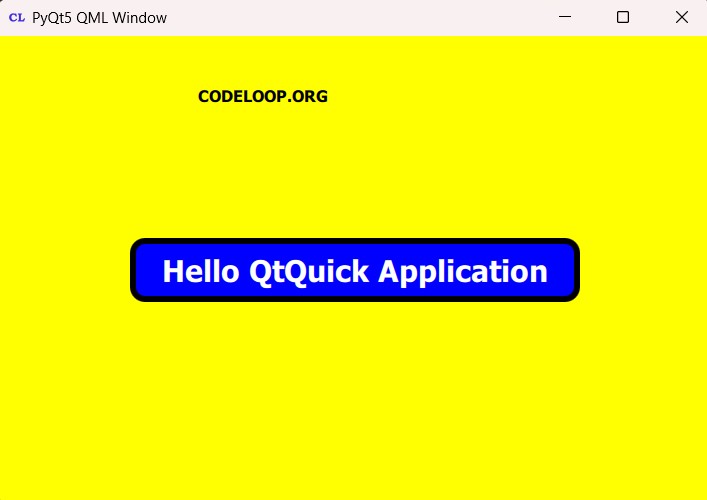
Run the code and this will be the result

Subscribe and Get Free Video Courses & Articles in your Email