In this Python OpenCV article we are going to talk about Line Detection With HoughLines algorithm. so line detection has it own technique that is called the Hough transform, it was invented by Richard Duda and Peter Hart, who extended the work done by Paul Hough in the early 1960s. so now we are using HoughLines and HoughLinesP for detecting lines so the difference is that. HoughLines uses the standard HoughTransForm and HoughLinesP probabilistic Hough Transform.
Also you can check Python GUI Development Tutorials in the below link.
1: PyQt5 GUI Development Tutorials
2: TKinter GUI Development Tutorials
3: Pyside2 GUI Development Tutorials
4: Kivy GUI Development Tutorials
So now this is the complete code for Line Detection In Python OpenCV With HoughLines
|
1 2 3 4 5 6 7 8 9 10 11 12 13 14 15 16 17 18 19 20 21 22 23 24 25 26 27 28 29 30 31 |
import cv2 import numpy as np import math image1 = cv2.imread('dave2.jpg') gray=cv2.cvtColor(image1,cv2.COLOR_BGR2GRAY) canimg = cv2.Canny(gray, 50, 200) lines= cv2.HoughLines(canimg, 1, np.pi/180.0, 120, np.array([])) for line in lines: rho, theta = line[0] a = np.cos(theta) b = np.sin(theta) x0 = a*rho y0 = b*rho x1 = int(x0 + 1000*(-b)) y1 = int(y0 + 1000*(a)) x2 = int(x0 - 1000*(-b)) y2 = int(y0 - 1000*(a)) cv2.line(image1,(x1,y1),(x2,y2),(0,0,255),2) cv2.imshow('Lines Detected',image1) cv2.imshow("Canny Detection", canimg) cv2.waitKey(0) cv2.destroyAllWindows() |
So at the top these are our imports that we are going to use in this article.
|
1 2 3 |
import cv2 import numpy as np import math |
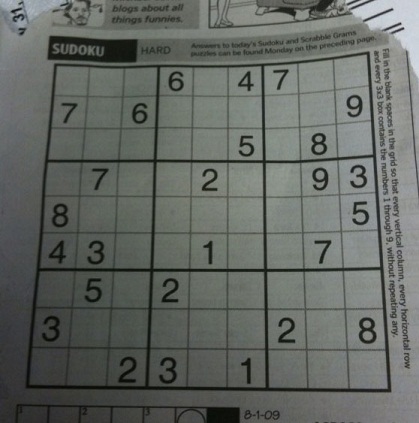
You need to have an image in your directory, iam using this image.
In here we have loaded our image and we have converted the image to gray scale.
|
1 2 |
image1 = cv2.imread('dave2.jpg') gray=cv2.cvtColor(image1,cv2.COLOR_BGR2GRAY) |
Also in this line of code we have created our Canny algorithm , you can check this article on Python OpenCV Canny Edge Detection.
|
1 |
canimg = cv2.Canny(gray, 50, 200) |
So now this is our HoughLine algorithm for Line Detection.
|
1 |
lines= cv2.HoughLines(canimg, 1, np.pi/180.0, 120, np.array([])) |
in here the first parameter is the image that we want to process, another parameter is The geometrical representations of the lines, rho and theta, which are usually 1 and np.pi/180.
Also we we want to write color lines on the line this code is for that
|
1 2 3 4 5 6 7 8 9 10 11 12 |
for line in lines: rho, theta = line[0] a = np.cos(theta) b = np.sin(theta) x0 = a*rho y0 = b*rho x1 = int(x0 + 1000*(-b)) y1 = int(y0 + 1000*(a)) x2 = int(x0 - 1000*(-b)) y2 = int(y0 - 1000*(a)) cv2.line(image1,(x1,y1),(x2,y2),(0,0,255),2) |
This is for showing of our image
|
1 2 3 4 |
cv2.imshow('Lines Detected',image1) cv2.imshow("Canny Detection", canimg) cv2.waitKey(0) cv2.destroyAllWindows() |
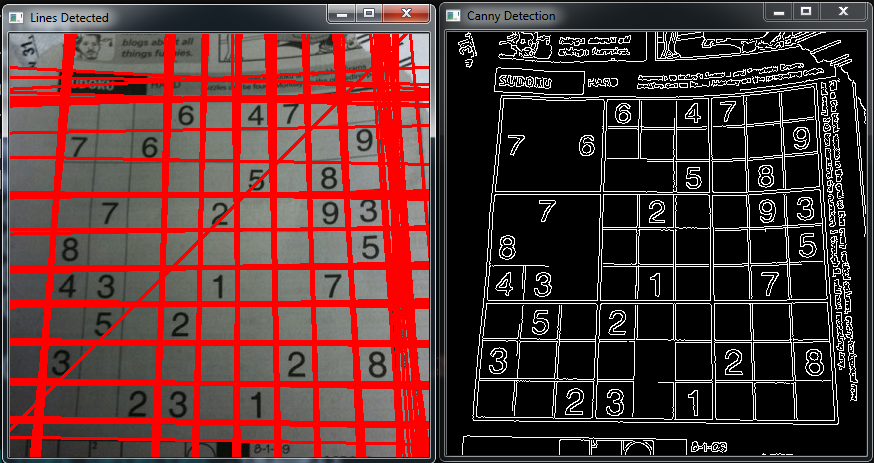
So now run the complete code and this will be the result
Also you can watch the video for this article
Subscribe and Get Free Video Courses & Articles in your Email