In this Pyside2 GUI article iam going to show you How to Create ProgressBar in Pyside2 , basically we are using QProgreeBar class for this article. also you can watch more articles on Python GUI Development with Pyside2 in the below links.
Check Python GUI Development With Pyside2
1: Getting Started With Pyside2 | Qt For Python
2: Pyside2 GUI Creating First Window
3: Pyside2 GUI Creating Window Icon
4: Pyside2 GUI How To Create Icon Modes
5: Pyside2 GUI How To Create Tooltip
6: Pyside2 GUI QPushButton With Signal And Slot
7: Pyside2 GUI Making Center The Window
8: Python GUI How To Create AboutBox
9: Python GUI How to Create Digital Clock in Pyside2
10: How To Create StatusBar In Pyside2
What is QProgressBar ?
A progress bar is used to give the user an indication of the progress of an operation and to reassure them that the application is still running.
The progress bar uses the concept of steps. You set it up by specifying the minimum and maximum possible step values, and it will display the percentage of steps that have been completed when you later give it the current step value. The percentage is calculated by dividing the progress (value() – minimum()) divided by maximum() – minimum().
You can specify the minimum and maximum number of steps with setMinimum() and setMaximum. The current number of steps is set with setValue(). The progress bar can be rewound to the beginning with reset().
If minimum and maximum both are set to 0, the bar shows a busy indicator instead of a percentage of steps. This is useful, for example, when using QNetworkAccessManager to download items when they are unable to determine the size of the item being downloaded.
So now this is the complete code for How to Create ProgressBar in Pyside2
|
1 2 3 4 5 6 7 8 9 10 11 12 13 14 15 16 17 18 19 20 21 22 23 24 25 26 27 28 29 30 31 32 33 34 35 36 37 38 39 40 41 42 43 44 45 46 |
from PySide2.QtWidgets import QApplication, QMainWindow, QProgressBar, QStatusBar, QLabel import sys from PySide2.QtGui import QIcon class Window(QMainWindow): def __init__(self): super().__init__() self.setWindowTitle("ProgressBar") self.setGeometry(300,200,500,400) self.statusLabel = QLabel("Showing Progress") self.progressbar = QProgressBar() self.progressbar.setMinimum(0) self.progressbar.setMaximum(100) self.setIcon() self.createStatusBar() def setIcon(self): appIcon = QIcon("icon.png") self.setWindowIcon(appIcon) def createStatusBar(self): self.statusBar = QStatusBar() self.progressbar.setValue(10) self.statusBar.addWidget(self.statusLabel, 1) self.statusBar.addWidget(self.progressbar, 2) self.setStatusBar(self.statusBar) myapp = QApplication(sys.argv) window = Window() window.show() myapp.exec_() sys.exit() |
OK in the above code first we have imported our classes from Pyside2 library
|
1 2 3 |
from PySide2.QtWidgets import QApplication, QMainWindow, QProgressBar, QStatusBar, QLabel import sys from PySide2.QtGui import QIcon |
And this is our main window class that inherits from QMainWindow, and we are going to add a few requirements for our window in this class like title, width, height and also we are calling our two methods in this class. we also created the object of our QProgressBar and QLabel class in the constructor.
|
1 2 3 4 5 6 7 8 9 10 11 12 13 14 15 |
class Window(QMainWindow): def __init__(self): super().__init__() self.setWindowTitle("ProgressBar") self.setGeometry(300,200,500,400) self.statusLabel = QLabel("Showing Progress") self.progressbar = QProgressBar() self.progressbar.setMinimum(0) self.progressbar.setMaximum(100) self.setIcon() self.createStatusBar() |
Also this method is for setting our window icon
|
1 2 3 |
def setIcon(self): appIcon = QIcon("icon.png") self.setWindowIcon(appIcon) |
So now this is the method that we are going to create our StatusBar . also we have set the progressbar value in this method.
|
1 2 3 4 5 6 |
def createStatusBar(self): self.statusBar = QStatusBar() self.progressbar.setValue(10) self.statusBar.addWidget(self.statusLabel, 1) self.statusBar.addWidget(self.progressbar, 2) self.setStatusBar(self.statusBar) |
So in here every Pyside2 application must create an application object. The sys.argv parameter is a list of arguments from a command line.
Python scripts can be run from the shell. It is a way how we can control the startup of our scripts.
|
1 |
myapp = QApplication(sys.argv) |
Finally, we enter the mainloop of the application. The event handling starts from this point. The mainloop receives events from the window system and dispatches them to the application widgets. The mainloop ends if we call the exit() method or the main widget is destroyed. The sys.exit() method ensures a clean exit. The environment will be informed how the application ended.
The exec_() method has an underscore. It is because the exec is a Python keyword. And thus, exec_() was used instead.
|
1 2 |
myapp.exec_() sys.exit() |
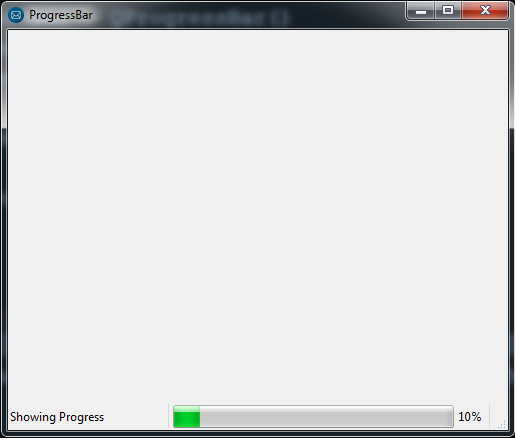
So now run the complete code and this will be the result
Also you can watch the complete video for this article
Subscribe and Get Free Video Courses & Articles in your Email