In this lesson we are going to learn How to Create CheckBox in PyQt6 & Python, A QCheckBox is an option button that can be checked or unchecked. Checkboxes are typically used to represent features in an application that can be enabled or disabled without affecting others. Whenever a checkbox is checked, it emits the signal stateChanged(). Connect to this signal if you want to trigger an action each time the checkbox changes state. also you can use isChecked() method to query whether or not a checkbox is checked. mostly checkbox is used when you want the user to select one or more than one option from a set of options. In such situations, you need to make use of checkboxes.
This is the complete code for How to Create CheckBox in PyQt6 & Python
|
1 2 3 4 5 6 7 8 9 10 11 12 13 14 15 16 17 18 19 20 21 22 23 24 25 26 27 28 29 30 31 32 33 34 35 36 37 38 39 40 41 42 43 44 45 46 47 48 49 50 51 52 53 54 55 56 57 58 59 60 61 62 63 64 65 66 67 68 69 70 71 72 73 74 75 76 |
from PyQt6.QtWidgets import QApplication, QWidget, QCheckBox,QVBoxLayout, QLabel,QHBoxLayout from PyQt6.QtGui import QIcon,QFont from PyQt6.QtCore import QSize from PyQt6.QtCore import Qt import sys class Window(QWidget): def __init__(self): super().__init__() self.setGeometry(200, 200, 700, 400) self.setWindowTitle("Codeloop.org - PyQt6 QCheckBox") self.setWindowIcon(QIcon('icon.png')) # this is our hboxlayout hbox = QHBoxLayout() # these are checkboxes self.check1 = QCheckBox("Python") self.check1.setIcon(QIcon('python.png')) self.check1.setIconSize(QSize(40, 40)) self.check1.setFont(QFont("Sanserif", 13)) self.check1.toggled.connect(self.item_selected) hbox.addWidget(self.check1) self.check2 = QCheckBox("HTML") self.check2.setIcon(QIcon('html.png')) self.check2.setIconSize(QSize(40, 40)) self.check2.setFont(QFont("Sanserif", 13)) self.check2.toggled.connect(self.item_selected) hbox.addWidget(self.check2) self.check3 = QCheckBox("Java") self.check3.setIcon(QIcon('java.png')) self.check3.setIconSize(QSize(40, 40)) self.check3.setFont(QFont("Sanserif", 13)) self.check3.toggled.connect(self.item_selected) hbox.addWidget(self.check3) # this is the vboxlayout vbox = QVBoxLayout() # we have created a label in here self.label = QLabel("Hello") self.label.setFont(QFont("Sanserif", 15)) # add the label in the vbox layout vbox.addWidget(self.label) # add the hbox layout in the vbox layout vbox.addLayout(hbox) # set the layout for the main window self.setLayout(vbox) def item_selected(self): value = "" # check for the check box value if self.check1.isChecked(): value = self.check1.text() if self.check2.isChecked(): value = self.check2.text() if self.check3.isChecked(): value = self.check3.text() self.label.setText("You have selected : " + value) app = QApplication(sys.argv) window = Window() window.show() sys.exit(app.exec()) |
In here we have created the width and height also x and y position for the window.
|
1 |
self.setGeometry(200, 200, 700, 400) |
This is used for adding title to the window.
|
1 |
self.setWindowTitle("Codeloop.org - PyQt6 QCheckBox") |
In here we have created an icon, make sure that you have already added an icon to your working directory.
|
1 |
self.setWindowIcon(QIcon('icon.png')) |
You can use QCheckBox class for creating checkbox in pyqt6 & python.
|
1 |
self.check1 = QCheckBox("Python") |
You can use toggled signal to add functionally for the checkbox, and in here we have connected the signal with item_selected() slot.
|
1 |
self.check3.toggled.connect(self.item_selected) |
And this is the method or slot that we have connected with toggled signal, in this method we are getting the value from the check box and after that we set that value to the label.
|
1 2 3 4 5 6 7 8 9 10 11 12 13 14 |
def item_selected(self): value = "" # check for the check box value if self.check1.isChecked(): value = self.check1.text() if self.check2.isChecked(): value = self.check2.text() if self.check3.isChecked(): value = self.check3.text() self.label.setText("You have selected : " + value) |
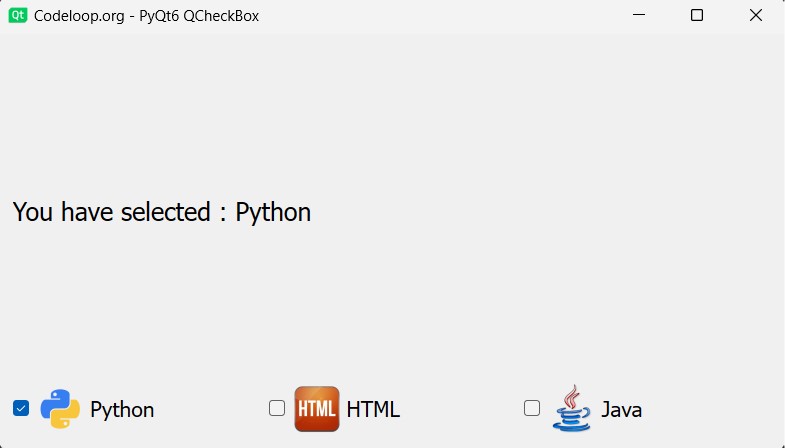
Run the complete code and this will be the result.

Learn More on PyQt6 Widgets:
- How to Create Label in PyQt6
- How to Create Button in PyQt6
- How to Create LineEdit in PyQt6
- How to Create QHBoxLayout in PyQt6
FAQs:
How to create checkbox in PyQt5 in Python?
For creating a checkbox in PyQt5, you can use QCheckBox class, this is a basic example:
|
1 2 3 4 5 6 7 8 9 10 11 12 13 14 15 16 17 |
from PyQt5.QtWidgets import QApplication, QCheckBox, QWidget, QVBoxLayout app = QApplication([]) # Create a checkbox checkbox = QCheckBox('Check me') # Create a layout and add the checkbox to it layout = QVBoxLayout() layout.addWidget(checkbox) # Create a main widget widget = QWidget() widget.setLayout(layout) widget.show() app.exec_() |
How to create checkbox in Python?
A: In Python, you can create a checkbox using libraries like PyQt5 for GUI applications or Tkinter for basic GUIs. This is a simple example using Tkinter:
|
1 2 3 4 5 6 7 8 9 |
import tkinter as tk root = tk.Tk() # Create a checkbox checkbox = tk.Checkbutton(root, text="Check me") checkbox.pack() root.mainloop() |
How to uncheck a checkbox PyQt5?
To uncheck a checkbox in PyQt5, you can use setChecked() method of the QCheckBox class and pass False as the argument. This is an example:
|
1 |
checkbox.setChecked(False) |
Subscribe and Get Free Video Courses & Articles in your Email