In this lesson we want to learn about QLineEdit in Python PySide6, PySide6 QLineEdit widget is used to create a single-line text input field in the graphical user interface. It is a commonly used widget in PySide6 and allows users to enter and edit text in an application. In this lesson, we will discuss how to work with PySide6 QLineEdit widget to create text input fields and customize their behavior.
Creating a QLineEdit
To create a new PySide6 QLineEdit in Python, we first need to import the QtWidgets module:
|
1 |
from PySide6.QtWidgets import QLineEdit |
We can then create a new QLineEdit object by calling its constructor:
|
1 |
line_edit = QLineEdit() |
This creates a new QLineEdit object that can be added to our application’s layout using the addWidget() method of a layout object. For example, if we have a QVBoxLayout object called layout, we can add the line edit to it like this:
|
1 |
layout.addWidget(line_edit) |
We can also set the initial text of the line edit using the setText() method:
|
1 |
line_edit.setText("Codeloop.org") |
This sets the text of the line edit to “Initial text”.
Retrieving Text
We can retrieve the text entered into the line edit by calling its text() method:
|
1 |
text = line_edit.text() |
This returns the current text in the line edit.
Handling User Input
We can also customize the behavior of the line edit to respond to user input. For example, we can connect a function to the textChanged signal of the line edit that will be called whenever the text is changed:
|
1 2 3 4 |
def handle_text_changed(text): print("Text changed to:", text) line_edit.textChanged.connect(handle_text_changed) |
This connects the handle_text_changed() function to the textChanged signal of the line edit. Whenever the user types in the line edit and the text is changed, the function will be called with the new text as an argument.
Validating User Input
We can also use the line edit to validate user input and ensure that it meets certain requirements. For example, we can set a regular expression that the text must match using the setValidator() method:
|
1 2 3 4 5 |
from PySide6.QtCore import QRegularExpression from PySide6.QtGui import QRegularExpressionValidator validator = QRegularExpressionValidator(QRegularExpression("[0-9]{3}")) line_edit.setValidator(validator) |
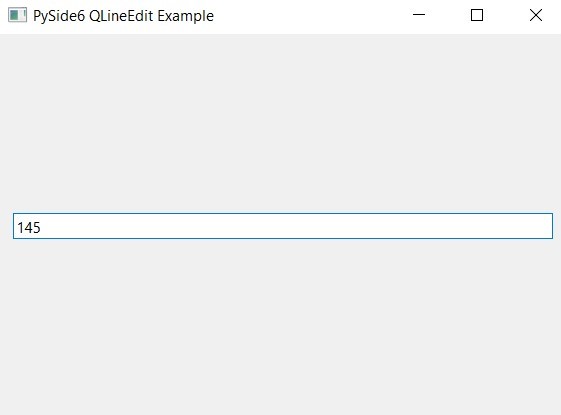
This sets a regular expression validator on the line edit that ensures that the text contains exactly three digits. If the user types in anything else, the line edit will not accept the input.
This is the GUI complete code for this.
|
1 2 3 4 5 6 7 8 9 10 11 12 13 14 15 16 17 18 19 20 21 22 23 24 25 26 27 28 29 30 31 32 33 |
from PySide6.QtWidgets import QApplication, QWidget, QVBoxLayout, QLineEdit from PySide6.QtCore import QRegularExpression from PySide6.QtGui import QRegularExpressionValidator # Create the application app = QApplication([]) # Create the main window window = QWidget() window.setWindowTitle("PySide6 QLineEdit Example") # Create the layout layout = QVBoxLayout() # Create the QLineEdit widget line_edit = QLineEdit() line_edit.setPlaceholderText("Enter text here") # Create the validator validator = QRegularExpressionValidator(QRegularExpression("[0-9]{3}")) line_edit.setValidator(validator) # Add the QLineEdit widget to the layout layout.addWidget(line_edit) # Set the layout on the main window window.setLayout(layout) # Show the main window window.show() # Run the event loop app.exec() |
In the above code, we have imported the QRegularExpression and QRegularExpressionValidator classes from PySide6.QtCore and PySide6.QtGui, respectively.
Run the code and you can not write text in the field, you can just write numbers.

This is a complete example of using PySide6 to create a QLineEdit widget with some additional functionality:
|
1 2 3 4 5 6 7 8 9 10 11 12 13 14 15 16 17 18 19 20 21 22 23 24 25 26 27 28 29 30 31 32 33 34 35 36 37 38 39 40 41 42 43 44 45 46 |
from PySide6.QtWidgets import QApplication, QWidget, QVBoxLayout, QLineEdit, QLabel class LineEditWidget(QWidget): def __init__(self, parent=None): super().__init__(parent) self.initUI() def initUI(self): # Create the layout layout = QVBoxLayout() # Create the QLineEdit widget self.line_edit = QLineEdit() self.line_edit.setPlaceholderText("Enter text here") self.line_edit.returnPressed.connect(self.returnPressed) # Create the QLabel widget self.label = QLabel("No text entered.") # Add the QLineEdit and QLabel widgets to the layout layout.addWidget(self.line_edit) layout.addWidget(self.label) # Set the layout on the widget self.setLayout(layout) def returnPressed(self): # Get the text from the QLineEdit text = self.line_edit.text() # Set the text on the QLabel self.label.setText(f"Text entered: {text}") if __name__ == "__main__": # Create the application app = QApplication([]) # Create the main window window = LineEditWidget() window.setWindowTitle("PySide6 QLineEdit Example") # Show the main window window.show() # Run the event loop app.exec() |
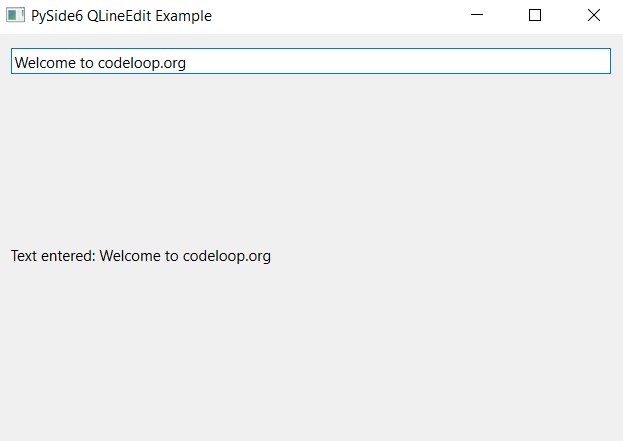
In this example, we define new LineEditWidget class that inherits from QWidget. In the initUI method we create a QVBoxLayout layout and add a QLineEdit and QLabel widget to it. We also connect the returnPressed signal of the QLineEdit to the returnPressed method of LineEditWidget.
The returnPressed method gets text from the QLineEdit, sets it on the QLabel, and updates text of the label to reflect the text entered in the QLineEdit.
In main block of the code, we create a new LineEditWidget, set its window title, show it, and run the event loop.
Run the complete code write something in the QLineEdit and press enter.

Final Thoughts
PySide6 QLineEdit widget is a powerful tool for creating text input fields in graphical user interfaces. We can create new line edits, set their initial text, retrieve the text entered by the user, customize their behavior in response to user input, and validate user input to ensure that it meets certain requirements. With these tools, we can create informative and user-friendly graphical user interfaces that make it easy for users to enter and edit text in our applications.