In this PySide6 lesson we want to learn How to Create QRadioButton in PySide6, so we already know that PySide6 is Python binding for the Qt toolkit that can be used to build GUI applications in Python. One of the widgets that PySide6 provide is the QRadioButton widget. In this lesson, we want to learn what QRadioButtons are, how they work, and how you can use them to build nice GUIs.
What is a QRadioButton ?
QRadioButton is a button that can be selected by the user to choose from a set of mutually exclusive options. Only one radio button in a set can be selected at any given time. Radio buttons are commonly used in GUIs to provide the user with a way to choose from a set of options.
How to Create QRadioButtons in PySide6
To create a QRadioButton in PySide6, you can use the QRadioButton class. this is an example of how to create a radio button in python pyside6:
|
1 2 3 4 5 6 7 8 9 10 11 12 13 14 15 16 17 18 19 20 |
# Import necessary modules from PySide6 from PySide6.QtWidgets import QApplication, QRadioButton, QWidget # Create a QApplication instance app = QApplication([]) # Create a QWidget instance widget = QWidget() # Create a QRadioButton instance with radio_button = QRadioButton("Codeloop", widget) # Set the position of the radio button within the widget radio_button.move(50, 50) # Make the widget visible widget.show() # Start the application's event loop app.exec() |
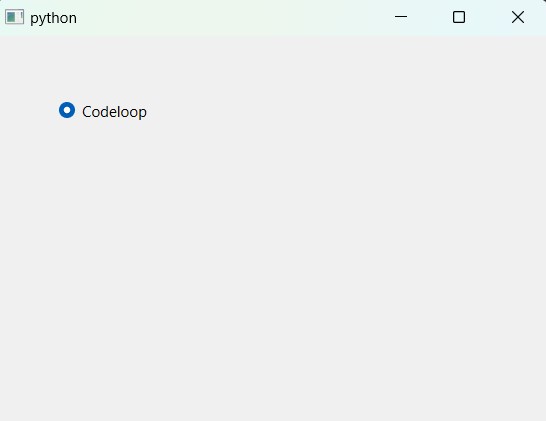
In the above example, we have created QRadioButton. We set the parent of the radio button to be the widget object, which is a QWidget that we’ll use to display the radio button. After that we use the move() method to position the radio button at coordinates (50, 50) inside the widget. And at the end we show the widget and start the event loop with app.exec().
Run the code and this will be the result

You can create multiple radio buttons and add them to the same parent widget to create a set of mutually exclusive options. This is an example:
|
1 2 3 4 5 6 7 8 9 10 11 12 13 14 15 16 17 18 19 20 21 22 23 24 25 26 27 |
# Import necessary modules from PySide6 from PySide6.QtWidgets import QApplication, QRadioButton, QVBoxLayout, QWidget # Create a QApplication instance app = QApplication([]) # Create a QWidget instance widget = QWidget() # Create a QVBoxLayout instance and set its parent to the widget layout = QVBoxLayout(widget) # Create three QRadioButton instances option1 = QRadioButton("PyQt6", widget) option2 = QRadioButton("PySide6", widget) option3 = QRadioButton("TKinter", widget) # Add the radio buttons to the vertical layout layout.addWidget(option1) layout.addWidget(option2) layout.addWidget(option3) # Make the widget visible widget.show() # Start the application's event loop app.exec() |
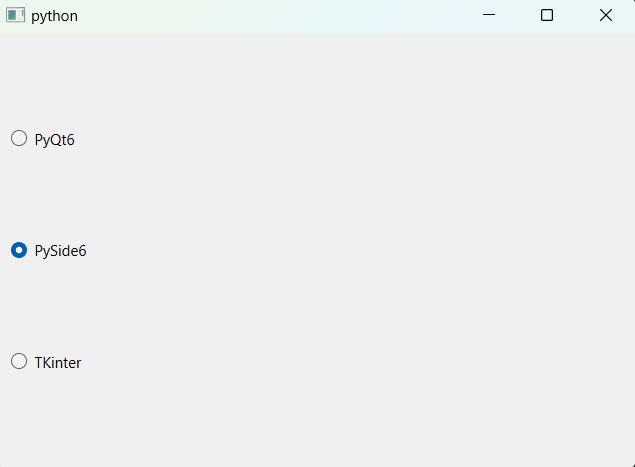
In this example we have created three radio buttons and add them to a vertical layout using QVBoxLayout class. The addWidget() method is used to add radio buttons to the layout in order that they should appear. By default, only one radio button in the set can be selected at any given time.
Run the code and this will be the result

How to Get Selected QRadioButton in PySide6
To retrieve the selected radio button from a set of radio buttons, you can use the isChecked() method of the QRadioButton class. This is an example:
|
1 2 3 4 5 6 |
if option1.isChecked(): print("Option 1 selected") elif option2.isChecked(): print("Option 2 selected") elif option3.isChecked(): print("Option 3 selected") |
This is complete example on Python PySide6 QRadioButton
|
1 2 3 4 5 6 7 8 9 10 11 12 13 14 15 16 17 18 19 20 21 22 23 24 25 26 27 28 29 30 31 32 33 34 35 36 37 38 39 40 41 42 43 44 45 46 47 48 49 50 51 52 53 54 |
# Import necessary modules from PySide6 from PySide6.QtWidgets import QApplication, QRadioButton, QVBoxLayout, QWidget, QLabel from PySide6.QtGui import QFont class RadioButtons(QWidget): def __init__(self): super().__init__() # Create a QVBoxLayout instance layout = QVBoxLayout() # Create QRadioButton instances for options self.option1 = QRadioButton("PyQt6") self.option2 = QRadioButton("PySide6") self.option3 = QRadioButton("TKinter") # Add radio buttons to the layout layout.addWidget(self.option1) layout.addWidget(self.option2) layout.addWidget(self.option3) # Set the layout for the widget self.setLayout(layout) # Connect the toggled signal of each radio button to the selected_option method self.option1.toggled.connect(self.selected_option) self.option2.toggled.connect(self.selected_option) self.option3.toggled.connect(self.selected_option) # Create a label to display the selected option self.label = QLabel("Selected option: ", self) self.label.setFont(QFont("Sanerif", 20)) layout.addWidget(self.label) def selected_option(self): # Check which option is selected and update the label text accordingly if self.option1.isChecked(): self.label.setText("Selected option: PyQt6") elif self.option2.isChecked(): self.label.setText("Selected option: PySide6") elif self.option3.isChecked(): self.label.setText("Selected option: TKinter") if __name__ == '__main__': # Create a QApplication instance app = QApplication([]) # Create an instance of the RadioButtons class widget = RadioButtons() # Show the widget widget.show() # Start the application event loop app.exec() |
In the above example, we have define new RadioButtons class that inherits from QWidget. In the __init__ method, we have created vertical layout with three radio buttons. after that we have added the radio buttons to the layout and set the layout as the layout of the widget, or we can say the main window layout.
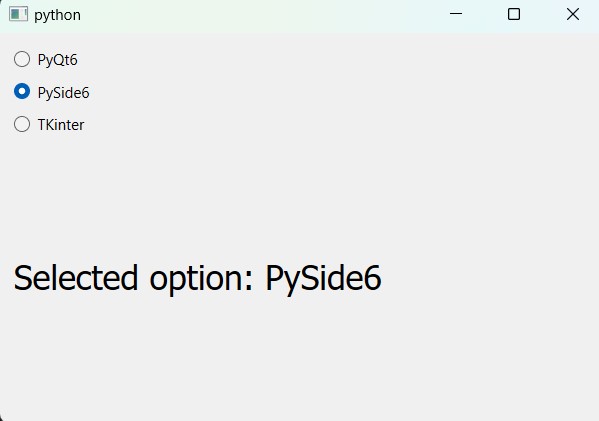
After that we connect the toggled signal of each radio button to a single slot selected_option using the connect() method. The toggled signal is emitted whenever checked state of the radio button changes. In the selected_option method, we check which radio button is selected using the isChecked() method of each radio button, and print a message indicating which option is selected.
Run the code and this will be the result
