In this wxPython Tutorial we want to learn about Creating Custom Widget with wxPython, wxPython is powerful library for creating desktop applications using Python programming language. on of the best thing about wxPython is creating custom widgets. custom widgets can be used to enhance the functionality of an application, it allows developers to create unique user interfaces that stand out from the rest.
Creating Custom Widget in wxPython
First of all we need to install wxPython, you can use pip for the installation of wxPython.
|
1 |
pip install wxPython |
First step in creating a custom widget is to subclass an existing wxPython widget. this allows you to take advantage of the functionality that is already built into the base widget, and also adding your own custom behavior.
For example, let’s say that we want to create custom button widget that displays a message when it is clicked. we can start by subclassing wx.Button widget:
|
1 2 3 4 5 6 7 8 9 |
import wx class CustomButton(wx.Button): def __init__(self, parent, label): super().__init__(parent, label=label) self.Bind(wx.EVT_BUTTON, self.on_button_click) def on_button_click(self, event): wx.MessageBox("Welcome to codeloop.org") |
After that you have created your custom widget, you can use it just like any other wxPython widget. for example if we want to use our custom button in wxPython application, we can create an instance of the CustomButton class and add it to a sizer:
|
1 2 3 4 5 6 7 |
class MyFrame(wx.Frame): def __init__(self): super().__init__(None, title="Custom Widget Example") sizer = wx.BoxSizer(wx.VERTICAL) btn = CustomButton(self, label="Click me") sizer.Add(btn, 0, wx.ALL, 10) self.SetSizer(sizer) |
In this example we have created MyFrame class that subclasses wx.Frame widget. after that we creates an instance of the CustomButton class and add it to a sizer using Add method. and lastly we set the sizer for the frame using the SetSizer method.
This is the complete code for this article
|
1 2 3 4 5 6 7 8 9 10 11 12 13 14 15 16 17 18 19 20 21 22 23 24 25 26 27 28 29 30 31 32 33 34 35 36 37 38 39 40 41 42 43 44 |
import wx # Define custom button class class CustomButton(wx.Button): def __init__(self, parent, label): # Initialize base class with parent and label super().__init__(parent, label=label) # Bind button click event to the custom event handler self.Bind(wx.EVT_BUTTON, self.on_button_click) def on_button_click(self, event): # Display message box when the button is clicked wx.MessageBox("Welcome to codeloop.org") # Define the main application class class MyFrame(wx.Frame): def __init__(self): # Initialize base class super().__init__(None, title="Custom Widget Example") # Create vertical box sizer to manage the layout of child widgets sizer = wx.BoxSizer(wx.VERTICAL) # Create an instance of the CustomButton class btn = CustomButton(self, label="Click me") # Add custom button to the sizer with some padding sizer.Add(btn, 0, wx.ALL, 10) # Set sizer for the frame to manage the layout of child widgets self.SetSizer(sizer) class MyApp(wx.App): def OnInit(self): # Create an instance of the main application frame frame = MyFrame() # Show the main application frame frame.Show() # Return True to indicate successful initialization return True # Entry point of the program if __name__ == "__main__": # Create an instance of the application app = MyApp() # Start main event loop app.MainLoop() |
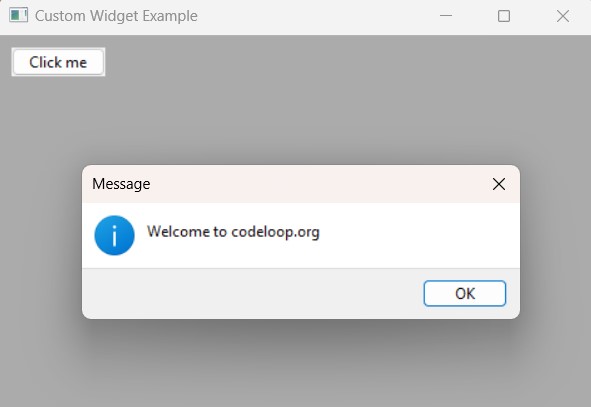
Run the complete code and this is the result

Subscribe and Get Free Video Courses & Articles in your Email