In this React Native Tutorial we want to learn Style Text in React Native, as you know with React Native you can build beautiful and powerful native applications for Android and IOS with just one code base.
OK first we want to create our React Native Project, there are two ways that you can create React Native Project, the first way is using React Native CLI, and the second way is using Expo CLI, now the main difference between these two is this that React Native CLI setup is little bit tough and it needs a lot of works to create Project, but if you have created your React Native Project using React Native CLI, you can customize your application, because you have access to native codes of Android and IOS. on the other hand with Expo CLI you can easily create your project, but the main problem with Expo Cli is this that you don’t have access to Android and IOS Native codes and you can not bring changes to those codes if you need. also when you want to build APK using Expo CLI it will be much larger than React Native CLI.
We are going to create our React Native Project using Expo CLI.
So now first install expo cli.
|
1 |
npm install -g expo-cli |
After that create your React Native Project with Expo CLI. you can give the name of your project as you want.
|
1 |
expo init AwesomeProject |
There will be different files in your React Native Project, but we are interested in the App.js file, so open your App.js file, you will see that we have a simple Text component in our file. there are two ways that you can style your text or components in React Native. the first way is inline style. in here we have given inline styles for the two Text that we have.
|
1 2 |
<Text style = {{fontSize:30, color:"brown"}}>Codeloop.org</Text> <Text style = {{fontSize:15, color:"green"}}>We want to learn styling text in React Native</Text> |
And this is the complete code for App.js file.
|
1 2 3 4 5 6 7 8 9 10 11 12 13 14 15 16 17 18 19 20 21 22 23 24 |
import { StatusBar } from 'expo-status-bar'; import React from 'react'; import { StyleSheet, Text, View } from 'react-native'; export default function App() { return ( <View style={styles.container}> <Text style = {{fontSize:30, color:"brown"}}>Codeloop.org</Text> <Text style = {{fontSize:15, color:"green"}}>We want to learn styling text in React Native</Text> <StatusBar style="auto" /> </View> ); } const styles = StyleSheet.create({ container: { flex: 1, backgroundColor: '#fff', alignItems: 'center', justifyContent: 'center', }, }); |
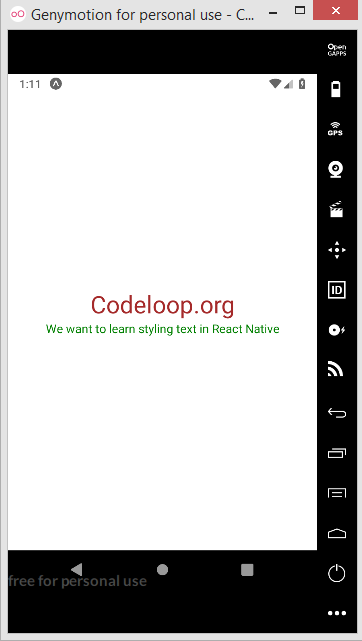
Run your React Native Project from Expo Metro Bundler and this will be the result.

If you don’t want to use inline styling in React Native, than you can create your styles separately using StyleSheet.create() function and after that you can connect those styles with your components.
|
1 2 3 4 5 6 7 8 9 10 11 |
textOne: { fontSize:30, color:"brown" }, textTwo: { fontSize:15, color:"green" } |
So you can see that we have names for every style, now we can add these names to the specific Text components that we want to change the color.
|
1 2 |
<Text style = {styles.textOne}>Codeloop.org</Text> <Text style = {styles.textTwo}>We want to learn styling text in React Native</Text> |
This is the complete code for App.js.
|
1 2 3 4 5 6 7 8 9 10 11 12 13 14 15 16 17 18 19 20 21 22 23 24 25 26 27 28 29 30 31 32 33 34 |
import { StatusBar } from 'expo-status-bar'; import React from 'react'; import { StyleSheet, Text, View } from 'react-native'; export default function App() { return ( <View style={styles.container}> <Text style = {styles.textOne}>Codeloop.org</Text> <Text style = {styles.textTwo}>We want to learn styling text in React Native</Text> <StatusBar style="auto" /> </View> ); } const styles = StyleSheet.create({ container: { flex: 1, backgroundColor: '#fff', alignItems: 'center', justifyContent: 'center', }, textOne: { fontSize:30, color:"brown" }, textTwo: { fontSize:15, color:"green" } }); |
If you run the project the result will be the same.
Subscribe and Get Free Video Courses & Articles in your Email