In this article we want discuss about Python Top GUI Frameworks, now when you want to build GUI applications in Python, then there will be different choices for you, we have different powerful libraries for building GUI applications in Python, in this article we will talk about the most popular and powerful Python GUI Framework, also we will create practical example about those Python GUI libraries.
Python Top GUI Frameworks
In software development, Python continues one of the most powerful language. Python has ability to integrate with different frameworks and libraries, and this makes it a popular choice for creating graphical user interfaces (GUIs). As developers, it’s important to know about different Python GUI frameworks and libraries, and select the most suitable tools for our projects. In this article we explore and compare the best Python GUI frameworks and libraries, also we will talk about their features, installation and create some examples.
TKinter
Tkinter is standard Python library for creating graphical user interfaces (GUIs). TKinter is simple and easy, also it has interface to the Tk GUI toolkit, TK is cross platform GUI toolkit and it is a part of Tcl scripting language. Tkinter allows developers to create windows, dialogs, buttons, menus, and other GUI elements in Python scripts.
Key features of Tkinter:
- Simplicity: Tkinter is known for its simplicity, by this reason it is popular choice for beginners in Python GUI development. It has nice and easy interface, also the syntax is easy and Python developers can easily create basic GUI applications with Python TKinter.
- Cross-platform Compatibility: Tkinter is cross platform, it means that when we create a GUI application in TKinter, than you can run that on different operating systems, including Windows, macOS, and Linux without requiring modifications to the code.
- Integration with Tk GUI Toolkit: Tkinter provides a Python interface to the Tk GUI toolkit, and it offers different customizable GUI elements such as buttons, labels, textboxes, and canvas widgets.
- Bundled with Python: Tkinter comes bundled with Python, it means that you don’t need to install TKinter separately, because it is already packed with Python installation.
- Extensibility: we already have mentioned that there are different built-in widgets in TKinter, also TKinter allows for customization and extensibility through the creation of custom widgets and the use of third-party extensions.
How to Install TKinter ?
You don’t need to install TKinter, because it is already bundled with Python.
How to Create GUI Window in TKinter ?
Creating a GUI window in Tkinter is a straightforward process.
- First start by importing Tkinter module into your Python script.
- Create an instance of the Tk class to create the main window of your GUI application.
- You can customize the appearance and behavior of the window by setting attributes such as its title, size and resizable properties.
- Finally, call the mainloop() method on the Tk object to start the Tkinter event loop, which listens for user events such as mouse clicks and keyboard inputs.
|
1 2 3 4 5 6 7 8 9 10 11 12 13 14 15 16 |
import tkinter as tk # Create main window root = tk.Tk() # Set window title root.title("My Tkinter Window - Codeloop") # Set window size (width x height) root.geometry("400x300") # Allow window resizing (width, height) root.resizable(True, True) # Run main event loop root.mainloop() |
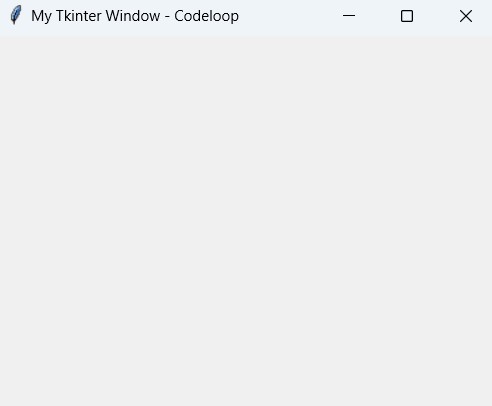
Run the complete code and this will be the result
PyQt6
PyQt6 is Python binding for Qt application framework, PyQt6 is developed by Riverbank Computing. and Qt is cross-platform C++ framework, Qt is used for developing GUI applications with C++, also you can use Qt for non-GUI tools and utilities. on the other hand PyQt6 allows developers to use Qt functionality in Python, and using PyQt6 you can build powerful graphical applications or GUI’s with Python programming language. using PyQt6 you can access to Qt’s classes and functions, and it allows developers to build GUI elements, handle event using signals and slots, manage layouts with different layout managers and perform other tasks and build complex GUI applications.
Key features of PyQt6 :
- Cross-platform compatibility: When you create a GUI application with PyQt6, then it can run on different platforms, including Windows, macOS, Linux, and mobile platforms like Android and iOS.
- Rich set of widgets: PyQt6 provides access to Qt’s extensive collection of widgets and controls, using PyQt6 you can easily create highly customizable and attractive user interfaces.
- Signal and slot mechanism: PyQt6 uses Qt’s signal and slot mechanism for event handling, and using that we can connect different parts of the application in a flexible and efficient manner.
- Integration with Qt Designer: PyQt6 smoothly integrates with Qt Designer, Qt Designer is visual design tool for creating Qt-based GUI applications. You can use Qt Designer to design user interfaces visually and then generate Python code using PyQt6.
- Extensive documentation and community support: PyQt6 has complete documentation and large community of users and developers. There are a lot of resources available to help developers get started with PyQt6 and solve any issues they encounter during development.
There is a good course in Udemy on PyQt6 in the name of (PyQt6 GUI Development with Qt Designer ) that you can join.
How to Install PyQt6 ?
To install PyQt6, you can use pip, open your terminal or command prompt and use this command for PyQt6 installation.
|
1 |
pip install PyQt6 |
How to Create GUI Window in PyQt6 ?
For creating GUI window in PyQt6, you typically follow these steps:
- Import necessary modules: PyQt6 provides several modules that you need to import to work with its classes and functions.
- Create an application object: This object manages the application’s control flow and settings.
- Create a main window: This is the window that will serve as the main interface for your application.
- Customize the window: You can set properties such as the window title, size, position, and other attributes.
- Show the window: Finally, you need to make the window visible by calling the show() method.
This is a basic example of how to create a simple GUI window using PyQt6:
|
1 2 3 4 5 6 7 8 9 10 11 12 13 14 15 16 17 18 19 20 21 22 |
import sys from PyQt6.QtWidgets import QApplication, QMainWindow def main(): # Create application object app = QApplication(sys.argv) # Create main window window = QMainWindow() # Customize window window.setWindowTitle("PyQt6 Window - Codeloop.org") window.setGeometry(100, 100, 400, 300) # x, y, width, height # Show window window.show() # Execute application's event loop sys.exit(app.exec()) if __name__ == "__main__": main() |
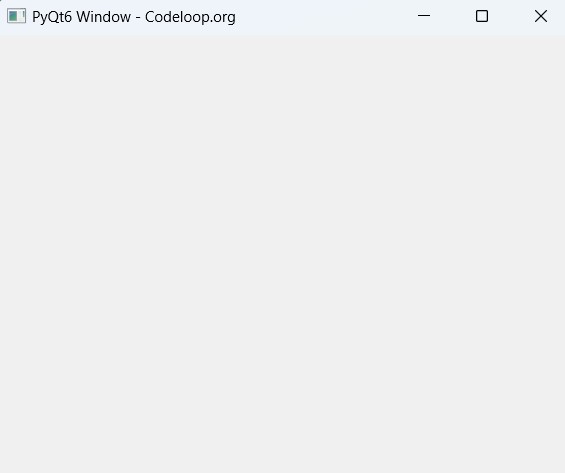
Run the complete code and this will be the result
Difference Between PyQt5 and PyQt6
Now there will be a question in your mind, that we already had PyQt5, now let’s talk about difference between PyQt5 and PyQt6.
| Feature | PyQt5 | PyQt6 |
|---|---|---|
| Qt Version | Based on Qt5 | Based on Qt6 |
| Python Version | Compatible with Python 3.5 and later | Compatible with Python 3.6 and later |
| Deprecated Modules | No major deprecated modules | Some modules deprecated (e.g., QtWebKit) |
| Runtime Performance | Similar to PyQt5 | Improved performance optimizations |
| Typing Annotations | Limited support for typing annotations | Enhanced support for typing annotations |
| Module Organization | Hierarchical module organization | Flat module organization |
| Event Loop Policy | Uses Qt’s default event loop policy | Allows setting custom event loop policies |
| Asyncio Integration | Limited asyncio integration | Improved asyncio integration |
| Signal and Slot Syntax | Uses old-style connect syntax | Introduces new signal-slot syntax |
| Development Status | Stable | Continuously evolving and improving |
wxPython
wxPython is Python wrapper for wxWidgets C++ GUI library, wxWidgets is a library that you can build cross-platform desktop applications with native look with C++. wxPython provides Python bindings for the wxWidgets library, using wxWidget you can build native applications using Python code.
Key features of wxPython:
- Cross-platform compatibility: wxPython applications can run on different operating systems, including Windows, macOS, and Linux. and for this you don’t need to bring change in the codebase.
- Native look and feel: wxPython applications have native appearance and behavior on each platform, and this is one of the best feature for wxPython.
- Extensive widget set: wxPython provides different GUI widgets and controls, and you can create complex and feature rich user interfaces.
- Event-driven programming: Like many GUI frameworks, wxPython is event-driven, it means that it responds to user actions and system events by executing predefined event handlers.
- Customizable: wxPython applications are highly customizable, you can modify the appearance and behavior of GUI elements to suit their needs.
- Documentation and community support: wxPython benefits has complete and good documentation, also it has large community of users and developers that you can benefit from that.
How to Install wxPython ?
To install wxPython, you can use pip, open your terminal or command prompt and use this command for wxPython installation.
|
1 |
pip install wxPython |
How to Create GUI Window in wxPython ?
For creating GUI window in PyQt6, you typically follow these steps:
- We import the wxPython library with import wx.
- We define a class MyWindow that inherits from wx.Frame. This class represents our main window. In the constructor (__init__), we call the parent class constructor (super()) and set the window’s title and initial size.
- Inside the MyWindow class, we create a panel (wx.Panel) that serves as the main content area of the window. We bind the wx.EVT_CLOSE event to the on_close method to handle the window close event.
- We define the on_close method to destroy the window when it’s closed.
- In the main function, we create a wx.App object, which represents our application. We then create an instance of the MyWindow class and start the application’s event loop with app.MainLoop().
- Finally, we check if the script is being run as the main program with if __name__ == “__main__”:, and if so, we call the main function to start the application.
This is the complete code
|
1 2 3 4 5 6 7 8 9 10 11 12 13 14 15 16 17 18 19 |
import wx class MyWindow(wx.Frame): def __init__(self, parent, title): super(MyWindow, self).__init__(parent, title=title, size=(300, 200)) self.panel = wx.Panel(self) self.Bind(wx.EVT_CLOSE, self.on_close) self.Show() def on_close(self, event): self.Destroy() def main(): app = wx.App() frame = MyWindow(None, "wxPython Window - Codeloop.org") app.MainLoop() if __name__ == "__main__": main() |
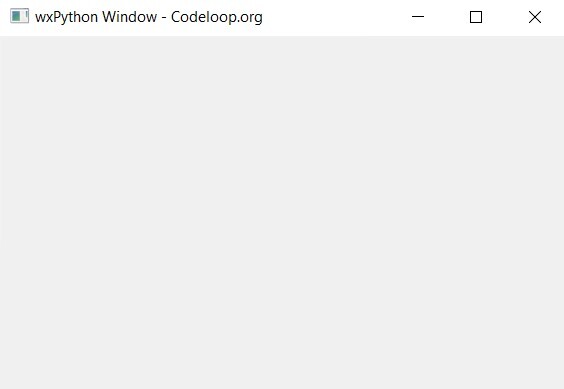
Run the code and this will the result
Kivy
Kivy is an open-source Python framework for developing multi-touch applications. using Kivy you can create cross-platform applications with natural user interface (NUI), also it allows users to interact with the application via touch gestures, mouse input or keyboard events.
Key features of Kivy:
- Cross-platform compatibility: Kivy applications can run on different platforms, including Windows, macOS, Linux, Android, and iOS. you don’t need to bring any modification to the codebase. This is achieved through Kivy’s support for multiple input methods and its abstraction layer for platform-specific APIs.
- Multi-touch support: Kivy is designed to handle multi-touch inputs easily, so you can using Kivy you can develop touch-enabled applications such as educational software, games and more.
- Natural user interface (NUI): Kivy provides a set of customizable widgets and tools for creating user-friendly user interfaces with smooth animations, transitions and effects.
- Python-based: Kivy is written in Python and offers a Pythonic API, making it accessible and familiar to Python developers. It leverages the power and simplicity of Python syntax, allowing developers to focus on application logic rather than low-level details.
- Open-source and community-driven: Kivy is an open-source project with an active community of developers contributing to its development and maintenance. It benefits from frequent updates, bug fixes and new features contributed by the community.
How to Install Kivy ?
To install Kivy, you can use pip, open your terminal or command prompt and use this command for Kivy installation.
|
1 |
pip install kivy |
How to Create GUI Window in Kivy ?
To create a GUI window in Kivy, you need to define a Kivy application and create a layout that represents your window. This is a basic example of how to create a simple GUI window in Kivy:
|
1 2 3 4 5 6 7 8 9 10 11 12 13 14 15 16 17 18 19 20 21 22 23 24 25 26 27 28 29 30 31 32 33 |
# Import required Kivy modules from kivy.app import App from kivy.uix.label import Label from kivy.uix.button import Button from kivy.uix.boxlayout import BoxLayout # Define your Kivy application class class MyKivyApp(App): def build(self): # Creat layout to hold your widgets layout = BoxLayout(orientation='vertical') # Add widgets to the layout label = Label(text='Hello Codeloop.org') button = Button(text='Click Me') # Bind events the btton button.bind(on_press=self.on_button_click) # Add widgets to the layout layout.add_widget(label) layout.add_widget(button) # Return the layout as the root widget of your application return layout # Define event handler for button click def on_button_click(self, instance): print('Button clicked') # Run your Kivy application if __name__ == '__main__': MyKivyApp().run() |
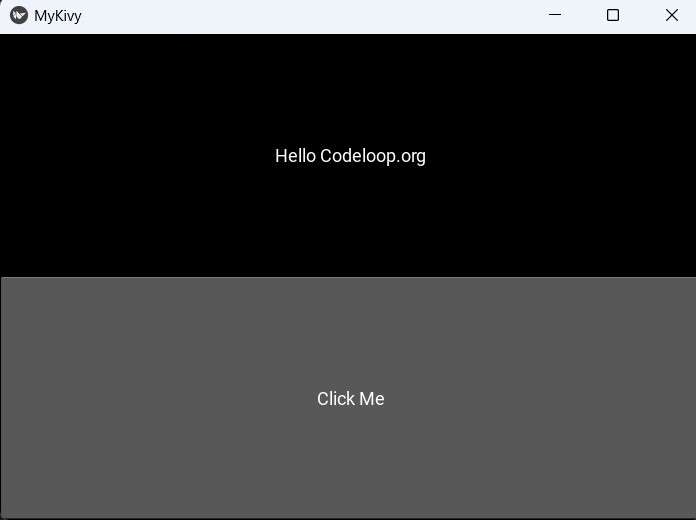
Run the complete code and this will be the result
PySide6
PySide6 is Python binding for Qt for Python (PySide) project, using PySide6 we can create cross-platform applications with Qt framework using Python. Qt is a GUI framework for C++ programming language, and it is developed by Qt Company for building applications with graphical user interfaces (GUIs), also non GUI tools and utilities.
PySide6 provides Python bindings for the Qt6 libraries, using PySide6 you can access to all features and functionalities of Qt, including creating windows, dialogs, buttons, menus, and other GUI elements inside Python.
Key features of PySide6 :
- Cross-platform compatibility: PySide6 applications can run on different operating systems including Windows, macOS, Linux and mobile platforms like Android and iOS, and you don’t need to bring changes in the codebase for these platforms.
- Native look and feel: PySide6 applications have a native appearance and behavior on each platform, and this makes them feel familiar and intuitive to users.
- Signal-Slot mechanism: PySide6 uses Qt’s signal-slot mechanism for handling events and communication between different parts of the application.
- Pythonic API: PySide6 provides a Pythonic API, and it is easy for Python developers to work with Qt and access to its powerful features.
- Integration with Qt Designer: PySide6 has Qt Designer, it is a graphical tool for designing Qt based GUI applications. You can use Qt Designer to visually design UI layouts and after that you can generate Python code using PySide6 to implement the functionality, or you can directly load the UI file in Python.
- Documentation and Community support: PySide6 benefits from Qt’s documentation and a large community of users and developers.
How to Install PySide6 ?
To install PySide6, you can use pip, open your terminal or command prompt and use this command for PySide6 installation.
|
1 |
pip install PySide6 |
How to Create GUI Window in PySide6 ?
For creating a GUI window in PySide6, you need to define a main application class that inherits from QApplication and a main window class that inherits from QMainWindow. after that you can create and customize the main window by adding widgets and defining their properties. This is a basic example:
|
1 2 3 4 5 6 7 8 9 10 11 12 13 14 15 16 17 18 19 20 21 22 23 24 25 26 27 28 29 30 31 |
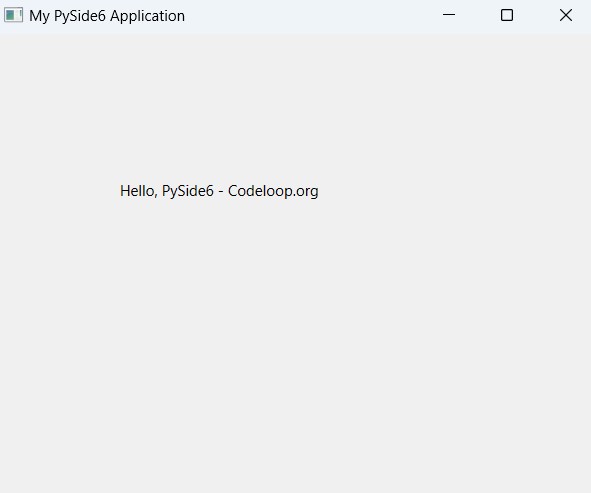
import sys from PySide6.QtWidgets import QApplication, QMainWindow, QLabel class MainWindow(QMainWindow): def __init__(self): super().__init__() # Set window title and size self.setWindowTitle("My PySide6 Application") self.resize(400, 300) # Creat label widget self.label = QLabel("Hello, PySide6 - Codeloop.org", self) self.label.setGeometry(100, 100, 200, 50) # Set label position and size def main(): # Create an instance of QApplication app = QApplication(sys.argv) # Create an instance of the main window window = MainWindow() window.show() # Show the main window # Start the application event loop sys.exit(app.exec()) if __name__ == "__main__": main() |
Run the complete code and this will be the result
Python Top 5 GUI Frameworks
Now let’s compare the Top 5 Python GUI Frameworks in this table
| Feature | TKinter | PyQt6 | wxPython | Kivy | PySide6 |
|---|---|---|---|---|---|
| Language | Python | Python | Python | Python | Python |
| Main GUI Library | Tkinter (based on Tk) | PyQt (based on Qt) | wxWidgets (C++ library) | Kivy (Python library) | Qt for Python (PySide/PyQt alternative) |
| Licensing | Open-source | Dual-licensed (GPL and commercial) | Open-source | Open-source | Open-source |
| Look and Feel | Native (platform-dependent) | Native (platform-dependent) | Native (platform-dependent) | Customizable | Native (platform-dependent) |
| Easy of Use | Beginner friendly | Moderate to Advanced | Moderate to Advanced | Beginner to Intermediate | Moderate to Advanced |
| Cross-platform | Yes | Yes | Yes | Yes | Yes |
| Community Support | Large | Large | Moderate | Moderate | Moderate |
| Documentation | Good | Good | Good | Moderate | Good |
| Learning Curve | Low | Moderate to High | Moderate to High | Moderate to High | Moderate to High |
| Performance | Moderate | High | High | High | High |
| Widget Set | Basic | Extensive | Extensive | Extensive | Extensive |
| Event Handling | Simple | Complex | Complex | Complex | Complex |
| Popularity | Widely used | Widely used | Widely used | Growing | Growing |
| Mobile Development | No | Yes | Yes | Yes | Yes |
| Multimedia Support | Limited | Extensive | Extensive | Limited | Extensive |
Python Top 10 GUI Frameworks
We already have talked about Python Top 5 GUI Frameworks, but there are more GUI libraries in Python that we have mentioned in this table.
| Framework | Introduction | Installation |
|---|---|---|
| Tkinter | Tkinter is a standard GUI toolkit for Python. | Included with Python installation. |
| PyQt6 | PyQt6 is a set of Python bindings for Qt6. | pip install PyQt6 |
| wxPython | wxPython is a Python binding for wxWidgets. | pip install wxPython |
| Kivy | Kivy is an open-source Python framework for developing multi-touch applications. |
pip install kivy |
| PySide6 | PySide6 is a Python binding for Qt6. | pip install PySide6 |
| PySimpleGUI | PySimpleGUI is a Python GUI framework designed to make GUI development more accessible to Python beginners | pip install PySimpleGUI |
| Libavg | libavg allows programmers, media artists and designers to quickly develop media applications. It uses python as scripting language and is written in high-speed C++. | Download from official website |
| PyForms | PyForms is GUI framework in Python and that is the Python implementation of Windows Forms. USing PyForms you can create highly interactive interfaces for Windows GUI mode, Web mode, and Terminal mode. | pip install PyForms |
| Wax | Wax is a wrapper for wxPython, offering the same functionality as wxPython but is easier to use. | Included with Linux distributions. |
| PyGTK | PyGTK is indeed an older library that was widely used for creating GTK-based applications with Python. However, its development has largely discontinued, and it is considered deprecated in favor of more modern alternatives. | pip install PyGTK |
Subscribe and Get Free Video Courses & Articles in your Email