In this Python PyQt5 article i want to show you Drawing of Rectangle With QPainter Class , and also we are going to talk about QPainter Class in PyQt5 . so first of all let me talk about QPainter class.
Also you can read more Python GUI articles in the below links
- Kivy GUI Development Tutorials
- TKinter GUI Development Tutorials
- Pyside2 GUI Development
- wxPython GUI Development Tutorials
- PyQt5 GUI Development Tutorials
What is Python PyQt5 QPainter Class ?
The QPainter class in PyQt5 is a powerful and flexible class that provides different 2D painting functions to create custom graphics and designs in PyQt5 application. It allows you to paint on widgets and images using a variety of pens, brushes, and other tools. You can use it to draw lines, shapes, text, images, and gradients, and apply transformations such as scaling, rotation, and translation.
This is simple example
|
1 2 3 4 5 6 7 8 9 10 11 12 13 14 15 16 17 18 19 20 21 22 23 24 25 26 27 28 29 30 31 32 33 |
import sys from PyQt5.QtWidgets import QApplication, QWidget from PyQt5.QtGui import QPainter, QColor # Custom widget class inheriting from QWidget class MyWidget(QWidget): def __init__(self): super().__init__() # Set the geometry (position and size) of the widget self.setGeometry(100, 100, 300, 200) # Set the window title self.setWindowTitle('Drawing in Codeloop') # Override the paintEvent method to perform custom painting def paintEvent(self, event): # Create a QPainter object associated with this widget painter = QPainter(self) # Set the pen color to red (RGB: 255, 0, 0) painter.setPen(QColor(255, 0, 0)) # Draw a rectangle at position (50, 50) with width 100 and height 100 painter.drawRect(50, 50, 100, 100) # Entry point of the application if __name__ == '__main__': # Create the QApplication object to manage the GUI application app = QApplication(sys.argv) # Create an instance of the custom widget widget = MyWidget() # Show the widget on the screen widget.show() # Start the event loop to handle user input and events sys.exit(app.exec_()) |
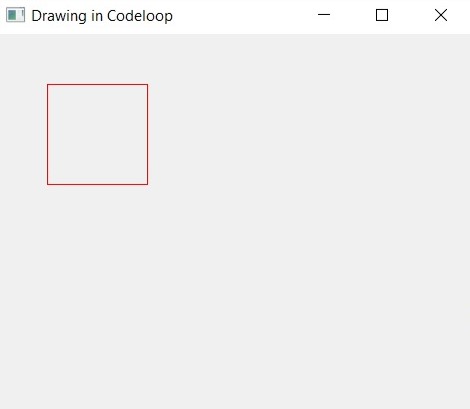
In the above example we have create MyWidget class that inherits from QWidget. after that we set the geometry and window title of the widget in the constructor. after that we override the paintEvent() method which is called whenever the widget needs to be repainted. in this method we have created QPainter object that is associated with the widget by passing self as an argument. we set the pen color to red using setPen() and draw a rectangle using drawRect().
and lastly we create an instance of MyWidget and show it using the show() method, as well as running the Qt event loop using app.exec_(). when the window appears, you should see red rectangle drawn on it.
Run the code and this will be the result

Now let’s create another example, now this is the complete code for drawing a rectangle
|
1 2 3 4 5 6 7 8 9 10 11 12 13 14 15 16 17 18 19 20 21 22 23 24 25 26 27 28 29 30 31 32 33 34 35 36 37 38 39 40 41 42 43 44 45 46 47 48 49 |
from PyQt5 import QtGui from PyQt5.QtWidgets import QApplication, QMainWindow from PyQt5.QtGui import QPainter, QBrush, QPen from PyQt5.QtCore import Qt import sys # Custom window class inheriting from QMainWindow class Window(QMainWindow): def __init__(self): super().__init__() # Initialize window properties self.title = "PyQt5 Drawing Rectangle" self.top = 100 self.left = 100 self.width = 680 self.height = 500 # Call the method to initialize window self.InitWindow() # Method to initialize window properties def InitWindow(self): # Set window icon self.setWindowIcon(QtGui.QIcon("icon.png")) # Set window title self.setWindowTitle(self.title) # Set window geometry (position and size) self.setGeometry(self.top, self.left, self.width, self.height) # Show the window self.show() # Override paintEvent method to perform custom painting def paintEvent(self, e): # Create QPainter object associated with this window painter = QPainter(self) # Set th pen (outline) color to black, width to 5 pixels, and style to solid line painter.setPen(QPen(Qt.black, 5, Qt.SolidLine)) # Set the brush (fill) color to green with diagonal cross pattern painter.setBrush(QBrush(Qt.green, Qt.DiagCrossPattern)) # Draw a rectangle painter.drawRect(100, 15, 400, 200) # Create the QApplication object to manage the GUI application App = QApplication(sys.argv) # Create an instance of the custom window class window = Window() # Start the event loop to handle user input and events sys.exit(App.exec_()) |
This is our main Window class that extends from QMainWindow. and in the constructor of the class we need to initialize some requirements of the window . also we have called our initWindow() method in here.
|
1 2 3 4 5 6 7 8 9 10 11 12 |
class Window(QMainWindow): def __init__(self): super().__init__() self.title = "PyQt5 Drawing Rectangle" self.top = 100 self.left = 100 self.width = 680 self.height = 500 self.InitWindow() |
After that we are going to create our InitWindow() method. we set our window title, window icon and window geometry. also we need to show our window.
|
1 2 3 4 5 |
def InitWindow(self): self.setWindowIcon(QtGui.QIcon("icon.png")) self.setWindowTitle(self.title) self.setGeometry(self.top, self.left, self.width, self.height) self.show() |
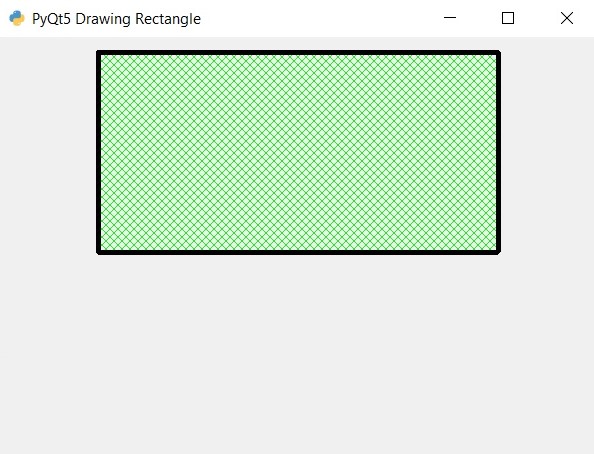
This is the paintEvent() method and it is built in method in QPainter class, and we are going to draw our Reactangle in this method. first we have created the object of QPainter class, after that we have set the pen and also brush for the Rectangle and at the end we have drawn the Rectangle.
|
1 2 3 4 5 6 7 |
def paintEvent(self, e): painter = QPainter(self) painter.setPen(QPen(Qt.black, 5, Qt.SolidLine)) #painter.setBrush(QBrush(Qt.red, Qt.SolidPattern)) painter.setBrush(QBrush(Qt.green, Qt.DiagCrossPattern)) painter.drawRect(100, 15, 400,200) |
Also every PyQt5 application must create an application object.
|
1 |
App = QApplication(sys.argv) |
Finally, we enter the mainloop of the application. The event handling starts from this point.
|
1 2 |
window = Window() sys.exit(App.exec()) |
Run the complete code and this will be the result

QPainter Class Functionalities in PyQt5
You can use QPainter class to draw different elements on a widget.
- Drawing Shapes:
- QPainter offers methods to draw basic geometric shapes such as rectangles, ellipses, polygons, and circles. For example, drawRect(), drawEllipse(), drawPolygon() and drawCircle() methods can be used to draw these shapes. These methods take parameters like position, size and style to customize the appearance of the shapes.
- Drawing Lines:
- Lines can be drawn using the drawLine() method of QPainter. This method requires specifying the start and end points of the line. Additionally, QPainter provides options to customize the line style, thickness, and color using methods like setPen() and setBrush().
- Drawing Text:
- Text can be drawn on widgets using the drawText() method of QPainter. This method allows specifying the position, font and color of the text to be drawn. PyQt5 provides QFont class to set the font properties such as font family, size, weight, and style. QPainter also supports drawing multiline text and text alignment options.
- Drawing Images:
- QPainter enables drawing images on widgets using the drawImage() method. This method requires specifying the position and size of the image to be drawn. PyQt5 provides QImage and QPixmap classes to load and manipulate image data. Images can be loaded from files or created dynamically from raw image data.
Let’s demonstrate these functionalities with a practical example:
|
1 2 3 4 5 6 7 8 9 10 11 12 13 14 15 16 17 18 19 20 21 22 23 24 25 26 27 28 29 30 31 32 33 34 35 36 37 38 39 40 |
import sys from PyQt5.QtWidgets import QApplication, QWidget from PyQt5.QtGui import QPainter, QColor, QFont, QPixmap class MyWidget(QWidget): def __init__(self): super().__init__() self.setGeometry(100, 100, 300, 200) self.setWindowTitle('Drawing Shapes, Lines, Text, and Images') def paintEvent(self, event): painter = QPainter(self) # Drawing shapes painter.setBrush(QColor(255, 0, 0)) # Red color painter.drawRect(50, 50, 100, 100) # Draw a rectangle painter.setBrush(QColor(0, 255, 0)) # Green color painter.drawEllipse(180, 50, 100, 100) # Draw an ellipse # Drawing lines painter.setPen(QColor(0, 0, 255)) # Blue color painter.drawLine(20, 20, 280, 180) # Draw a line # Drawing text painter.setPen(QColor(255, 255, 255)) # White color font = QFont('Arial', 12) painter.setFont(font) painter.drawText(50, 180, 'Hello, PyQt5!') # Drawing image pixmap = QPixmap('icon.png') # Load image from file painter.drawPixmap(180, 120, pixmap) # Draw image if __name__ == '__main__': app = QApplication(sys.argv) widget = MyWidget() widget.show() sys.exit(app.exec_()) |
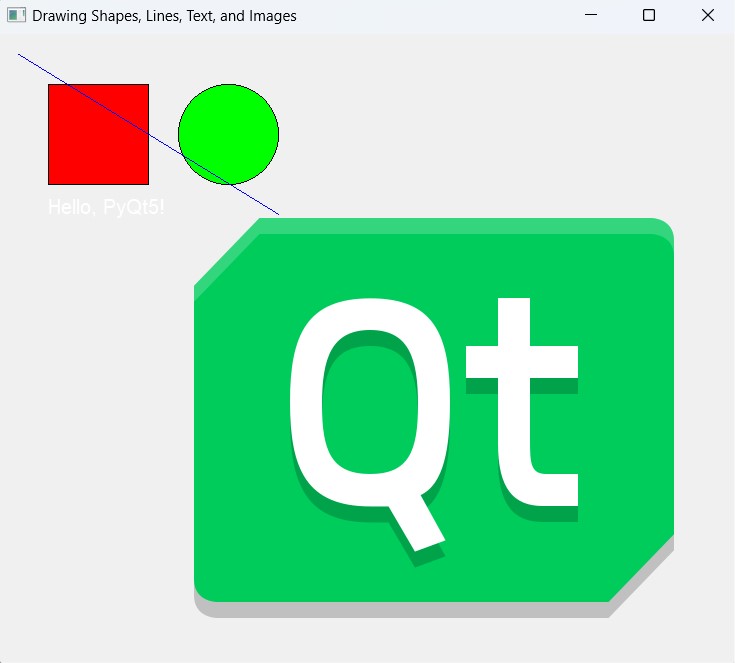
In this example, we have created a custom widget MyWidget that inherits from QWidget. We override the paintEvent() method to perform custom painting using QPainter. Inside paintEvent(), we use different QPainter methods to draw shapes, lines, text and images on the widget. And lastly we create an instance of MyWidget and display it using the QApplication event loop.
Run the code and this will be the result

Subscribe and Get Free Video Courses & Articles in your Email