In this Python OpenCV article iam going to talk about simple Face Detection Introduction. so basically in this article we are using HaarCascade Classifier. Face Detection is a computer technology that determines the locations and sizes of human faces in arbitrary (digital) images. but before talking about other topics, let’s talk about Python OpenCV and how we can install that.
What is OpenCV in Python?
How to Install Python OpenCV?
You can use pip for Python OpenCV Installation, Open your command prompt or terminal and write this command.
|
1 |
pip install opencv-python |
What is Face detection in Python?
Usage of Face Detection in Python OpenCV?
- Biometric identification and verification systems.
- Video surveillance and security systems.
- Automatic tagging and organizing of photos in social media platforms.
- Augmented reality applications.
- Emotion recognition and analysis.
- Access control systems.
- Facial expression analysis.
What Is Haar Cascade ?
A Haar Cascade is basically a classifier which is used to detect the object for which it has been trained for, from the source. The Haar Cascade is trained by superimposing the positive image over a set of negative images. The training is generally done on a server and on various stages. Better results are obtained by using high quality images and increasing the amount of stages for which the classifier is trained.
You can also used predefined Haar Cascades which are available on Github
Python OpenCV Face Detection Introduction
Let’s create our example, This is our complete code for Python OpenCV Face Detection Introduction
|
1 2 3 4 5 6 7 8 9 10 11 12 13 14 15 16 17 18 19 20 21 22 23 24 |
import cv2 # Read input image image = cv2.imread("lena.tif") # Load pre-trained face cascade classifier face_cascade = cv2.CascadeClassifier("haarcascade_frontalface_default.xml") # Detect faces in the image faces = face_cascade.detectMultiScale(image, scaleFactor=1.1, minNeighbors=7) # Print number of faces detected print("Faces Detected:", len(faces)) # Draw rectangles around the detected faces for x, y, w, h in faces: cv2.rectangle(image, (x, y), (x+w, y+h), (0, 0, 255), 4) # Display image with detected faces cv2.imshow("Face Detected", image) # Wait for a key press and close all windows cv2.waitKey(0) cv2.destroyAllWindows() |
So in this line of code we have loaded the image, you need to have an image in your working directory
|
1 |
image = cv2.imread("lena.tif") |
This is for loading our Haar Cascade Classifier that we have already copied in our directory
|
1 |
face_cascade = cv2.CascadeClassifier("haarcascade_frontalface_default.xml") |
detecMultiScale() function is for detecting objects if it finds a face in the image it will return in the form of x,y,w,h. and it needs some parameters.
ScaleFactor: This is parameter is for specifying how much the image size is reduced at each image scale.
minNeighbors: Parameter specifying how many neighbors each candidate rectangle should have to retain it, this parameter will affect the quality of the detected faces.
|
1 |
faces = face_cascade.detectMultiScale(image, scaleFactor = 1.1, minNeighbors = 7) |
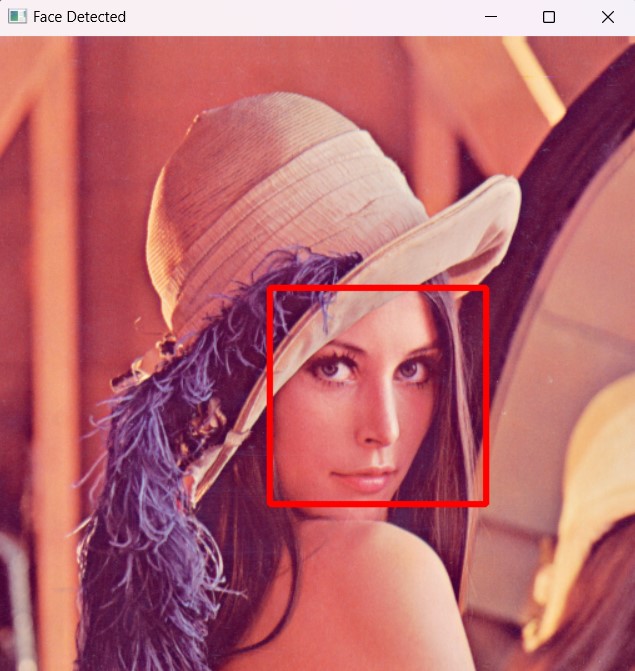
In this code we want to draw rectangle to the faces in the image.
|
1 2 |
for x,y,w,h in faces: cv2.rectangle(image, (x,y), (x+w, y+h), (0,0,255), 4) |
In this line of code we want to show our image
|
1 |
cv2.imshow("Face Detected", image) |
Run the code and this will be the result

Subscribe and Get Free Video Courses & Articles in your Email