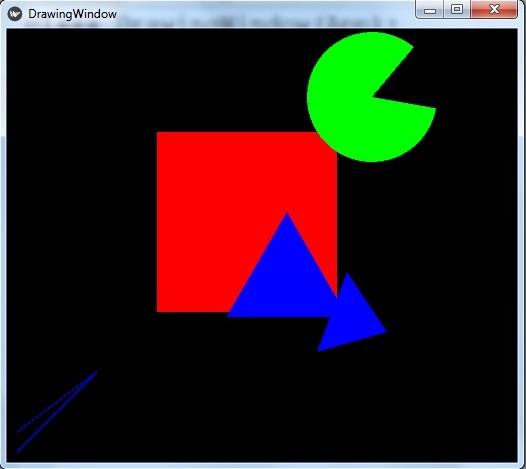
In this Python Kivy article we are going to learn How to Draw Shapes, so particularly we are going to draw Ellipse, Rectangle, Triangle and Line in Python Kivy.
What is Kivy ?
Kivy is an open source Python framework for developing multi touch applications and user interfaces (UIs) for desktop and mobile platforms. it is designed to be cross platform and can run on different operating systems, including Windows, Linux, macOS, iOS and Android.
Kivy is based on the Model-View-Controller (MVC) architectural pattern and uses declarative approach to define the UI layout and behavior. It provides different built in widgets and graphics primitives, as well as support for multimedia, networking and other advanced features.
Kivy applications are written in Python, which allows for rapid development and easy integration with other Python libraries and tools. Kivy also includes a graphical user interface designer called Kivy Designer, which allows developers to create UIs visually without writing any code.
Kivy is licensed under the MIT license, which allows developers to use it in both open-source and commercial projects. it has large and active community of developers, which contributes to its ongoing development and provides support through online forums, documentation, and tutorials.
Also if you are interested in Python GUI Development with different libraries, you can check the below links.
- PyQt5 GUI Development Tutorials
- Pyside2 GUI Development Tutorials
- wxPython GUI Development Tutorials
- TKinter GUI Development Tutorials
So first of all you need to create a new python file, iam going to call it drawingshapes.py and you need to add this code in that file.
|
1 2 3 4 5 6 7 8 9 10 11 12 13 14 15 16 17 18 19 20 21 22 23 |
from kivy.app import App from kivy.uix.relativelayout import RelativeLayout class MyRelativeLayout(RelativeLayout): pass class DrawingWindow(App): def build(self): return MyRelativeLayout() if __name__ == "__main__": window = DrawingWindow() window.run() |
In this file we have created a class that extends from RelativeLayout, because we are going to add our shapes in the relative layout. the second class is our main class that extends from App class and we return our MyRelativeLayout class in here.
After that you need to create another file that is our .kv file, make sure that you give the name as your main window class, for example in the above code my main class name is DrawingWindow, you need to give your kivy file drawingwindow.kv. you can see that we have added our all shapes in our kivy relative layout.
|
1 2 3 4 5 6 7 8 9 10 11 12 13 14 15 16 17 18 19 20 21 22 23 24 25 26 27 28 29 30 31 32 33 34 35 36 37 38 39 |
#:kivy 1.10.0 <MyRelativeLayout>: canvas: Color: rgb:1,0,0 Rectangle: pos:400,400 size:180,180 Color: rgb:0,1,0 Ellipse: angle_start:100 angle_end:400 pos:300,300 size:130,130 Color: rgb:0,0,1 Ellipse: segments:3 pos:210,110 size:140,140 Triangle: points:310,110,340,190,380,130 Line: points:10,30,90,90,10,10,60 |
So now run your code and this is the result.

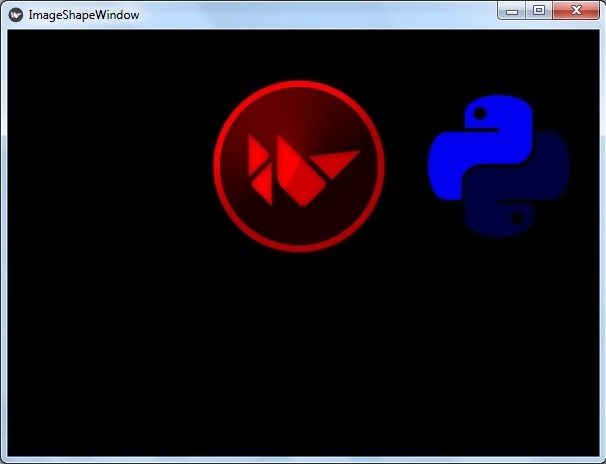
Also you can add images in your shapes, so for this we are going to create a new python file, iam going to call it imageshapes.py. add this code in your file.
|
1 2 3 4 5 6 7 8 9 10 11 12 13 14 15 16 17 18 19 20 21 22 23 |
from kivy.app import App from kivy.uix.relativelayout import RelativeLayout class MyRelativeLayout(RelativeLayout): pass class ImageShapeWindow(App): def build(self): return MyRelativeLayout() if __name__ == "__main__": window = ImageShapeWindow() window.run() |
Now create your kivy file, my kivy file name is imageshapewindow.kv, the same as my main class.
|
1 2 3 4 5 6 7 8 9 10 11 12 13 14 15 16 17 18 19 20 21 22 |
#:kivy 1.10.0 <MyRelativeLayout>: canvas: Color: rgb:1,0,0 Ellipse: pos:200,200 size:180,180 source:'kivy.png' Color: rgb:0,0,1 Rectangle: pos:400,200 size:180,180 source:'python.png' |
You can see that we have added a source to our shapes, make sure that you have already added some images in your working directory.
Run your code and this is the result.

Also you can watch the complete video for this article
Subscribe and Get Free Video Courses & Articles in your Email