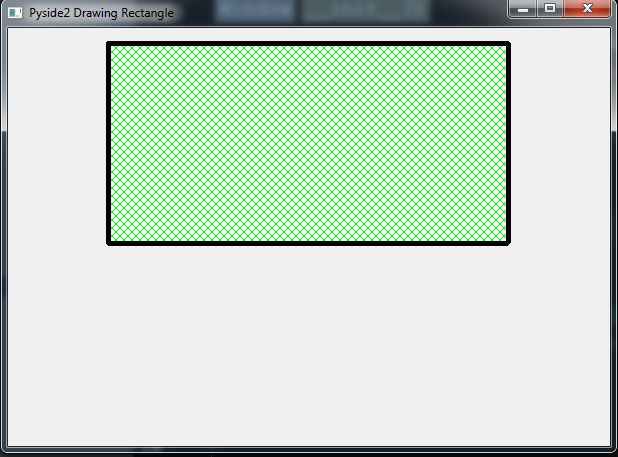
In this Python article we are going to learn about Creating Rectangle in Pyside2 with QPainter class,
so the QPainter class performs low-level painting on widgets and other paint devices.
Also you can check more Python GUI Development tutorials with different libraries.
1: PyQt5 GUI Development Tutorials
2: TKinter GUI Development Tutorials
3: wxPython GUI Development Tutorials
4: Kivy GUI Development Tutorials
Learn How to Create Ellipse in Pyside2 with QPainter Class
What is QPainter Class ?
According to Qt For Python Documentation the QPainter provides highly optimized functions
to do most of the drawing GUI programs require. It can draw everything from simple lines to
complex shapes like pies and chords. It can also draw aligned text and pixmaps. Normally, it
draws in a “natural” coordinate system, but it can also do view and world transformation.
QPainter can operate on any object that inherits the QPaintDevice class.
What is Rectangle ?
According to Wikipedia in Euclidean plane geometry, a rectangle is a quadrilateral with four right
angles. It can also be defined as an equiangular quadrilateral, since equiangular means that all of
its angles are equal. It can also be defined as a parallelogram containing a right angle.
So now this is the complete source code for Python Creating Rectangle in Pyside2 with QPainter
|
1 2 3 4 5 6 7 8 9 10 11 12 13 14 15 16 17 18 19 20 21 22 23 24 25 26 27 28 29 30 |
from PySide2.QtWidgets import QApplication, QWidget from PySide2.QtGui import QPainter, QPen, QBrush from PySide2.QtCore import Qt import sys class Window(QWidget): def __init__(self): super().__init__() self.setWindowTitle("Pyside2 Drawing Rectangle") self.setGeometry(300,200,700,500) self.show() def paintEvent(self, e): painter = QPainter(self) painter.setPen(QPen(Qt.black, 5, Qt.SolidLine)) # painter.setBrush(QBrush(Qt.red, Qt.SolidPattern)) painter.setBrush(QBrush(Qt.green, Qt.DiagCrossPattern)) painter.drawRect(100, 15, 400, 200) app = QApplication(sys.argv) window = Window() sys.exit(app.exec_()) |
So these are the imports that we need for this article.
|
1 2 3 4 |
from PySide2.QtWidgets import QApplication, QWidget from PySide2.QtGui import QPainter, QPen, QBrush from PySide2.QtCore import Qt import sys |
In this line of code we have set our window title, also we are going to set the geometry for
the window, you can use setGeometry() method and it takes some parameters like x, y position
also width and height.
|
1 2 |
self.setWindowTitle("Pyside2 Drawing Rectangle") self.setGeometry(300,200,700,500) |
When you want to draw using QPainter class, you need to add paintEvent() method, it is a
built in method for QPainter class and it is used for drawing shapes in Pyside2. you can see in
this method first we have created the object of QPainter class, after that we have set the Pen
and Brush style for our QPainter class and at the end you can draw the rectangle using
drawRect() method, you need to set the x, y position and also width and height of the rectangle.
|
1 2 3 4 5 6 7 |
def paintEvent(self, e): painter = QPainter(self) painter.setPen(QPen(Qt.black, 5, Qt.SolidLine)) # painter.setBrush(QBrush(Qt.red, Qt.SolidPattern)) painter.setBrush(QBrush(Qt.green, Qt.DiagCrossPattern)) painter.drawRect(100, 15, 400, 200) |
For every Pyside2 application we need to create the object of QApplication.
|
1 |
app = QApplication(sys.argv) |
And this is the starting point of the loop.
|
1 |
sys.exit(app.exec_()) |
So run the complete code and this will be the result.

Subscribe and Get Free Video Courses & Articles in your Email
