In this PyQt5 Tutorial we are going to learn Working with Qt Designer, as you know PyQt5 is one of the best library for GUI Development in Python programming language. the point best about pyqt5 is this that you can use Qt Designer, it means that you can design your application using a gui designer, it has drag and drop functionalities. and you can separate your main design from the coding.
What is PyQt5 ?
PyQt5 is Python binding for Qt toolkit, it is cross platform application framework widely used for developing GUI applications. PyQt5 allows developers to create desktop applications that can run on multiple platforms, including Windows, macOS and Linux using Python programming language.
PyQt5 provides different Python modules that wraps the functionality of Qt framework, including modules for user interface elements such as buttons, labels and text boxes, as well as modules for working with graphics, databases and networking.
with PyQt5, developers can build desktop applications using powerful and flexible Python language, while taking advantage of rich feature set and cross platform capabilities of the Qt framework. PyQt5 also supports Qt Designer, it is drag and drop GUI designer tool, to quickly create and modify user interfaces.
So we can say that PyQt5 is powerful and nice tool for building cross platform desktop applications using Python, and it is widely used by developers in different industries, including software development, scientific research and education.
Learn More
- How to Create MySQL Database in PyQt5
- How to Insert Data to Mysql Database in PyQt5
- Selecting Data from Mysql Database in QTableWidget
What is Qt Designer ?
Qt Designer is the Qt tool for designing and building graphical user interfaces (GUIs) with Qt Widgets. You can compose and customize your windows or dialogs in a what-you-see-is-what-you-get (WYSIWYG) manner, and test them using different styles and resolutions. Widgets and forms created with Qt Designer integrate seamlessly with programmed code, using Qt’s signals and slots mechanism, so that you can easily assign behavior to graphical elements. All properties set in Qt Designer can be changed dynamically within the code. Furthermore, features like widget promotion and custom plugins allow you to use your own components with Qt Designer.
Installation
First of all we should install Qt Designer, because by default when you install pyqt5, we don’t have Qt Designer in their. you need to install PyQt5 Tools.
|
1 |
pip install pyqt5-tools |
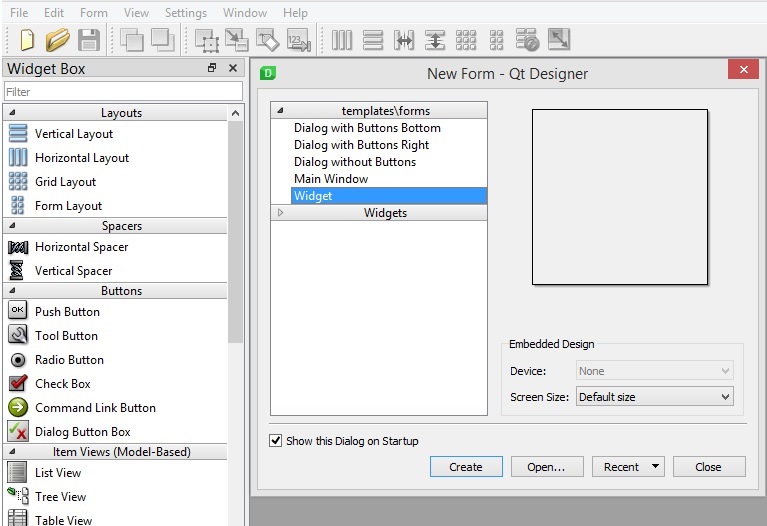
After installation you need to open your terminal and write pyqt5designer or you can writer pyqt5designer.exe. and this is our Qt Designer interface in PyQt5.

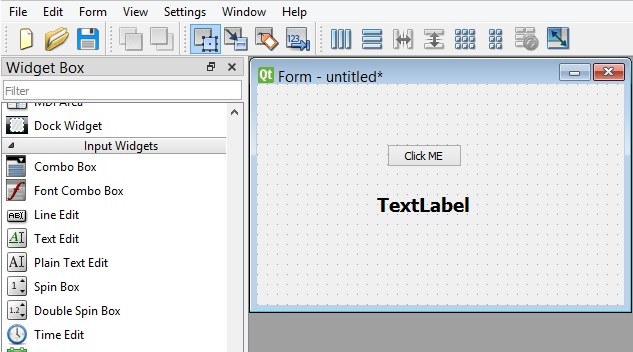
Now let’s add a QPushButton with QLineEdit in our Qt Designer.

After creating of your design. You need to save your design, and you will see that it is a .ui file extension it means user interface. Now it is time to interact with this file in our PyQt5, there are two ways that you can do, the first way is that you can directly load the ui file in your pyqt5 codes, the second way is that you can convert your .ui file in to .py file using pyuic5 module.
Loading UI File
In this way you need to just copy your UI file from Qt Designer and add that in your working directory. after that create a new python file, I want to call LoadUI.py and add this code.
|
1 2 3 4 5 6 7 8 9 10 11 12 13 14 15 16 17 |
from PyQt5.QtWidgets import QApplication, QWidget from PyQt5 import uic class UI(QWidget): def __init__(self): super().__init__() #this is used for loading ui file uic.loadUi("design.ui", self) app = QApplication([]) window = UI() window.show() app.exec_() |
So you can use uic module for loading of UI file.
|
1 |
uic.loadUi("design.ui", self) |
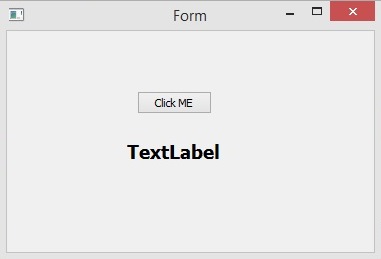
Run the code and this is the result.

To find an object, we can use findChild on anyone of it’s parent objects while supplying the type of widget we are getting and the name. make sure that you have given name for your widgets. for example in here we want to find our QPushButton and QLabel. so you can use this code.
|
1 2 |
button = self.findChild(QPushButton, 'pushButton') self.label = self.findChild(QLabel, "label") |
This is the code first we have found our QPushButton with QLabel, and after that we have connected the clicked signal of the button with the method that we have created.
|
1 2 3 4 5 6 7 8 9 10 11 12 13 14 15 16 17 18 19 20 21 22 23 24 25 26 27 28 29 |
from PyQt5.QtWidgets import QApplication, QWidget, QPushButton, QLabel from PyQt5 import uic class UI(QWidget): def __init__(self): super().__init__() #this is used for loading ui file uic.loadUi("design.ui", self) # find our widgets button = self.findChild(QPushButton, 'pushButton') button.clicked.connect(self.clicked) self.label = self.findChild(QLabel, "label") #Creating method for connecting to the clicked signal of button def clicked(self): self.label.setText("Codeloop") app = QApplication([]) window = UI() window.show() app.exec_() |
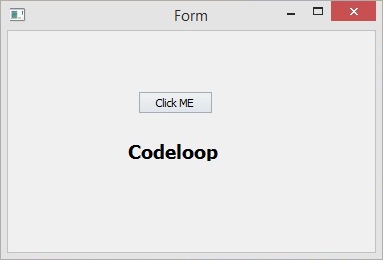
Run the code and this is the result

Convert UI File to Python File
In this way we are using pyuic5 module, it is located in the Scripts folder of your python installation, you need to just copy your .ui file in your Scripts folder and after that run this command. this will convert your ui file in to python file.
|
1 |
pyuic5 design.ui -o design.py -x |
And this is the converted code. also we have added our clicked_btn() method, because we want to connect that method with the clicked signal of the QPushButton.
|
1 2 3 4 5 6 7 8 9 10 11 12 13 14 15 16 17 18 19 20 21 22 23 24 25 26 27 28 29 30 31 32 33 34 35 36 37 38 39 40 41 42 43 44 45 46 47 48 49 50 51 52 53 54 55 56 57 |
# -*- coding: utf-8 -*- # Form implementation generated from reading ui file 'design.ui' # # Created by: PyQt5 UI code generator 5.15.1 # # WARNING: Any manual changes made to this file will be lost when pyuic5 is # run again. Do not edit this file unless you know what you are doing. from PyQt5 import QtCore, QtGui, QtWidgets class Ui_Form(object): def setupUi(self, Form): Form.setObjectName("Form") Form.resize(367, 221) self.pushButton = QtWidgets.QPushButton(Form) self.pushButton.setGeometry(QtCore.QRect(130, 60, 75, 23)) self.pushButton.setObjectName("pushButton") #connect the method with the clicked signal self.pushButton.clicked.connect(self.clicked_btn) self.label = QtWidgets.QLabel(Form) self.label.setGeometry(QtCore.QRect(120, 110, 101, 20)) font = QtGui.QFont() font.setPointSize(14) font.setBold(True) font.setWeight(75) self.label.setFont(font) self.label.setObjectName("label") self.retranslateUi(Form) QtCore.QMetaObject.connectSlotsByName(Form) # Creating method for connecting to the clicked signal of button def clicked_btn(self): self.label.setText("Codeloop") def retranslateUi(self, Form): _translate = QtCore.QCoreApplication.translate Form.setWindowTitle(_translate("Form", "Form")) self.pushButton.setText(_translate("Form", "Click ME")) self.label.setText(_translate("Form", "TextLabel")) if __name__ == "__main__": import sys app = QtWidgets.QApplication(sys.argv) Form = QtWidgets.QWidget() ui = Ui_Form() ui.setupUi(Form) Form.show() sys.exit(app.exec_()) |
Run the code and the result will be the same.

Subscribe and Get Free Video Courses & Articles in your Email