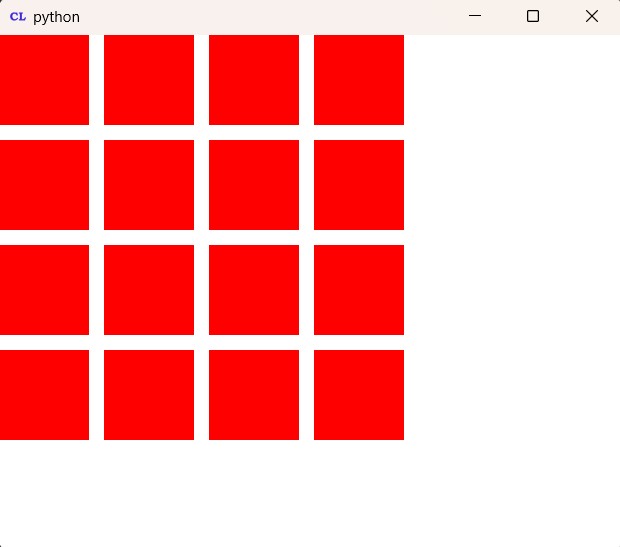
In this PyQt5 QtQuick QML article iam going to show you Creating Grid, also iam going to show you creating of repeaters in QML. so first of all let’s talk about Grid in PyQt5.
PyQt5 QtQuick QML Tutorial: Creating Grid and Repeater
Grid is a type that positions its child items in grid formation. A Grid creates a grid of cells that is large enough to hold all of its child items, and places these items in the cells from left to right and top to bottom. Each item is positioned at the top-left corner of its cell with position (0, 0). A Grid defaults to four columns, and creates as many rows as are necessary to fit all of its child items. The number of rows and columns can be constrained by setting the rows and columns properties.
Creating Grid in PyQt5 QtQuick QML
OK now you need to create two files in your Pycharm IDE, the first one is grid.qml and the second one main.qml, This is our grid.qml.
|
1 2 3 4 5 6 7 8 9 10 11 12 13 14 15 16 17 18 19 20 21 22 23 24 25 26 27 28 29 30 31 32 33 34 35 36 37 38 39 40 |
import QtQuick.Window 2.2 import QtQuick 2.3 Window { visible:true id:root width:360 height:360 Grid { spacing:15 columns:4 rows:4 Repeater { model:16 Rectangle { color:"red" width:360/4 height:360/4 } } } } |
This is our main window and there are the width and height for the window.
|
1 2 3 4 5 |
Window { visible:true id:root width:360 height:360 |
OK now this is the grid, you can see that we have columns and rows for our grids.
|
1 2 3 4 |
Grid { spacing:15 columns:4 rows:4 |
Also we are going to create repeater and we give the size of 16 for the repeater. because we want to create 16 rectangle.
Understanding Repeater in PyQt5 QtQuick QML
So the Repeater type is used to create a large number of similar items. Like other view types, a Repeater has a model and a delegate: for each entry in the model, the delegate is instantiated in a context seeded with data from the model. A Repeater item is usually enclosed in a positioner type such as Row or Column to visually position the multiple delegate items created by the Repeater.
|
1 2 3 4 5 6 7 8 9 10 11 12 13 14 15 16 |
Repeater { model:16 Rectangle { color:"red" width:360/4 height:360/4 } } |
Running the PyQt5 QtQuick QML Application
To run the complete application, we use PyQt5 to load and execute the QML file. This is a Python code to run the QML application:
|
1 2 3 4 5 6 7 8 9 10 11 12 13 14 15 16 17 18 19 20 21 22 23 24 25 26 27 28 29 30 31 32 |
from PyQt5.QtQml import QQmlApplicationEngine from PyQt5.QtWidgets import QApplication from PyQt5.QtGui import QIcon import sys # Define function to run the QML application def runQML(): # Create an instance of QApplication app = QApplication(sys.argv) # Create an instance of QQmlApplicationEngine engine = QQmlApplicationEngine() # Set window icon for the application app.setWindowIcon(QIcon("codeloop.png")) # Load QML file engine.load('grid.qml') # Check if there are any root objects loaded. If not, return -1 if not engine.rootObjects(): return -1 # Execute the application and return the exit code return app.exec_() # Entry point of the script if __name__ == "__main__": # Exit the application and return the exit code sys.exit(runQML()) |
Run the complete code and this will be the result

Subscribe and Get Free Video Courses & Articles in your Email