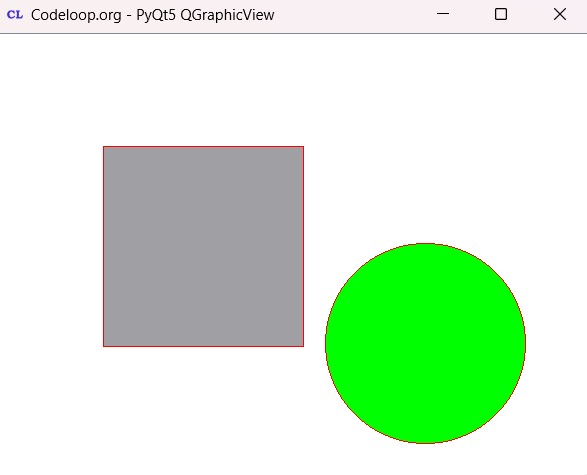
In this PyQt5 article i want to talk about PyQt5 QGraphicView And QGraphicScene Introduction. now first of all let’s talk about these two classes.
What is QGraphicView in PyQt5?
QGraphicsView is a widget provided by PyQt5 for displaying the contents of a QGraphicsScene. It serves as a viewport onto the scene, allowing users to view and interact with the graphics items within it.
What is QGraphicScene in PyQt5?
QGraphicsScene is a fundamental class in PyQt5 that represents a 2D scene, and it contains a collection of graphical items. It acts as a container for managing and organizing different graphics items, such as shapes, text, images and custom widgets.
So this is the complete code for PyQt5 QGraphicView And QGraphicScene Introduction
|
1 2 3 4 5 6 7 8 9 10 11 12 13 14 15 16 17 18 19 20 21 22 23 24 25 26 27 28 29 30 31 32 33 34 35 36 37 38 39 40 41 42 43 44 45 46 47 48 49 50 51 52 53 54 55 56 57 58 |
from PyQt5 import QtGui from PyQt5.QtWidgets import QApplication, QMainWindow, QGraphicsScene, QGraphicsView, QGraphicsItem from PyQt5.QtGui import QPen, QBrush from PyQt5.Qt import Qt import sys class Window(QMainWindow): def __init__(self): super().__init__() # Window properties self.title = "Codeloop.org - PyQt5 QGraphicsView" self.top = 200 self.left = 500 self.width = 600 self.height = 500 self.InitWindow() def InitWindow(self): # Set window icon and properties self.setWindowIcon(QtGui.QIcon("codeloop.png")) self.setWindowTitle(self.title) self.setGeometry(self.left, self.top, self.width, self.height) # Create the QGraphicsView self.createGraphicView() self.show() def createGraphicView(self): # Create a QGraphicsScene and define brushes and pen self.scene = QGraphicsScene() self.greenBrush = QBrush(Qt.green) self.grayBrush = QBrush(Qt.gray) self.pen = QPen(Qt.red) # Create QGraphicsView and set its geometry graphicView = QGraphicsView(self.scene, self) graphicView.setGeometry(0, 0, 600, 500) # Add shapes to the scene self.shapes() def shapes(self): # Add ellipse and rectangle to the scene ellipse = self.scene.addEllipse(20, 20, 200, 200, self.pen, self.greenBrush) rect = self.scene.addRect(-100, -100, 200, 200, self.pen, self.grayBrush) # Set flags for moving and selecting items ellipse.setFlag(QGraphicsItem.ItemIsMovable) rect.setFlag(QGraphicsItem.ItemIsMovable) ellipse.setFlag(QGraphicsItem.ItemIsSelectable) # Initialize the application App = QApplication(sys.argv) window = Window() sys.exit(App.exec()) |
After that we are going to create our main Window class that extends from QMainWindow. and in the constructor of the class we need to initialize some requirements of the window.
|
1 2 3 4 5 6 7 8 9 10 11 12 |
class Window(QMainWindow): def __init__(self): super().__init__() self.title = "PyQt5 QGraphicView" self.top = 200 self.left = 500 self.width = 600 self.height = 500 self.InitWindow() |
In this method we are going to set our window title, window icon and window geometry, also we need to show our window in here.
|
1 2 3 4 5 6 7 8 |
def InitWindow(self): self.setWindowIcon(QtGui.QIcon("icon.png")) self.setWindowTitle(self.title) self.setGeometry(self.left, self.top, self.width, self.height) self.createGraphicView() self.show() |
And this method is the place that we are going to create our QGraphicView and QGraphicScene. so first we have created the object of QGraphicScene. also we have created some QBrush and QPen, because we will use from them when we draw our rectangle an circle in QGraphicScene. after that we have created the object of QGraphicView, also we set the geometry for our QGraphicView.
|
1 2 3 4 5 6 7 8 9 10 11 |
def createGraphicView(self): self.scene =QGraphicsScene() self.greenBrush = QBrush(Qt.green) self.grayBrush = QBrush(Qt.gray) self.pen = QPen(Qt.red) graphicView = QGraphicsView(self.scene, self) graphicView.setGeometry(0,0,600,500) self.shapes() |
In here we draw shapes for our scene.
|
1 2 3 4 5 6 7 |
def shapes(self): ellipse = self.scene.addEllipse(20,20, 200,200, self.pen, self.greenBrush) rect = self.scene.addRect(-100,-100, 200,200, self.pen, self.grayBrush) ellipse.setFlag(QGraphicsItem.ItemIsMovable) rect.setFlag(QGraphicsItem.ItemIsMovable) ellipse.setFlag(QGraphicsItem.ItemIsSelectable) |
I have used some flags, so this flag is for making movable our rectangle and circle.
|
1 |
rect.setFlag(QGraphicsItem.ItemIsMovable) |
and this flag is for item selection.
|
1 |
ellipse.setFlag(QGraphicsItem.ItemIsSelectable) |
Run the code this will be the result also you can move the shapes

FAQs:
What is the use of PyQt5?
PyQt5 is a Python library that allows you to create desktop applications with graphical user interfaces (GUIs). PyQt5 has different widgets for building interactive and visually appealing applications for different purposes, such as productivity tools, multimedia applications and scientific visualization software.
How to make a GUI using PyQt5?
Making a GUI using PyQt5 involves creating a QApplication instance, defining one or more QWidget-based classes to represent windows or dialogs, After that we cab add PyQt5 widgets to these classes for designing the user interface. Also you can use Qt Designer for designing your GUI application, and after that you can convert your .ui file to Python code using pyuic5 tool.
Is PyQt5 hard to learn?
The difficulty of learning PyQt5 depends on the person programming experience and familiarity with GUI development concepts. PyQt5 provides different documentation, tutorials and examples to help developers get started with GUI programming.
Is PyQt5 free to use?
PyQt5 is available under the GNU General Public License (GPL) and a commercial license provided by Riverbank Computing. GPL allows PyQt5 to be freely used, modified and distributed under certain conditions. But if you plan to distribute PyQt5 based applications commercially, then you need to buy a commercial license from Riverbank Computing.
Subscribe and Get Free Video Courses & Articles in your Email