In this article iam going to talk about PyQt5 QFileDialog Browsing An Image , especially we are going to browse an Image with QFileDialog in PyQt5 , first o all the FileDialog widget provides a dialog useful for selecting of files. these are commonly used when a user wants to open or save a file within the application, so first of all let’s talk about PyQt5.
What is PyQt5 ?
PyQt5 is Python binding for the Qt cross platform application framework and it allows developers to create desktop applications with graphical user interface (GUI) using Python programming language. PyQt5 is developed by Riverbank Computing and is licensed under the GPL and commercial licenses.
Qt is popular framework for developing graphical user interfaces, and PyQt5 provides access to all of Qt’s functionality, including support for widgets, layouts, graphics, multimedia and networking and it also provides Pythonic API for working with Qt that makes it easy to create and manage GUIs in Python.
Some of the key features of PyQt5 include:
- Cross-platform support: PyQt5 allows developers to create applications that run on multiple platforms, including Windows, macOS and Linux.
- Qt Designer integration: PyQt5 includes integration with Qt Designer, Qt Designer visual tool for designing and laying out GUIs.
- Extensive documentation: PyQt5 provides extensive documentation and examples, that make it easy to learn and use.
- Support for modern Python features: PyQt5 supports the latest features of Python, such as type annotations, async/await and f-strings.
- Large community: PyQt5 has large and active community of developers and it provides support, guidance and contributions to the project.
PyQt5 is often used in desktop application development for creating GUIs with different functionality, such as data visualization, multimedia playback and database integration. it is also often used in scientific and engineering applications for creating custom visualization and analysis tools.
You can use pip for the installation of PyQt5.
|
1 |
pip install PyQt5 |
Also you can check more Python GUI articles in the below links
- Kivy GUI Development Tutorials
- TKinter GUI Development Tutorials
- Psyide2 GUI Development
- wxPython GUI Development Tutorials
- PyQt5 GUI Development Tutorials
So first we need to import some classes
|
1 2 3 4 |
from PyQt5 import QtGui from PyQt5.QtWidgets import QApplication,QWidget, QVBoxLayout, QPushButton, QFileDialog , QLabel, QTextEdit import sys from PyQt5.QtGui import QPixmap |
This is our main window class that extends from QWidget and in here we are going to initialize some requirements of the window like title and geometry.
|
1 2 3 4 5 6 7 8 9 |
class Window(QWidget): def __init__(self): super().__init__() self.title = "PyQt5 Open File" self.top = 200 self.left = 500 self.width = 400 self.height = 300 |
In here we have set the window title, icon and geometry.
|
1 2 3 |
self.setWindowIcon(QtGui.QIcon("icon.png")) self.setWindowTitle(self.title) self.setGeometry(self.left, self.top, self.width, self.height) |
When you are going to create widgets, you need to create layout, in here we are using QVBoxLayout.
|
1 |
vbox = QVBoxLayout() |
These are our widgets, also we need to add our widgets in our layout.
|
1 2 3 4 5 6 7 |
self.btn1 = QPushButton("Open Image") self.btn1.clicked.connect(self.getImage) vbox.addWidget(self.btn1) self.label = QLabel("Hello") vbox.addWidget(self.label) |
After creating of the layout, you need to set the layout for the main window.
|
1 |
self.setLayout(vbox) |
This method is used for browsing an image.
|
1 2 3 4 5 6 7 |
def getImage(self): fname = QFileDialog.getOpenFileName(self, 'Open file', 'c:\', "Image files (*.jpg *.gif)") imagePath = fname[0] pixmap = QPixmap(imagePath) self.label.setPixmap(QPixmap(pixmap)) self.resize(pixmap.width(), pixmap.height()) |
At the end we create the object of our Window and QApplication.
|
1 2 3 |
App = QApplication(sys.argv) window = Window() sys.exit(App.exec()) |
Complete source code for PyQt5 QFileDialog Browsing An Image
|
1 2 3 4 5 6 7 8 9 10 11 12 13 14 15 16 17 18 19 20 21 22 23 24 25 26 27 28 29 30 31 32 33 34 35 36 37 38 39 40 41 42 43 44 45 46 47 48 49 |
from PyQt5 import QtGui from PyQt5.QtWidgets import QApplication, QWidget, QVBoxLayout, QPushButton, QFileDialog, QLabel, QTextEdit import sys from PyQt5.QtGui import QPixmap class Window(QWidget): def __init__(self): super().__init__() self.title = "PyQt5 Open File" self.top = 200 self.left = 500 self.width = 400 self.height = 300 self.InitWindow() def InitWindow(self): self.setWindowIcon(QtGui.QIcon("icon.png")) self.setWindowTitle(self.title) self.setGeometry(self.left, self.top, self.width, self.height) vbox = QVBoxLayout() self.btn1 = QPushButton("Open Image") self.btn1.clicked.connect(self.getImage) vbox.addWidget(self.btn1) self.label = QLabel("Hello") vbox.addWidget(self.label) self.setLayout(vbox) def getImage(self): fname = QFileDialog.getOpenFileName(self, 'Open file') imagePath = fname[0] pixmap = QPixmap(imagePath) self.label.setPixmap(QPixmap(pixmap)) self.resize(pixmap.width(), pixmap.height()) App = QApplication(sys.argv) window = Window() window.show() sys.exit(App.exec_()) |
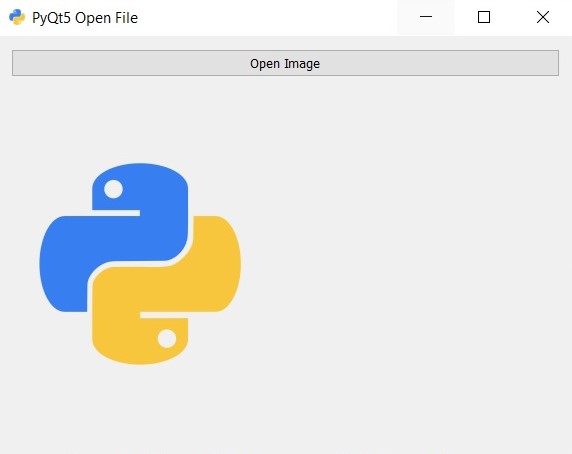
Run your code open an image and this will be the output

Now let’s create another example on PyQt5 QFileDialog Browsing An Image, this time we are going to create menu for our PyQt5 Application.
|
1 2 3 4 5 6 7 8 9 10 11 12 13 14 15 16 17 18 19 20 21 22 23 24 25 26 27 28 29 30 31 32 33 |
import sys from PyQt5.QtWidgets import QApplication, QMainWindow, QLabel, QAction, QFileDialog from PyQt5.QtGui import QPixmap class MainWindow(QMainWindow): def __init__(self): super().__init__() # Create a menu bar and add a "Open Image" action menubar = self.menuBar() file_menu = menubar.addMenu('File') open_image_action = QAction('Open Image', self) open_image_action.triggered.connect(self.browse_image) file_menu.addAction(open_image_action) # Create a QLabel to display the loaded image self.image_label = QLabel(self) self.setCentralWidget(self.image_label) def browse_image(self): # Open a file dialog to browse for an image file filename, _ = QFileDialog.getOpenFileName(self, 'Open Image', '', 'Image files (*.jpg *.jpeg *.png)') # Load the selected image and display it in the QLabel if filename: pixmap = QPixmap(filename) self.image_label.setPixmap(pixmap) if __name__ == '__main__': app = QApplication(sys.argv) window = MainWindow() window.show() sys.exit(app.exec_()) |
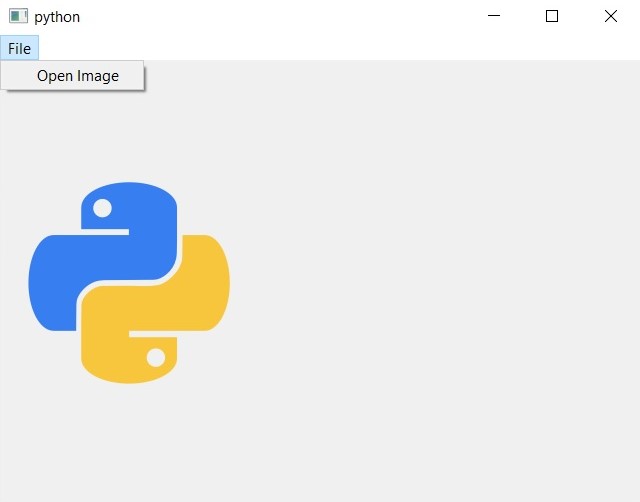
In this example we have created QMainWindow with menu bar that includes an “Open Image” action. when this action is triggered, the browse_image method is called, which opens QFileDialog to allow the user to select an image file. Once file is selected, the browse_image method loads the selected image into a QPixmap and displays it in a QLabel.
Note that we have limited the file types that can be selected to .jpg, .jpeg, and .png files, but you can modify this to suit your needs.
Run your code open an image using menu item, you will see this result

Also you can watch the complete video for this article.
Subscribe and Get Free Video Courses & Articles in your Email
Hi,
How to send the image in a second window by click.
Thanks