In this Java GUI article we are going to learn about JavaFX Window Example, so if you are
Java programmer, you know that there are two popular options for GUI Development on
Java Programming Language, the first one is Swing and the second one is JavaFX. comparing
to Swing, JavaFX is one the best GUI Development option for Java. because JavaFX is a GUI
toolkit that allows you to rapidly build rich cross-platform applications. JavaFX takes advantage
of modern GPUs through hardware-accelerated graphics while providing well-designed
programming interfaces enabling developers to combine graphics, animation, and UI controls.
Also you can check Python GUI Development Tutorials in the below link.
1: PyQt5 GUI Development Tutorials
2: TKinter GUI Development Tutorials
3: Pyside2 GUI Development Tutorials
4: Kivy GUI Development Tutorials
5: wxPython GUI Development Tutorials
Requirements
So for working with JavaFX examples, you need to setup your development environment to
compile and run the program. for JavaFX examples you need to download and install
JDK (Java Development Kit). also we are using JetBrain Pycharm IDE.
OK now let’s create our first project in JavaFX.
- Launch JetBrain Pycharm IDE.
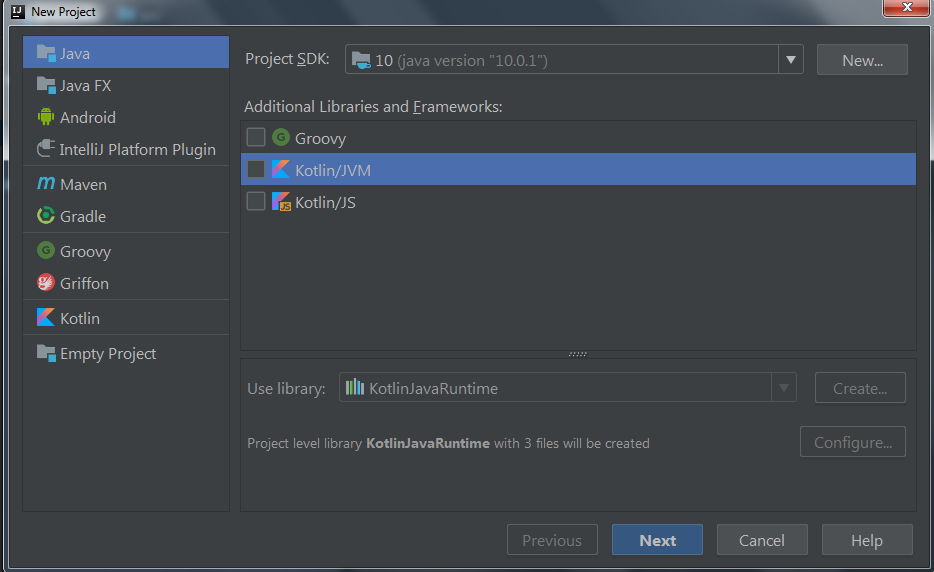
- On the File menu, select File ➤ New Project.
- After that choose Java and Kotlin/JVM.
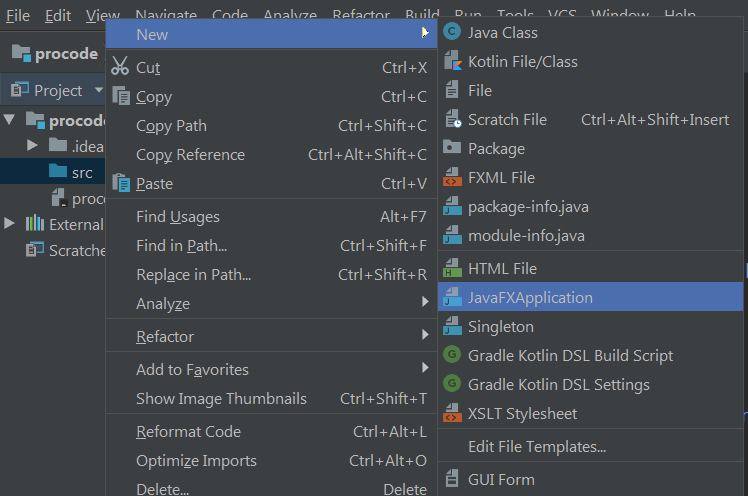
- In the Project we create our JavaFX Application.


After that give a name for your JavaFX application, now you will receive a Java file
like this.
|
1 2 3 4 5 6 7 8 9 10 11 12 13 14 15 |
import javafx.application.Application; import javafx.stage.Stage; public class HelloWorld extends Application { public static void main(String[] args) { launch(args); } @Override public void start(Stage stage) { } } |
So we need to write all our JavaFX codes in the start() method. because when the program
begins in the start method a separate thread of execution occurs, that we can call it
JavaFX application thread. now let’s add our JavaFX Window Example in here. we
are going to add this code in the start() method.
|
1 2 3 4 5 6 7 8 9 10 11 12 13 14 15 16 17 |
//window title stage.setTitle("JavaFX GUI Application"); //javafx container Group root = new Group(); //creating scene Scene scene = new Scene(root, 400, 300); //set scene to stage stage.setScene(scene); //show the stage stage.show(); |
So every JavaFX applications should have a container, a container is like layout. as we have created a Group container in the above code.
|
1 |
Group root = new Group(); |
Also for every JavaFX application we need to create a Scene object. in the scene we need to add our container with the width and height of the window, if you want to colorize your window, you can do it in here.
|
1 |
Scene scene = new Scene(root, 400, 300); |
At the end you need to set your scene object to the stage of the window, and show the window.
|
1 2 |
stage.setScene(scene); stage.show(); |
So now this the complete code for Java GUI – JavaFX Window Example .
|
1 2 3 4 5 6 7 8 9 10 11 12 13 14 15 16 17 18 19 20 21 22 23 24 25 26 27 28 29 30 31 32 33 34 35 36 37 38 |
import javafx.application.Application; import javafx.scene.Group; import javafx.scene.Scene; import javafx.stage.Stage; public class HelloWorld extends Application { public static void main(String[] args) { launch(args); } @Override public void start(Stage stage) { //window title stage.setTitle("JavaFX GUI Application"); //javafx container Group root = new Group(); //creating scene Scene scene = new Scene(root, 400, 300); //set scene to stage stage.setScene(scene); //show the stage stage.show(); } } |
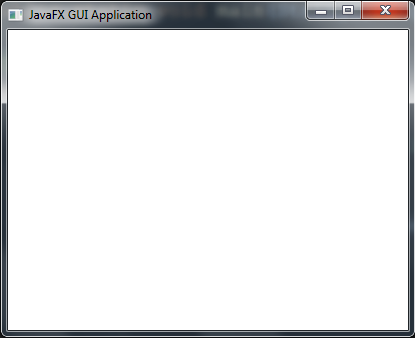
If you run the code, you will see that we have a nice window in JavaFX.

Subscribe and Get Free Video Courses & Articles in your Email