In this Python Flask article we are going to learn How to Upload Files With Python Flask ,
so for this purpose we are using Flask-Uploads library. Flask-Uploads allows your application
to flexibly and efficiently handle file uploading and serving the uploaded files. You can create
different sets of uploads – one for document attachments, one for photos, etc. – and the application
can be configured to save them all in different places and to generate different URLs for them.
Learn How to Work with Flask Login and Flask Logout
Installation
So first of all you need to install Flask-Uploads, you can easily use pip for the installation.
|
1 |
pip install Flask-Uploads |
OK after installation, you need to create a python file at name of app.py, and add these codes in
that file. there are some imports from flask_uploads that we will need in this article. after that you
can see that we have Upload Sets, so an “upload set” is a single collection of files. and you can see
that we have just one upload set. now you need to configure the location of the uploaded image
for example in here when ever i upload the image it will be saved in the static/images folder.
|
1 2 3 4 5 6 7 8 9 10 11 12 13 14 15 16 17 18 19 20 21 22 23 24 25 26 27 28 |
from flask import Flask, render_template, request, flash from flask_uploads import UploadSet, configure_uploads, IMAGES app = Flask(__name__) app.config['SECRET_KEY'] = 'hardsecretkey' photos = UploadSet('photos', IMAGES) app.config['UPLOADED_PHOTOS_DEST'] = 'static/images' configure_uploads(app, photos) @app.route('/', methods=['GET', 'POST']) def upload(): if request.method == 'POST' and 'photo' in request.files: filename = photos.save(request.files['photo']) return filename return render_template('upload.html') if __name__ == "__main__": app.run(debug=True) |
Now you need to create a templates folder because we want to add our template, we have
just one template that is upload.html.
templates/upload.html
|
1 2 3 4 5 6 7 8 9 10 11 12 13 14 15 16 17 18 19 20 21 22 23 24 25 26 27 28 29 30 |
<!DOCTYPE html> <html lang="en"> <head> <meta charset="UTF-8"> <title>Upload</title> <!-- CSS Bootstrap CDN Link --> <link rel="stylesheet" href="https://stackpath.bootstrapcdn.com/bootstrap/4.5.0/css/bootstrap.min.css" integrity="sha384-9aIt2nRpC12Uk9gS9baDl411NQApFmC26EwAOH8WgZl5MYYxFfc+NcPb1dKGj7Sk" crossorigin="anonymous"> </head> <body> <div class="container"> <br> <br> <hr> <form method=POST enctype=multipart/form-data action="{{ url_for('upload') }}"> <input type=file name=photo> <input type="submit" class="btn btn-success"> </form> </div> </body> </html> |
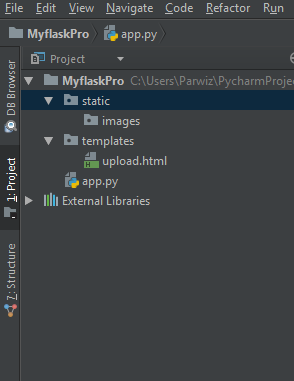
Also you need to create an static folder and in the static folder create another folder at name
of images, because after uploading the image we want to save the image in that path.
This is our Project structure.

Now run your Flask Project and go to http://localhost:5000/

After that choose a file and upload that , this will be the result, you will receive the uploaded image
or file name back.

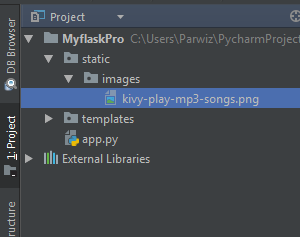
And if you check your static/images, you will see your uploaded image in their.

Subscribe and Get Free Video Courses & Articles in your Email
Thanks!
This Helped Me out A lot 🙂
your welcome
nice and easy tut for uploading images to folder