In this React Native tutorial we are going to learn How to Create View Component in React Native, there are different built in components in React Native that you can use, React Native provides a number of built in core components that you can directly use them in your applications, as an example we can use View, Button, Text and etc. so View is a type of built in component in React Native. the View component, simply put, is a container element that supports layout with flexbox, styling via CSS, some general touch handling, and accessibility controls. As such, View components come in many forms, but a basic usage might be as follows:
|
1 |
<View style={{ width : 200, height : 100, backgroundColor : "red" }} > |
This creates on the screen a red box 200 pixels wide and 100 pixels high, also in here we have used inline styles for the view component.
So first we want to create our React Native Project we are going to use Expo Cli.
First install expo cli.
|
1 |
npm install -g expo-cli |
After that create your React Native Project with Expo CLI. you can give the name of your project as you want.
|
1 |
expo init AwesomeProject |
After creating of the React Native Project, now open your App.js file and create a View component. make sure that you have imported the View component from React Native. and add this code in your App.js file.
|
1 2 3 4 |
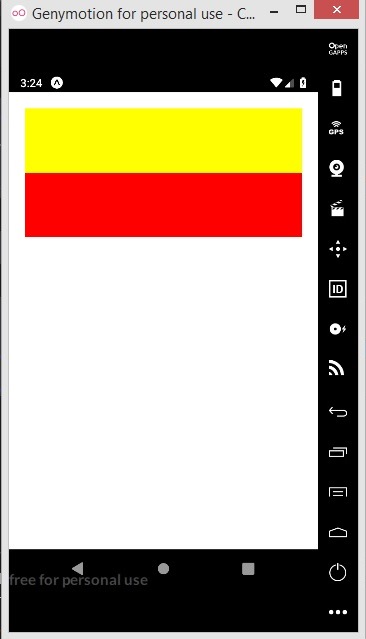
<View style={{ flexDirection : "column", height : 200, padding: 20 }}> <View style={{ backgroundColor : "yellow", flex : 0.5}} /> <View style={{ backgroundColor : "red", flex : 0.5}} /> </View> |
In the above code we have created three View component, also you can give background color, height, width and padding for a view.
This is the complete code for App.js.
|
1 2 3 4 5 6 7 8 9 10 11 |
import React from 'react'; import {View } from 'react-native'; export default function App() { return ( <View style={{ flexDirection : "column", height : 200, padding: 20 }}> <View style={{ backgroundColor : "yellow", flex : 0.5}} /> <View style={{ backgroundColor : "red", flex : 0.5}} /> </View> ); } |
Now change directory to your created project and run your project.
|
1 2 |
cd AwesomeProject npm start |
After that run your application from metro bundler, make sure that you have started your virtual emulator.
Subscribe and Get Free Video Courses & Articles in your Email