In this Python PyQt5 article we want to learn How to Create Python PyQt5 Window in 2023, also in the article we will talk about PyQt5 and also the installation process of PyQt5.
What Is PyQt5 ?
PyQt5 is a binding for Qt5 C++ a GUI framework for C++ programming language, PyQt5 is used to write all kinds of GUI applications, from accounting applications, to visualization tools used by scientists and engineers. it is possible to write PyQt5 applications that are just tens of lines long, and medium-size projects of 1000 to 10000 lines are very common. PyQt5 can be used free of charge for noncommercial purposes, but the license used by Python is different from that used by PyQt5 and Qt. Python is available with a very liberal license that allows it to be used to development both commercial and noncommercial applications. Both PyQt and Qt are dual-licensed: This essentially allows them to be used to develop noncommercial applications, which must in turn be licensed using an acceptable open source license such as the GNU General Public License (GPL); or to be used to develop commercial applications—in this case, a commercial PyQt license and a commercial Qt license must be purchased.
How to Create Python PyQt5 Window in 2023
First if all we need to install PyQt5 library and we can use pip for the installation.
|
1 |
pip install PyQt5 |
Join PyQt5 Full Course for Free
PyQt5 Course
Also you can read more Python GUI articles in the below links
- Kivy GUI Development Tutorials
- TKinter GUI Development Tutorials
- Pyside2 GUI Development
- wxPython GUI Development Tutorials
- PyQt5 GUI Development Tutorials
Once you have installed PyQt5, you can import the necessary modules in your Python code. You will typically need to import QApplication to create the application instance, QWidget to create the window, and any other widgets you want to add to the window.
This is an example of importing the necessary modules:
|
1 2 3 |
from PyQt5 import QtGui from PyQt5.QtWidgets import QApplication, QMainWindow import sys |
To create a PyQt5 window, you first need to create a window object. You can create a window object by subclassing QWidget, which is the base class for all widgets in PyQt5.
This is an example of creating a window object:
|
1 2 3 4 5 6 7 |
class MyWindow(QWidget): def __init__(self): super().__init__() self.setWindowTitle('My Window') self.setGeometry(100, 100, 300, 200) |
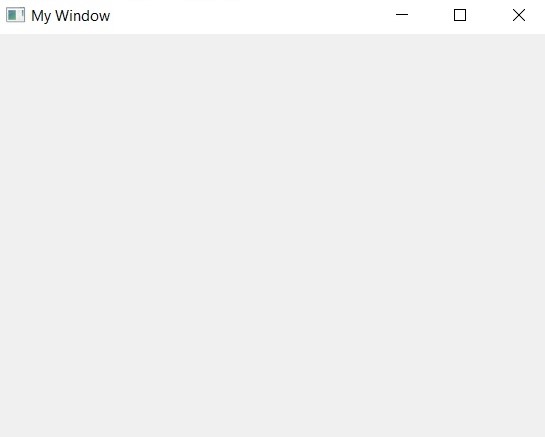
In this example we have created MyWindow class that inherits from QWidget. we set the window title to “My Window” using setWindowTitle and set the window size and position using setGeometry.
Once you’ve created the window object and added widgets to it, you can run the application by creating an instance of QApplication and calling its exec_() method.
This is an example of running the application:
|
1 2 3 4 5 6 7 8 |
if __name__ == '__main__': app = QApplication(sys.argv) window = MyWindow() window.show() sys.exit(app.exec_()) |
In this example we have create an instance of QApplication using app = QApplication(sys.argv). after that we have created an instance of our MyWindow class and call its show() method to display the window. and lastly we call sys.exit(app.exec_()) to run the application event loop.
This is the complete code
|
1 2 3 4 5 6 7 8 9 10 11 12 13 14 15 16 17 18 19 20 21 22 23 |
from PyQt5 import QtGui from PyQt5.QtWidgets import QApplication, QMainWindow import sys class MyWindow(QMainWindow): def __init__(self): super().__init__() self.setWindowTitle('My Window') self.setGeometry(100, 100, 300, 200) if __name__ == '__main__': app = QApplication(sys.argv) window = MyWindow() window.show() sys.exit(app.exec_()) |
Run the complete code and this will be the result

Also you can add widgets to it using different PyQt5 widgets available. PyQt5 provides different widgets including buttons, labels, text boxes and many more.
|
1 2 |
self.button = QPushButton('Click me', self) self.button.setGeometry(100, 100, 100, 30) |
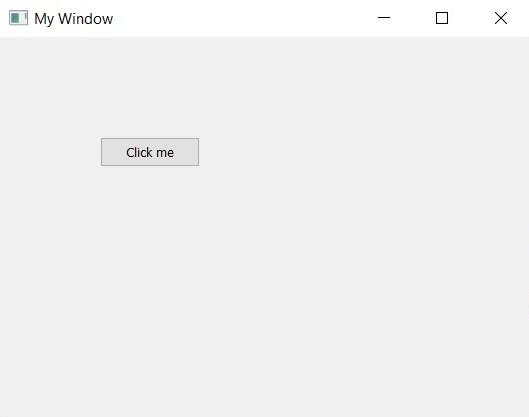
In this example we have created QPushButton widget and add it to the window using self.button = QPushButton(‘Click me’, self). we also set the button size and position using self.button.setGeometry(100, 100, 100, 30).
This is the complete code
|
1 2 3 4 5 6 7 8 9 10 11 12 13 14 15 16 17 18 19 20 21 22 23 24 25 26 |
from PyQt5 import QtGui from PyQt5.QtWidgets import QApplication, QMainWindow, QPushButton import sys class MyWindow(QMainWindow): def __init__(self): super().__init__() self.setWindowTitle('My Window') self.setGeometry(100, 100, 300, 200) self.button = QPushButton('Click me', self) self.button.setGeometry(100, 100, 100, 30) if __name__ == '__main__': app = QApplication(sys.argv) window = MyWindow() window.show() sys.exit(app.exec_()) |
Run the code and this will be the result

Also you can watch the complete video for this article
Subscribe and Get Free Video Courses & Articles in your Email