In this lesson we want to learn about How to Create Custom Notification in ElectronJS, so first of all What is ElectronJs?
What is ElectronJs?
ElectronJS is a framework that allows developers to build crossplatform desktop applications using web technologies such as JavaScript, HTML and CSS. It is built on top of Chromium, open source version of Google Chrome and Node.js, which provides runtime environment for JavaScript. with ElectronJS, you can use the same codebase to create applications for Windows, Mac and Linux. this eliminates the need to write separate code for different platforms and it makes it development faster and more efficient.
Main Structure of ElectronJS
Structure of an ElectronJS application is composed of two main parts: main process which runs on the desktop and manages the application’s lifecycle, and the renderer process, which runs in web page and handles the user interface. main process and the renderer process communicate with each other through inter-process communication (IPC) mechanisms. ElectronJS also provides set of built in modules such as electron and remote modules, which allow developers to access the native functionality of the operating system and perform tasks such as creating windows and accessing file system or displaying notifications.
Applications that are Created with ElectronJS
ElectronJS is used by many popular applications such as Visual Studio Code, Slack and Discord. It is also well good for creating desktop applications that require offline capabilities, native system integration, or access to hardware devices.
This is an example of how to create a custom notification in ElectronJS using notification module:
|
1 2 3 4 5 6 7 8 9 10 11 12 13 |
const {app, Notification} = require('electron'); function createNotification() { let notification = new Notification({ title: 'Hello, World!', body: 'This is a custom notification in ElectronJS.', icon: '/path/to/icon.png' }); notification.show(); } app.whenReady().then(createNotification); |
This code creates new instance of the Notification class, passing in an options object with the title, body and icon properties. show() method is called to display notification. whenReady() method of the app module is used to wait for the app to be ready before creating the notification.
You can also add click event listener that will be triggered when the user clicks on notification, like this:
|
1 2 3 |
notification.on('click', () => { console.log('Notification clicked'); }); |
You can also add an action to the notification like this:
|
1 2 3 4 |
notification.addEventListener('show', (event) => { event.preventDefault(); notification.close(); }); |
This is simple exampl but it demonstrates how to create custom notifications in ElectronJS. You can customize the notification further by adding different options, like buttons and custom actions.
This is the complete code for index.js – How to Build Custom Notifications in ElectronJS
|
1 2 3 4 5 6 7 8 9 10 11 12 13 14 15 16 17 18 19 20 21 22 23 24 25 26 27 28 29 30 31 32 33 34 35 36 37 38 39 40 41 42 43 44 |
const {app, BrowserWindow, Notification} = require('electron'); let mainWindow; function createWindow() { mainWindow = new BrowserWindow({ width: 800, height: 600, webPreferences: { nodeIntegration: true } }); mainWindow.loadFile('index.html'); mainWindow.on('closed', function () { mainWindow = null; }); } function createNotification() { let notification = new Notification({ title: 'Codeloop.org', body: 'Welcome to codeloop.org, this is for testing', icon: 'codeloop.png' }); notification.on('click', () => { console.log('Notification clicked'); }); notification.show(); } app.whenReady().then(createWindow).then(createNotification); app.on('window-all-closed', function () { if (process.platform !== 'darwin') { app.quit(); } }); app.on('activate', function () { if (mainWindow === null) { createWindow(); } }); |
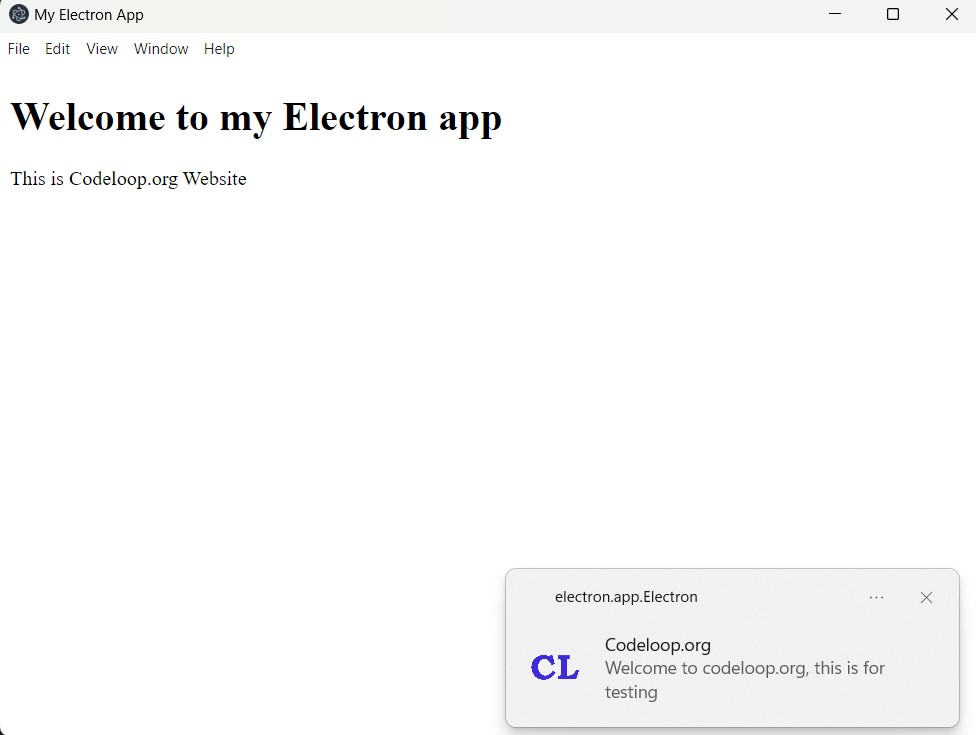
In this example createWindow() function creates new BrowserWindow instance, loads the index.html file and sets up an event listener to handle when the window is closed. createNotification() function creates new instance of the Notification class, passing in an options object with the title, body and icon properties and sets up an event listener to handle when the notification is clicked. The whenReady() method of the app module is used to wait for the app to be ready before creating the window and notification.
This is basic example, you can customize the window, html, css and the notification according to your needs.
This is basic index.html file
|
1 2 3 4 5 6 7 8 9 10 11 |
<!DOCTYPE html> <html> <head> <meta charset="UTF-8"> <title>My Electron App</title> </head> <body> <h1>Welcome to my Electron app</h1> <p>This is Codeloop.org Website</p> </body> </html> |
This file creates simple HTML document with <h1> heading and <p> paragraph. you can add more elements, styles and scripts to make it more interactive and beautiful. You can also include external CSS and JavaScript files to give more functionality to your app.
Note: You can run the application with npm start, also make sure that you have installed electronjs.
|
1 |
npm install electron |
Run the code using npm start and this will be the result

Subscribe and Get Free Video Courses & Articles in your Email