In this article we are going to talk about Django REST Framework Course for Beginners, also for more information about Django REST Framework Course for Beginners you can check the complete video for this article.
What are RESTFull API’s
A RESTful API acts as a translator between two machines communicating over a Web service. If your familiar with the concept of API This is just like an API but it’s working on a RESTful Web service and the API is used by two applications trying to communicate with each other over a network or Internet.
Web developers program REST API that server can receive data from applications. These applications can be web-apps, Android/iOS apps, etc. RESTful APIs return JSON files which can be interpreted by a variety of devices.
What is Django REST Framework
Django REST framework is a powerful and flexible toolkit for building Web APIs.
Some reasons you might want to use REST framework:
- The Web browsable API is a huge usability win for your developers.
- Authentication policies including packages for OAuth1a and OAuth2.
- Serialization that supports both ORM and non-ORM data sources.
- Customizable all the way down – just use regular function-based views if you don’t need the more powerful features.
- Extensive documentation, and great community support.
- Used and trusted by internationally recognised companies including Mozilla, Red Hat, Heroku, and Eventbrite.
Also you can read more django articles
1: Django Pagination Complete Example
2: Django Sending Email to Gmail Account
3: Build News Application in Django
5: Django User Authentication Framework
Also you can watch the complete video for Django REST Framework Course for Beginners
Installation
For the installation you can just use pip.
|
1 |
pip install djangorestframework |
OK after installation we need to create a new project in Django, and iam going to give the project name as MyProject.
|
1 |
django-admin startproject MyProject |
Now you need to change directory to the created project, after that create a new App, iam going to call my app as api_basic.
|
1 |
python manage.py startapp api_basic |
Also we need to create a superuser for our project like this.
|
1 |
python manage.py createsuperuser |
Now you need to open your django settings.py and add django rest_framework with your created app in the INSTALLED_APP of setting.
|
1 2 3 4 5 |
INSTALLED_APPS = ( ... 'rest_framework', 'api_basic', ) |
The important concept in building api is serializer, now you need to create a new python file in your created app at name of serializer.py, right now we are not adding any thing to this file.
What is Serializer
Before sending data to the client we need to serialize the data to JSON. the first thing we need to get started on our Web API is to provide a way of serializing and deserializing the data instances into representations such as json. We can do this by declaring serializers that work very similar to Django’s forms.
So now it is time to create our model, now you need to open your models.py file in your app, and add this code, basically we are going to create an Article model.
|
1 2 3 4 5 6 7 8 9 10 11 12 13 14 |
from django.db import models # Create your models here. class Article(models.Model): title = models.CharField(max_length=100) author =models.CharField(max_length=100) email = models.EmailField(max_length=100) date = models.DateTimeField(auto_now_add=True) def __str__(self): return self.title |
As in the top we have added the rest_framework to our installed app, also we have created a new model, now you need to migrate.
|
1 |
python manage.py makemigrations |
|
1 |
python manage.py migrate |
Now we can add our model in the admin.py, because we are using django super user for adding data.
|
1 2 3 4 5 6 7 |
from django.contrib import admin from .models import Article # Register your models here. admin.site.register(Article) |
OK now we are going to add codes in our serializer.py file, that we have already created. there are different serialzers that you can use, we will do this step by step.
If you are using this method, you need to specify all models fields to your seriaizer file.
|
1 2 3 4 5 6 7 8 9 10 11 12 13 14 15 16 17 18 19 20 21 22 23 24 25 26 27 28 29 |
from rest_framework import serializers from .models import Article class ArticleSerializer(serializers.Serializer): title = serializers.CharField(max_length=100) author = serializers.CharField(max_length=100) email = serializers.EmailField(max_length=100) date = serializers.DateTimeField() def create(self, validated_data): # Create and return a new `Article` instance, given the validated data. return Article.objects.create(validated_data) def update(self, instance, validated_data): #Update and return an existing `Article` instance, given the validated data. instance.title = validated_data.get('title', instance.title) instance.author = validated_data.get('author', instance.author) instance.email = validated_data.get('email', instance.email) instance.date = validated_data.get('date', instance.date) instance.save() return instance |
The first part of the serializer class defines the fields that get serialized/deserialized. The create() and update() methods define how fully fledged instances are created or modified when calling serializer.save()
A serializer class is very similar to a Django Form class, and includes similar validation flags on the various fields, such as required, max_length and default.
OK now open django shell using this command.
|
1 |
python manage.py shell |
So in django shell first of all you need these imports.
|
1 2 3 4 5 6 7 |
In [1]: from api_basic.models import Article In [2]: from api_basic.serializers import ArticleSerializer In [3]: from rest_framework.renderers import JSONRenderer In [4]: from rest_framework.parsers import JSONParser |
Now we need to create an article and save that.
|
1 2 3 4 |
In [5]: a = Article(title = 'New Article', author ='Parwiz', email = 'par@gmail.com', ) ...: In [6]: a.save() |
If you check your django admin panel, you can see that i have a new article. also you can add as much as articles you want.
now let’s just serialize the article, we are going to again django shell.
|
1 2 3 4 5 |
In [9]: serializer = ArticleSerializer(a) In [10]: serializer.data Out[10]: {'title': 'Article Title', 'author': 'John', 'email': 'john@gmail.com', 'date': '2020-05-24T09:14:02.081688Z'} |
At this point we’ve translated the model instance into Python native datatypes. To finalize the serialization process we render the data into json.
|
1 2 3 4 |
In [11]: content = JSONRenderer().render(serializer.data) ...: content Out[11]: b'{"title":"Article Title","author":"John","email":"john@gmail.com","date":"202 0-05-24T09:14:02.081688Z"}' |
Now this is our serialized data.
We can also serialize querysets instead of model instances. To do so we simply add a many=True flag to the serializer arguments.
|
1 2 |
In [13]: serializer = ArticleSerializer(Article.objects.all(), many=True) ...: serializer.data |
ModelSerializers
Our ArticleSerializer class is replicating a lot of information that’s also contained in the Article model. It would be nice if we could keep our code a bit more concise. In the same way that Django provides both Form classes and ModelForm classes, REST framework includes both Serializer classes, and ModelSerializer classes.
Let’s look at refactoring our serializer using the ModelSerializer class
|
1 2 3 4 5 6 7 8 9 |
from rest_framework import serializers from .models import Article class ArticleSerializer(serializers.ModelSerializer): class Meta: model = Article fields = ['id', 'title', 'author'] |
Let’s see how we can write some API views using our new Serializer class. For the moment we won’t use any of REST framework’s other features, we’ll just write the views as regular Django views.
So now open your views.py, and add this code.
|
1 2 3 4 5 6 7 8 9 10 11 12 13 14 15 16 17 18 19 20 21 22 23 24 25 |
from django.shortcuts import render from django.http import HttpResponse, JsonResponse from rest_framework.parsers import JSONParser from .models import Article from .serializers import ArticleSerializer @csrf_exempt def article_list(request): """ List all code articles, or create a new Article. """ if request.method == 'GET': articles = Article.objects.all() serializer = ArticleSerializer(articles, many=True) return JsonResponse(serializer.data, safe=False) elif request.method == 'POST': data = JSONParser().parse(request) serializer = ArticleSerializer(data=data) if serializer.is_valid(): serializer.save() return JsonResponse(serializer.data, status=201) return JsonResponse(serializer.errors, status=400) |
So now we are going to create a new python file in our app (api_basic) at name of urls.py.
|
1 2 3 4 5 6 7 8 9 |
from django.urls import path from .views import article_list urlpatterns = [ path('article/', article_list), ] |
Also you need to add this file to your main urls.py like this.
|
1 2 3 4 5 6 7 |
from django.contrib import admin from django.urls import path, include urlpatterns = [ path('admin/', admin.site.urls), path('', include('api_basic.urls')) ] |
Now run the project
|
1 |
python manage.py runserver |
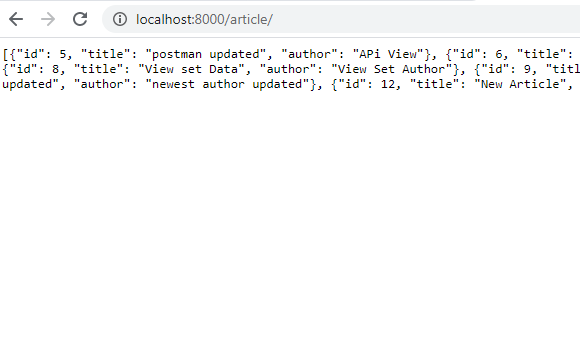
If you go to this url, you will see this result.
|
1 |
http://localhost:8000/article/ |
Also you can hit this url using PostMan.
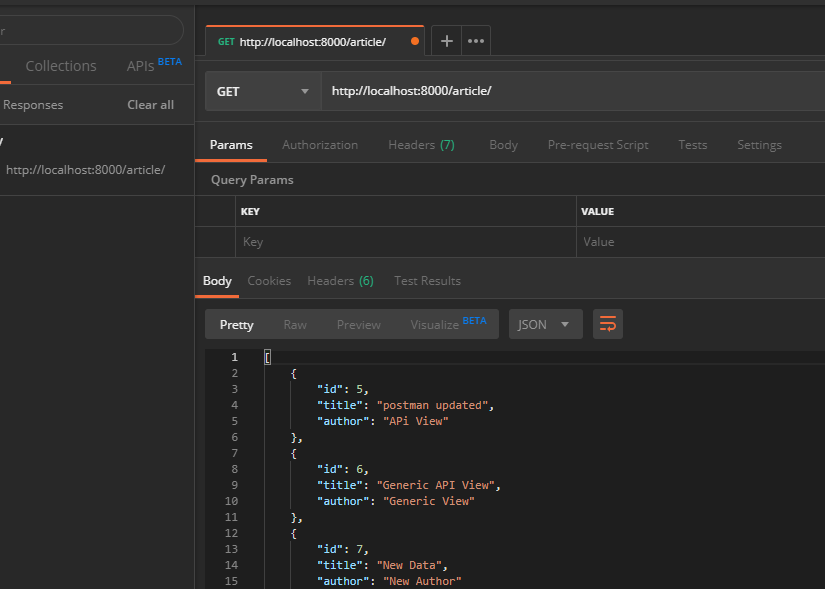
Also you can post the articles. but make sure that you have added csrf_exempt at the top of your view function, as we have already done this.
We’ll also need a view which corresponds to an individual article, and can be used to retrieve, update or delete the article. so now open your views.py and we need to add a new view function like this. before this we have created the view function for get and post of the article, but this is for delete and updating the article. also make note that these are function based api view, but when we have used class based or generic views, we don’t use these codes.
|
1 2 3 4 5 6 7 8 9 10 11 12 13 14 15 16 17 18 19 20 21 22 23 24 25 |
@csrf_exempt def article_detail(request, pk): """ Retrieve, update or delete article. """ try: article = Article.objects.get(pk=pk) except Article.DoesNotExist: return HttpResponse(status=404) if request.method == 'GET': serializer = ArticleSerializer(article) return JsonResponse(serializer.data) elif request.method == 'PUT': data = JSONParser().parse(request) serializer = ArticleSerializer(article, data=data) if serializer.is_valid(): serializer.save() return JsonResponse(serializer.data) return JsonResponse(serializer.errors, status=400) elif request.method == 'DELETE': article.delete() return HttpResponse(status=204) |
Also you need to open your urls.py, and add this new view function to the urls.py.
|
1 2 3 4 5 6 7 8 9 10 |
from django.urls import path from .views import article_list, article_detail urlpatterns = [ path('article/', article_list), path('detail/<int:pk>/', article_detail), ] |
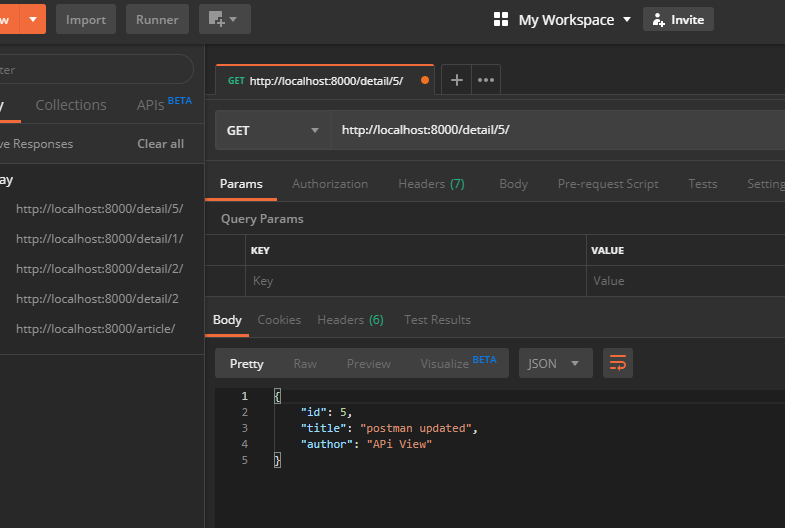
Now using this you can retrieve an specific id article, or you can update an article or you can delete an article.
Using api_view() Decorator in Function Based View
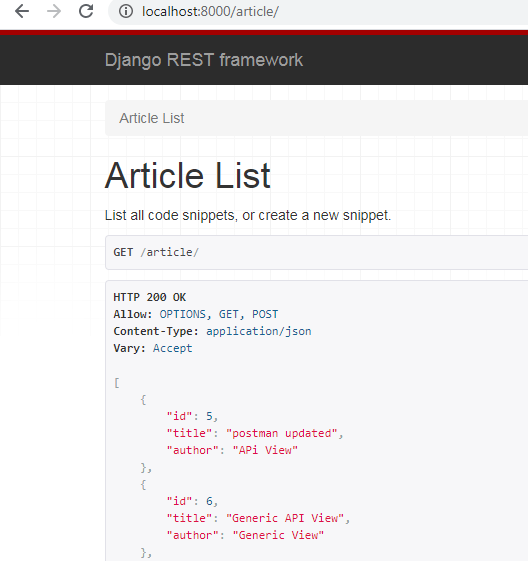
Also you can use decorators with function api based view, for example you can use api_view(), the core of this functionality is the api_view decorator, which takes a list of HTTP methods that your view should respond to. also using this decorator you can access to django browsable api view.
Now we are going to change views.py functions like this.
|
1 2 3 4 5 6 7 8 9 10 11 12 13 14 15 16 17 18 19 20 21 22 23 24 25 26 27 28 29 30 31 32 33 34 35 36 37 38 39 40 41 42 43 44 45 46 47 48 49 50 51 52 53 54 |
from .models import Article from .serializers import ArticleSerializer from rest_framework.decorators import api_view from rest_framework.response import Response from rest_framework import status # Create your views here. @api_view(['GET', 'POST']) def article_list(request): """ List all articles, or create a new article. """ if request.method == 'GET': articles = Article.objects.all() serializer = ArticleSerializer(articles, many=True) return Response(serializer.data) elif request.method == 'POST': serializer = ArticleSerializer(data=request.data) if serializer.is_valid(): serializer.save() return Response(serializer.data, status=status.HTTP_201_CREATED) return Response(serializer.errors, status=status.HTTP_400_BAD_REQUEST) @api_view(['GET', 'PUT', 'DELETE']) def article_detail(request, pk): """ Retrieve, update or delete article. """ try: article = Article.objects.get(pk=pk) except Article.DoesNotExist: return Response(status=status.HTTP_404_NOT_FOUND) if request.method == 'GET': serializer = ArticleSerializer(article) return Response(serializer.data) elif request.method == 'PUT': serializer = ArticleSerializer(article, data=request.data) if serializer.is_valid(): serializer.save() return Response(serializer.data) return Response(serializer.errors, status=status.HTTP_400_BAD_REQUEST) elif request.method == 'DELETE': article.delete() return Response(status=status.HTTP_204_NO_CONTENT) |
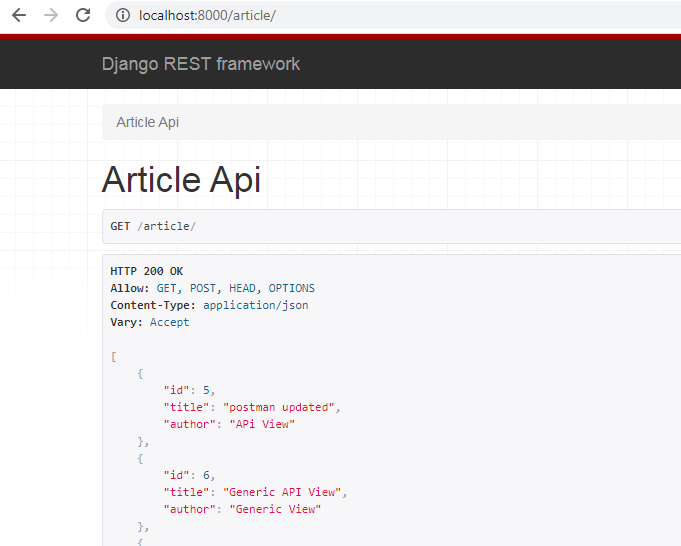
If you go to http://localhost:8000/article/ you can see a browsable api from the django rest framework with same functionality of posting article, getting article, retrieving article, deleting article and updating article .
Class Based API View
OK till now we have learned some basics on django rest framework, and we have created some examples on functions based api view. now it is time to talk about class based api view in django. REST framework provides an APIView class, which subclasses Django’s View class. Using the APIView class is pretty much the same as using a regular View class, as usual, the incoming request is dispatched to an appropriate handler method such as .get() or .post(). Additionally, a number of attributes may be set on the class that control various aspects of the API policy.
OK now we are going to bring changes in views.py again, i have removed all of the code from the views.py, because by using class based api view i don’t need that code.
|
1 2 3 4 5 6 7 8 9 10 11 12 13 14 15 16 17 18 19 20 21 22 23 24 25 26 27 28 29 30 31 32 33 34 35 36 37 38 39 40 41 42 43 44 45 46 47 48 49 50 51 |
from .models import Article from .serializers import ArticleSerializer from rest_framework.views import APIView from rest_framework.response import Response from rest_framework import status class ArticleAPIView(APIView): def get(self, request): articles = Article.objects.all() serializer = ArticleSerializer(articles, many=True) return Response(serializer.data) def post(self, request): serializer = ArticleSerializer(data=request.data) if serializer.is_valid(): serializer.save() return Response(serializer.data, status=status.HTTP_201_CREATED) return Response(serializer.errors, status=status.HTTP_400_BAD_REQUEST) class ArticleDetails(APIView): def get_object(self, id): try: return Article.objects.get(id=id) except Article.DoesNotExist: return Response(status=status.HTTP_404_NOT_FOUND) def get(self, request, id): article = self.get_object(id) serializer = ArticleSerializer(article) return Response(serializer.data) def put(self, request,id): article = self.get_object(id) serializer = ArticleSerializer(article, data=request.data) if serializer.is_valid(): serializer.save() return Response(serializer.data) return Response(serializer.errors, status=status.HTTP_400_BAD_REQUEST) def delete(self, request, id): article = self.get_object(id) article.delete() return Response(status=status.HTTP_204_NO_CONTENT) |
Also you need to bring changes in your urls.py file , because now we are using class based views.
|
1 2 3 4 5 6 7 8 9 10 11 12 |
from django.urls import path from .views import ArticleAPIView, ArticleDetails urlpatterns = [ path('article/', ArticleAPIView.as_view()), path('detail/<int:id>/', ArticleDetails.as_view()), ] |
If you go to http://localhost:8000/article/ you can see a browsable api from the django rest framework with same functionality of posting article, getting article, retrieving article, deleting article and updating article . but this time we have used class based api view.
Generic View And Mixins
One of the key benefits of class-based views is the way they allow you to compose bits of reusable behavior. REST framework takes advantage of this by providing a number of pre-built views that provide for commonly used patterns. the generic views provided by REST framework allow you to quickly build API views that map closely to your database models. if the generic views don’t suit the needs of your API, you can drop down to using the regular APIView class, or reuse the mixins and base classes used by the generic views to compose your own set of reusable generic views.
OK now we are again changing our views.py, and we are removing the previous code, by using this code you can add, get, update and delete the data. also there are separate mixins for different functionalities, for example posting article we are going to use CreateModelMixin, for getting the articles we are using ListModelMixin, for updating we are using UpdateModelMixin and for deleting we can use DestroyModelMixin.
|
1 2 3 4 5 6 7 8 9 10 11 12 13 14 15 16 17 18 19 20 21 22 23 24 25 26 27 28 29 30 31 32 |
from .models import Article from .serializers import ArticleSerializer from rest_framework import generics from rest_framework import mixins class GenericAPIView(generics.GenericAPIView, mixins.ListModelMixin, mixins.CreateModelMixin, mixins.UpdateModelMixin, mixins.RetrieveModelMixin, mixins.DestroyModelMixin): serializer_class = ArticleSerializer queryset = Article.objects.all() lookup_field = 'id' def get(self, request, id = None): if id: return self.retrieve(request) else: return self.list(request) def post(self, request): return self.create(request) def put(self, request, id=None): return self.update(request, id) def delete(self, request, id): return self.destroy(request, id) |
Also you need to change your urls.py file
|
1 2 3 4 5 6 7 8 |
from django.urls import path from .views import GenericAPIView urlpatterns = [ path('generic/article/<int:id>/', GenericAPIView.as_view()), ] |
If you go to http://localhost:8000/generic/article/ you can see a browsable api from the django rest framework with same functionality of posting article, getting article, retrieving article, deleting article and updating article . but this time we have used generic view and mixins.
Authentications
Authentication is the mechanism of associating an incoming request with a set of identifying credentials, such as the user the request came from, or the token that it was signed with. The permission and throttling policies can then use those credentials to determine if the request should be permitted. REST framework provides a number of authentication schemes out of the box, and also allows you to implement custom schemes. Authentication is always run at the very start of the view, before the permission and throttling checks occur, and before any other code is allowed to proceed. there are different authentications that we can use for example, Basic Authentication, Token Authentication and Session Authentication.
- Basic Authentication: This authentication scheme uses HTTP Basic Authentication, signed against a user’s username and password. Basic authentication is generally only appropriate for testing.
- Token Authentication: This authentication scheme uses a simple token-based HTTP Authentication scheme. Token authentication is appropriate for client-server setups, such as native desktop and mobile clients.
- Session Authentication: This authentication scheme uses Django’s default session backend for authentication. Session authentication is appropriate for AJAX clients that are running in the same session context as your website.
for settings of the authentication, you can use globally or you can use inside your python file. for the globally you can add the DEFAULT_AUTHENTICATION_CLASSES in your settings.py file.
|
1 2 3 4 5 6 |
REST_FRAMEWORK = { 'DEFAULT_AUTHENTICATION_CLASSES': [ 'rest_framework.authentication.BasicAuthentication', 'rest_framework.authentication.SessionAuthentication', ] } |
Note: we are not using globally, but we are adding the authentication classes inside our python file.
So now we are changing our views.py and we are adding our authentication classes.
First you need to import the required classes.
|
1 2 |
from rest_framework.authentication import SessionAuthentication,TokenAuthentication, BasicAuthentication from rest_framework.permissions import IsAuthenticated |
And now this is our new code for views.py
|
1 2 3 4 5 6 7 8 9 10 11 12 13 14 15 16 17 18 19 20 21 22 23 24 25 26 27 28 29 30 31 32 33 34 35 36 |
from .models import Article from .serializers import ArticleSerializer from rest_framework import generics from rest_framework import mixins from rest_framework.authentication import SessionAuthentication,TokenAuthentication, BasicAuthentication from rest_framework.permissions import IsAuthenticated class GenericAPIView(generics.GenericAPIView, mixins.ListModelMixin, mixins.CreateModelMixin, mixins.UpdateModelMixin, mixins.RetrieveModelMixin, mixins.DestroyModelMixin): serializer_class = ArticleSerializer queryset = Article.objects.all() lookup_field = 'id' authentication_classes = [SessionAuthentication, BasicAuthentication] #authentication_classes = [TokenAuthentication] permission_classes = [IsAuthenticated] def get(self, request, id = None): if id: return self.retrieve(request) else: return self.list(request) def post(self, request): return self.create(request) def put(self, request, id=None): return self.update(request, id) def delete(self, request, id): return self.destroy(request, id) |
I have commented the token authentication but you can use like that, now in here we have used session and basic authentication together, it will first check for the session authentication and after that check for basic authentication.
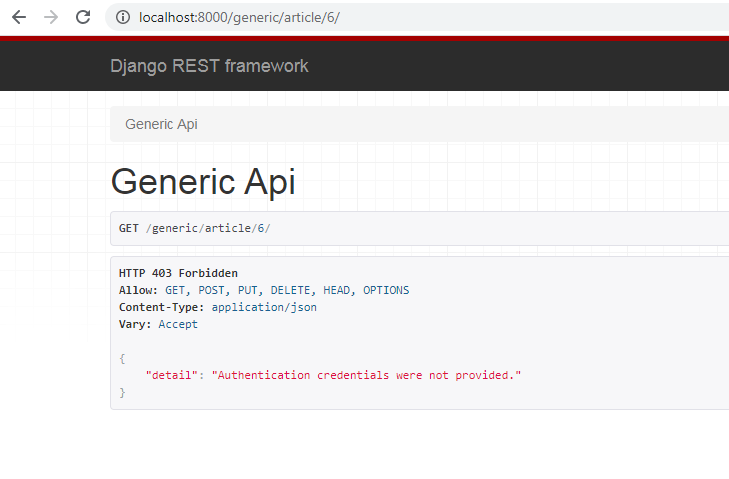
If you go to http://localhost:8000/generic/article/6/ , you can see a browsable api from the django rest framework. but this time we can not access to data, because we have used authentication.
For token authentication, you can manually create token from your django admin panel and after that you can authenticate using token.
Viewsets And Routers
A ViewSet class is simply a type of class-based View, that does not provide any method handlers such as .get() or .post(), and instead provides actions such as .list() and .create(). the method handlers for a ViewSet are only bound to the corresponding actions at the point of finalizing the view, using the .as_view() method.
There are different ways that you can implement viewsets, first way is that you can write your own viewsets. now we are going to change our views.py.
|
1 2 3 4 5 6 7 8 9 10 11 12 13 14 15 16 17 18 19 20 21 22 23 24 25 26 27 28 29 30 31 |
from .models import Article from .serializers import ArticleSerializer from rest_framework import viewsets from rest_framework.response import Response from rest_framework import status from django.shortcuts import get_object_or_404 class ArticleViewSet(viewsets.ViewSet): def list(self, request): articles = Article.objects.all() serializer = ArticleSerializer(articles, many=True) return Response(serializer.data) def create(self, request): serializer = ArticleSerializer(data=request.data) if serializer.is_valid(): serializer.save() return Response(serializer.data, status=status.HTTP_201_CREATED) return Response(serializer.errors, status=status.HTTP_400_BAD_REQUEST) def retrieve(self, request, pk=None): queryset = Article.objects.all() article = get_object_or_404(queryset, pk=pk) serializer = ArticleSerializer(article) return Response(serializer.data) |
Also you need to add your routers.
|
1 2 3 4 5 6 7 8 9 10 11 12 13 14 15 |
from django.urls import path, include from .views import ArticleViewSet from rest_framework.routers import DefaultRouter router = DefaultRouter() router.register('article', ArticleViewSet, basename='article') urlpatterns = [ path('viewset/', include(router.urls)) ] |
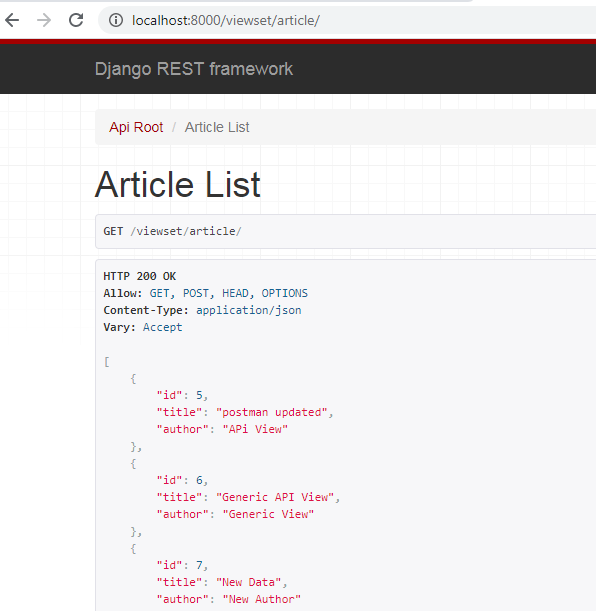
If you go to http://localhost:8000/viewset/article/ you can see a browsable api from the django rest framework with same functionality, but this time we have used viewsets and routers.
I have not used the update and delete functionalities, but you can do by your own.
Rather than writing your own viewsets, you’ll often want to use the existing base classes that provide a default set of behavior. For example:
|
1 2 3 4 5 6 7 |
class ArticleViewSet(viewsets.ModelViewSet): """ A viewset for viewing and editing article instances. """ serializer_class = ArticleSerializer queryset = Article.objects.all() |
Subscribe and Get Free Video Courses & Articles in your Email
hey men do you have a git rep for this project
thanks
no for right now i don’t have, but i will add as soon as possible
bro where is git
great job you did to learn REST API
Hey Parwiz
Very thorough and well explained.
One bug. In GenericAPI section, POST request won’t work because the post method isn’t expecting an id argument that is being passed in via the URL.
This can be easily fixed by adding an id=None argument to the post request in the GenericAPIView class as below:
class GenericAPIView(generics.GenericAPIView,

                     mixins.ListModelMixin,

                     mixins.CreateModelMixin,

                     mixins.UpdateModelMixin,

                     mixins.RetrieveModelMixin,

                     mixins.DestroyModelMixin):

    serializer_class = ArticleSerializer

    queryset = Article.objects.all()
    lookup_field = 'id'
    def get(self, request, id=None):
        if id:

            return self.retrieve(request)

        else:

            return self.list(request)
    def post(self, request, id=None):

        return self.create(request)
    def put(self, request, id=None):

        return self.update(request, id)
    def delete(self, request, id):

        return self.destroy(request, id)