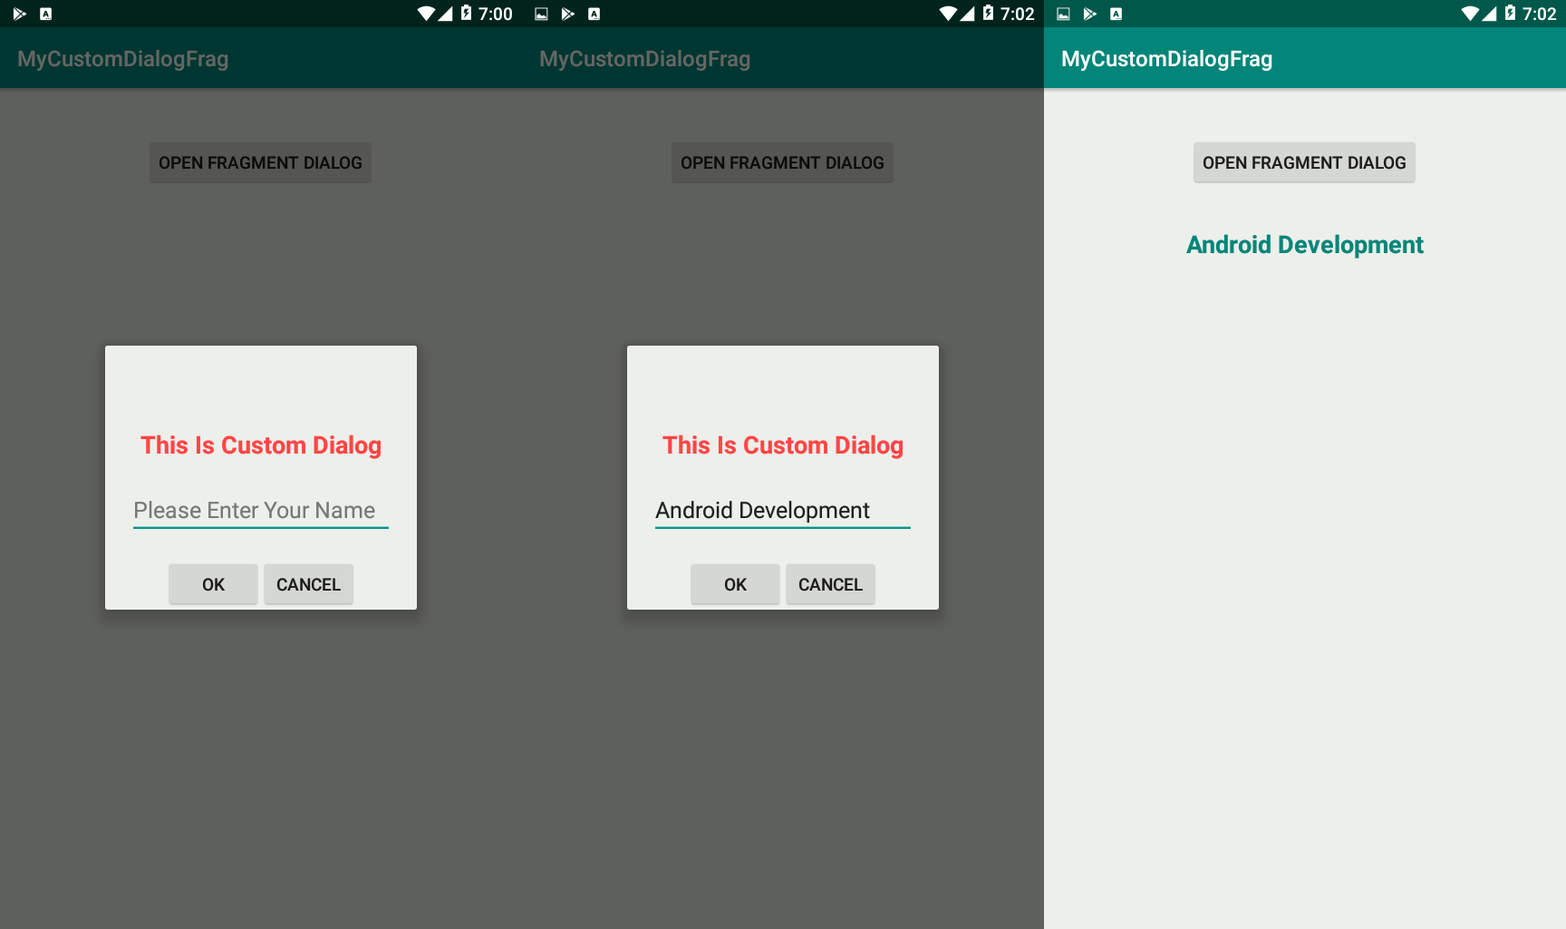
In this Android Studio article i want to show you How To Create Custom Fragment Dialog.
so for good explanation you can watch the video for this article.
Also you can read more android development articles
1: Android Development Articles
Also you can check Python GUI Development Tutorials in the below link.
1: PyQt5 GUI Development Tutorials
2: TKinter GUI Development Tutorials
3: Pyside2 GUI Development Tutorials
4: Kivy GUI Development Tutorials
5: wxPython GUI Development Tutorials
1: First of all create a new project in your Android Studio, and choose Empty Activity
also iam using API 20 for this project.
2: So now open your activity_main.xml and wee need to add a Button with a Textview in
their like this . i have removed the text of the Textview because we are going to send data
from our Custom Fragment Dialog to the MainActivity.
|
1 2 3 4 5 6 7 8 9 10 11 12 13 14 15 16 17 18 19 20 21 22 23 24 25 26 27 28 29 30 31 32 33 34 35 36 37 38 39 |
<?xml version="1.0" encoding="utf-8"?> <android.support.constraint.ConstraintLayout xmlns:android="http://schemas.android.com/apk/res/android" xmlns:app="http://schemas.android.com/apk/res-auto" xmlns:tools="http://schemas.android.com/tools" android:layout_width="match_parent" android:layout_height="match_parent" tools:context=".MainActivity"> <Button android:id="@+id/btnOpen" android:layout_width="wrap_content" android:layout_height="wrap_content" android:layout_marginStart="8dp" android:layout_marginTop="44dp" android:layout_marginEnd="8dp" android:text="Open Fragment Dialog" app:layout_constraintEnd_toEndOf="parent" app:layout_constraintStart_toStartOf="parent" app:layout_constraintTop_toTopOf="parent" /> <TextView android:id="@+id/txtInput" android:layout_width="match_parent" android:layout_height="wrap_content" android:layout_marginStart="8dp" android:layout_marginTop="36dp" android:layout_marginEnd="8dp" android:text="" android:textSize="20sp" android:textStyle="bold" android:textColor="@color/colorPrimary" android:textAlignment="center" app:layout_constraintEnd_toEndOf="parent" app:layout_constraintStart_toStartOf="parent" app:layout_constraintTop_toBottomOf="@+id/btnOpen" /> </android.support.constraint.ConstraintLayout> |
3: OK after that you need to first create a class of CustomFragmentDialog, also you need
to open your layout folder for creating custom_layout.xml for your CustomFragmentDialog.
because we are going to inflate this custom_layout.xml from our CustomFragmentDialog class.
So this is our custom_layout.xml, and we need to add some widgets in our layout, basically
we need a LinearLayout, a Textview, Editext and two PushButton like this.
|
1 2 3 4 5 6 7 8 9 10 11 12 13 14 15 16 17 18 19 20 21 22 23 24 25 26 27 28 29 30 31 32 33 34 35 36 37 38 39 40 41 42 43 44 45 46 47 48 49 50 51 52 53 54 55 56 57 58 59 60 61 |
<?xml version="1.0" encoding="utf-8"?> <RelativeLayout xmlns:android="http://schemas.android.com/apk/res/android" android:layout_width="match_parent" android:layout_height="match_parent"> <TextView android:id="@+id/textView" android:layout_width="wrap_content" android:layout_height="wrap_content" android:layout_alignParentTop="true" android:layout_centerHorizontal="true" android:layout_marginTop="27dp" android:textStyle="bold" android:textColor="@android:color/holo_red_light" android:textSize="20sp" android:text="This Is Custom Dialog" /> <EditText android:id="@+id/inputText" android:layout_width="wrap_content" android:layout_height="wrap_content" android:layout_alignParentTop="true" android:layout_centerHorizontal="true" android:layout_marginTop="79dp" android:ems="10" android:inputType="textPersonName" android:hint="Please Enter Your Name"/> <LinearLayout android:layout_width="match_parent" android:layout_height="wrap_content" android:layout_below="@+id/inputText" android:orientation="horizontal" android:layout_marginTop="20dp" android:gravity="center" > <Button android:layout_width="wrap_content" android:layout_height="wrap_content" android:text="OK" android:id="@+id/btnOk" /> <Button android:layout_width="wrap_content" android:layout_height="wrap_content" android:text="Cancel" android:id="@+id/btnCancel" /> </LinearLayout> </RelativeLayout> |
And now this is our CustomFragmentDialog.java class.
|
1 2 3 4 5 6 7 8 9 10 11 12 13 14 15 16 17 18 19 20 21 22 23 24 25 26 27 28 29 30 31 32 33 34 35 36 37 38 39 40 41 42 43 44 45 46 47 48 49 50 51 52 53 54 55 56 57 58 59 60 |
package com.forogh.parwiz.mycustomdialogfrag; import android.os.Bundle; import android.support.annotation.NonNull; import android.support.annotation.Nullable; import android.support.v4.app.DialogFragment; import android.view.LayoutInflater; import android.view.View; import android.view.ViewGroup; import android.widget.Button; import android.widget.EditText; import android.widget.Toast; public class CustomFragmentDialog extends DialogFragment { Button btnOk, btnCancel; EditText editInput; @Nullable @Override public View onCreateView(@NonNull final LayoutInflater inflater, @Nullable ViewGroup container, @Nullable Bundle savedInstanceState) { View view = inflater.inflate(R.layout.custom_layout, null); btnOk = view.findViewById(R.id.btnOk); btnCancel = view.findViewById(R.id.btnCancel); editInput = view.findViewById(R.id.inputText); btnCancel.setOnClickListener(new View.OnClickListener() { @Override public void onClick(View v) { getDialog().dismiss(); } }); btnOk.setOnClickListener(new View.OnClickListener() { @Override public void onClick(View v) { String input = editInput.getText().toString(); if(!input.equals("")) { ((MainActivity)getActivity()).txtInput.setText(input); } else { Toast.makeText(getActivity(), "Please Enter Something", Toast.LENGTH_SHORT).show(); } getDialog().dismiss(); } }); return view; } } |
Our this class extends from DialogFragment, also at the top of the class first we have created the object for our Button and EditText. and we have added the onCreateView method in our class , because when you want to inflate your fragment xml layout you need to add onCreateView life cycle.
4: also in the MainActivity.java first we need to reference our button that we have added in activity_main.xml.
after that we need to setOnClickListener for our button, because we want to open our Custom Fragment Dialog from our main activity.
|
1 2 3 4 5 6 7 8 9 10 11 12 13 14 15 16 17 18 19 20 21 22 23 24 25 26 27 28 29 30 31 32 33 34 |
package com.forogh.parwiz.mycustomdialogfrag; import android.support.v7.app.AppCompatActivity; import android.os.Bundle; import android.view.View; import android.widget.Button; import android.widget.TextView; public class MainActivity extends AppCompatActivity { Button btnOpen; TextView txtInput; @Override protected void onCreate(Bundle savedInstanceState) { super.onCreate(savedInstanceState); setContentView(R.layout.activity_main); btnOpen = findViewById(R.id.btnOpen); txtInput = findViewById(R.id.txtInput); btnOpen.setOnClickListener(new View.OnClickListener() { @Override public void onClick(View v) { CustomFragmentDialog fragmentDialog = new CustomFragmentDialog(); fragmentDialog.show(getSupportFragmentManager(), "CustomDialog"); } }); } } |
So now run the complete project and this will be the result

Also you can watch the complete video for this article
Video for sending data from Fragment Dialog to MainActivity.
Subscribe and Get Free Video Courses & Articles in your Email