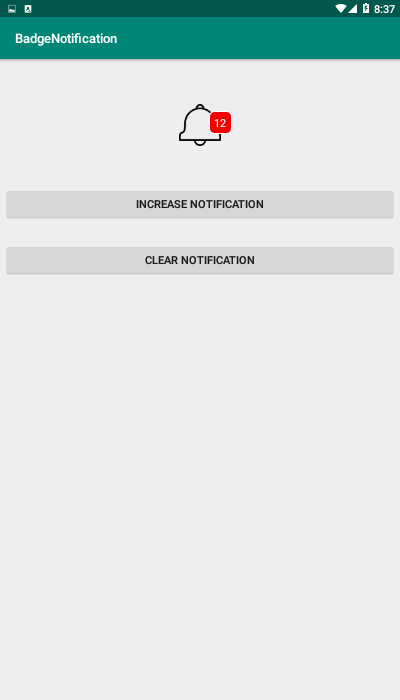
In this Android Studio article, we are going to learn about Creating Notification Badge in Android Studio, Badge Notifications are used to show the number of notifications, messages, and product count. Plenty of Android apps use badges these days. There’s no simple way to do it, so we’ll do it by coding it ourselves. also you can check my more android development articles in the below line.
Also you can read more android development articles
1: Android Development Articles
First of all create a new project in your Android Studio, and choose Empty Activity
also iam using API 22 for this project.
After creating of the Project, you need to open build.gradle(Module:app) and add
this library, because we are using third party library, and sync your project
|
1 |
implementation 'com.nex3z:notification-badge:1.0.2' |
So now you need create a resource file by right clicking on drawable folder and choosing
Drawable Resource File. also you need to give a name for that, in my case i have
given badge_file.xml, it is just an xml file and you need to add these codes in that file.
|
1 2 3 4 5 6 7 8 9 10 11 12 13 14 15 16 |
<?xml version="1.0" encoding="utf-8"?> <shape xmlns:android="http://schemas.android.com/apk/res/android" android:shape="rectangle"> <corners android:radius="8dp" /> <solid android:color="#f20000" /> <stroke android:width="2dip" android:color="#FFF" /> <padding android:bottom="5dp" android:left="5dp" android:right="5dp" android:top="5dp" /> </shape> |
OK after that you need to add an icon in your drawable folder, for example it should be
an email icon or a chat icon, what ever you want you can use, i have just used a notification
icon. after that we are going to design our activity_main.xml , and we are going to add this
code in their.
|
1 2 3 4 5 6 7 8 9 10 11 12 13 14 15 16 17 18 19 20 21 22 23 24 25 26 27 28 29 30 31 32 33 34 35 36 37 38 39 40 41 42 43 44 45 46 47 48 49 50 51 52 53 54 55 56 57 58 59 60 61 62 63 64 |
<?xml version="1.0" encoding="utf-8"?> <android.support.constraint.ConstraintLayout xmlns:android="http://schemas.android.com/apk/res/android" xmlns:app="http://schemas.android.com/apk/res-auto" xmlns:tools="http://schemas.android.com/tools" android:layout_width="match_parent" android:layout_height="match_parent" tools:context=".MainActivity"> <ImageView android:id="@+id/imageView" android:layout_width="wrap_content" android:layout_height="wrap_content" android:layout_marginStart="8dp" android:layout_marginTop="68dp" android:layout_marginEnd="8dp" app:layout_constraintEnd_toEndOf="parent" app:layout_constraintStart_toStartOf="parent" app:layout_constraintTop_toTopOf="parent" app:srcCompat="@drawable/badge_icon" /> <Button android:id="@+id/btnIncrease" android:layout_width="0dp" android:layout_height="wrap_content" android:layout_marginStart="8dp" android:layout_marginTop="64dp" android:layout_marginEnd="8dp" android:text="Increase Notification" app:layout_constraintEnd_toEndOf="parent" app:layout_constraintStart_toStartOf="parent" app:layout_constraintTop_toBottomOf="@+id/imageView" /> <Button android:id="@+id/btnClear" android:layout_width="0dp" android:layout_height="wrap_content" android:layout_marginStart="8dp" android:layout_marginTop="36dp" android:layout_marginEnd="8dp" android:text="Clear Notification" app:layout_constraintEnd_toEndOf="parent" app:layout_constraintStart_toStartOf="parent" app:layout_constraintTop_toBottomOf="@+id/btnIncrease" /> <com.nex3z.notificationbadge.NotificationBadge android:id="@+id/badge" android:layout_width="40dp" android:layout_height="40dp" android:layout_marginStart="8dp" android:layout_marginTop="76dp" android:layout_marginEnd="8dp" app:layout_constraintEnd_toEndOf="parent" app:layout_constraintHorizontal_bias="0.557" app:layout_constraintStart_toStartOf="parent" app:layout_constraintTop_toTopOf="parent" app:nbMaxTextLength="2" app:nbBackground="@drawable/badge_file" android:textSize="15sp" /> </android.support.constraint.ConstraintLayout> |
basically in the above xml code, iam using ConstraintLayout, also i have added an ImageView
with the icon that i have already added in my drawable folder. also you need to create two
buttons with the BadgeNotification library.
Now it is time to open your MainActivity.java, and add this code. we have just created the
object of NotificationBadge with the two Button, also we have created a variable of int
and we have initialized that to zero. also you need to set onClickListeners for the two buttons.
|
1 2 3 4 5 6 7 8 9 10 11 12 13 14 15 16 17 18 19 20 21 22 23 24 25 26 27 28 29 30 31 32 33 34 35 36 37 38 39 40 41 42 |
package com.forogh.parwiz.badgenotification; import android.support.v7.app.AppCompatActivity; import android.os.Bundle; import android.view.View; import android.widget.Button; import com.nex3z.notificationbadge.NotificationBadge; public class MainActivity extends AppCompatActivity { NotificationBadge notificationBadge; Button btnIncrease, btnClear; int count = 0; @Override protected void onCreate(Bundle savedInstanceState) { super.onCreate(savedInstanceState); setContentView(R.layout.activity_main); notificationBadge = findViewById(R.id.badge); btnIncrease = findViewById(R.id.btnIncrease); btnClear = findViewById(R.id.btnClear); btnIncrease.setOnClickListener(new View.OnClickListener() { @Override public void onClick(View v) { notificationBadge.setNumber(count++); } }); btnClear.setOnClickListener(new View.OnClickListener() { @Override public void onClick(View v) { notificationBadge.setNumber(0); } }); } } |
So now if you run the project this will be the result

Also you can watch the complete video for this article
Subscribe and Get Free Video Courses & Articles in your Email
Comments are closed.